
If you have been following along on this blog for awhile, you’ll know that I have been working on the little office area in Autumn’s room. I have been working on a gallery/art wall and also plan to paint her desk, revamp the old chair that goes with the desk… and, well… I’ve also decided to paint the other two pieces of furniture in her room. Whew! I am going to be busy! Well, I have been working on one project after another and it is slowly starting to come together. I got her fabric pinboard done (see post HERE) and this weekend I worked on a chalkboard with some art buckets. This chalkboard was a DIY project and I used an old picture frame that we had downstairs and just painted the glass with chalk paint. Such an easy DIY and I love to recycle things that I already have laying around the house!! Plus, this project did not cost me a lot… all I purchased was the little floral hangers (3), the metal buckets and the art supplies that I stocked them with.
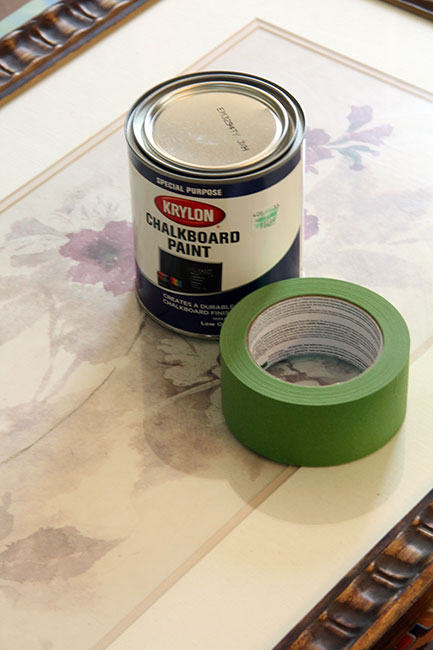
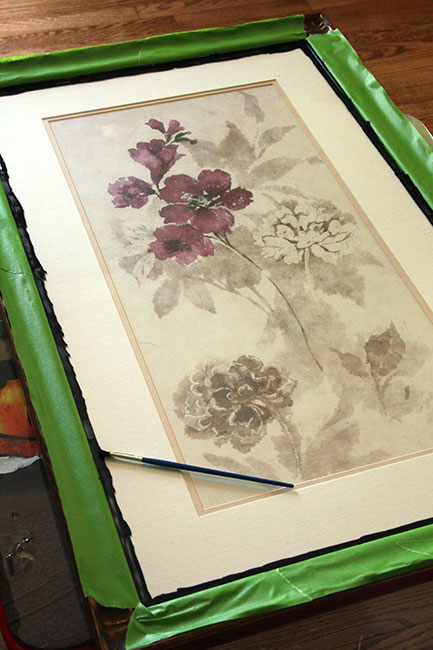
This is what the old picture frame looked like… I had bought it at HomeGoods YEARS ago and I took it down when it didn’t match our decor in our family room anymore. I purchased this can of chalk paint at Hobby Lobby. I just happened to be there and they even let me use my 40% off coupon on it. I have 2-3 other chalkboard paint projects that I have planned, so it made sense to buy a can of paint. Make sure the chalkboard paint you purchase is safe to use on glass. I also had frog paint leftover from when we painted the rainbow striped wall in Autumn’s room (see post HERE).

The first step is taping off the frame.
Then I used a mini craft brush to paint around the edges of the frame.
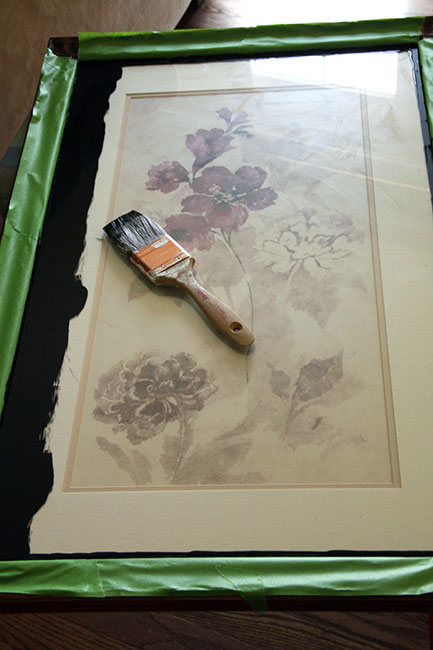
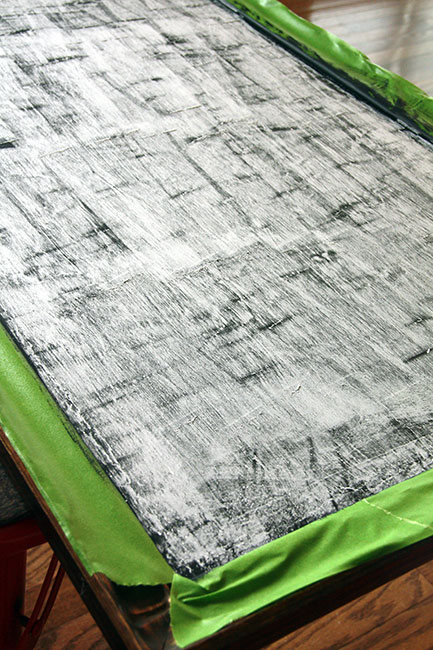
Then I painted vertical stripes down the length of the frame to give it an even texture.
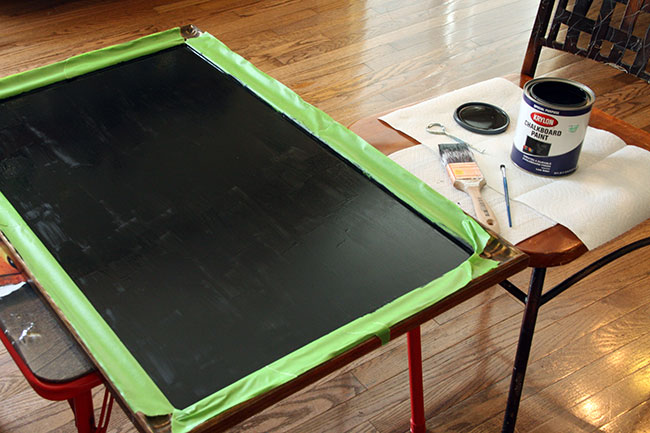
This is what the frame looked like after the first coat of paint. Wait 1-6 hours to paint the second coat (this may be different per the instructions on your paint can). Then, use a knife to go around the edges before tearing off the frog tape.
Then, cover the entire chalkboard in chalk to activate the chalkboard. Then, you can rub it off… I used a baby wipe to clean it off really well. 🙂 Yes, my kids are out of diapers and I still buy baby wipes for stuff like this!
And, ta-da! You have a really nice chalkboard!!!
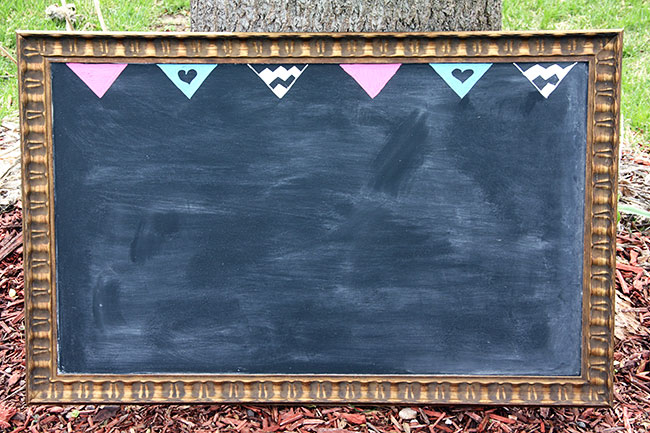 My daughters room is really girly, so I wanted to make the chalkboard a little more girly. I did this by taking some bright chalkboard markers and I added a banner to the top! I cut a triangle shape out of paper and outlined it, so that each triangle was the same size.
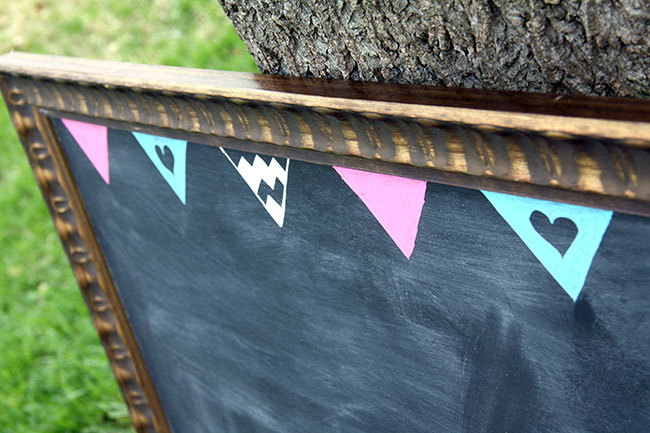
I did each triangle a little different… I actually got this idea from a chalkboard I saw at Hobby Lobby! I love recreating Hobby Lobby stuff, that store is full of inspiration!
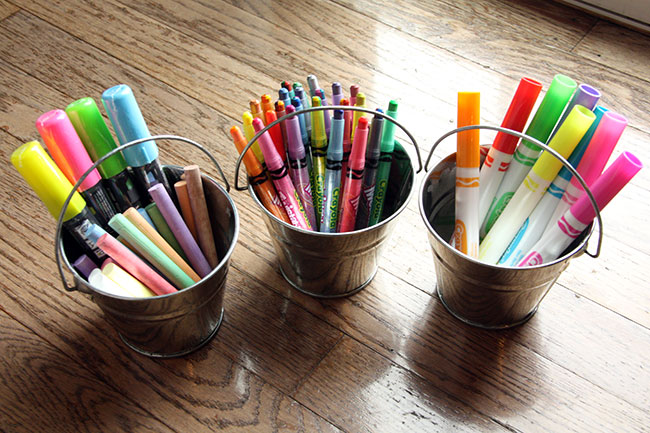
I filled three buckets full of art drawing goodies… only one bucket has chalkboard items in it, but the other buckets are full of markers and colored pencils that she can use at her desk.
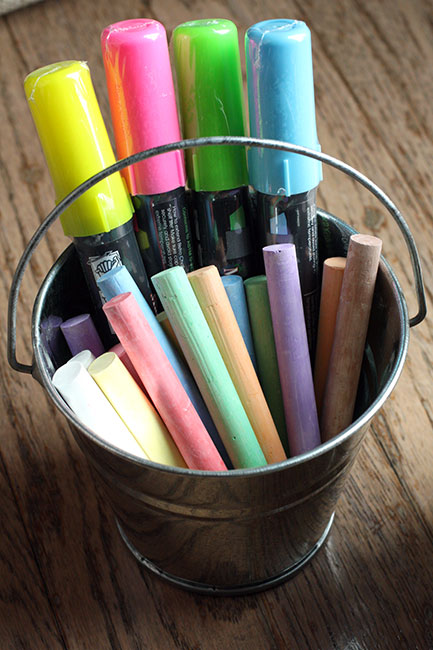
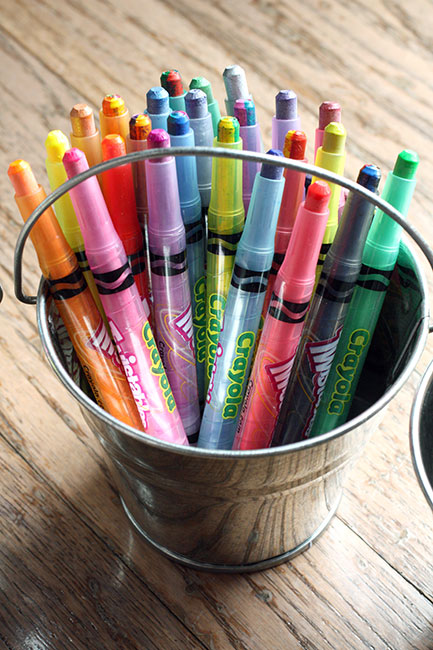
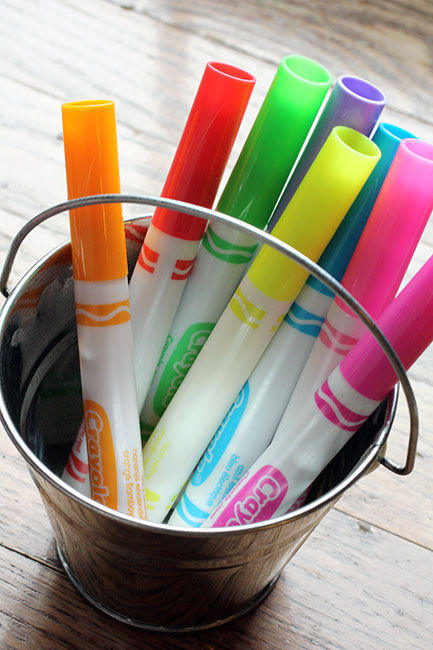
It was fun browsing the art aisle in Hobby Lobby… I got her some chalk markers, a box of rainbow colored chalk, twist colored pencils in multi-colors and spring colored markers! She loved them!
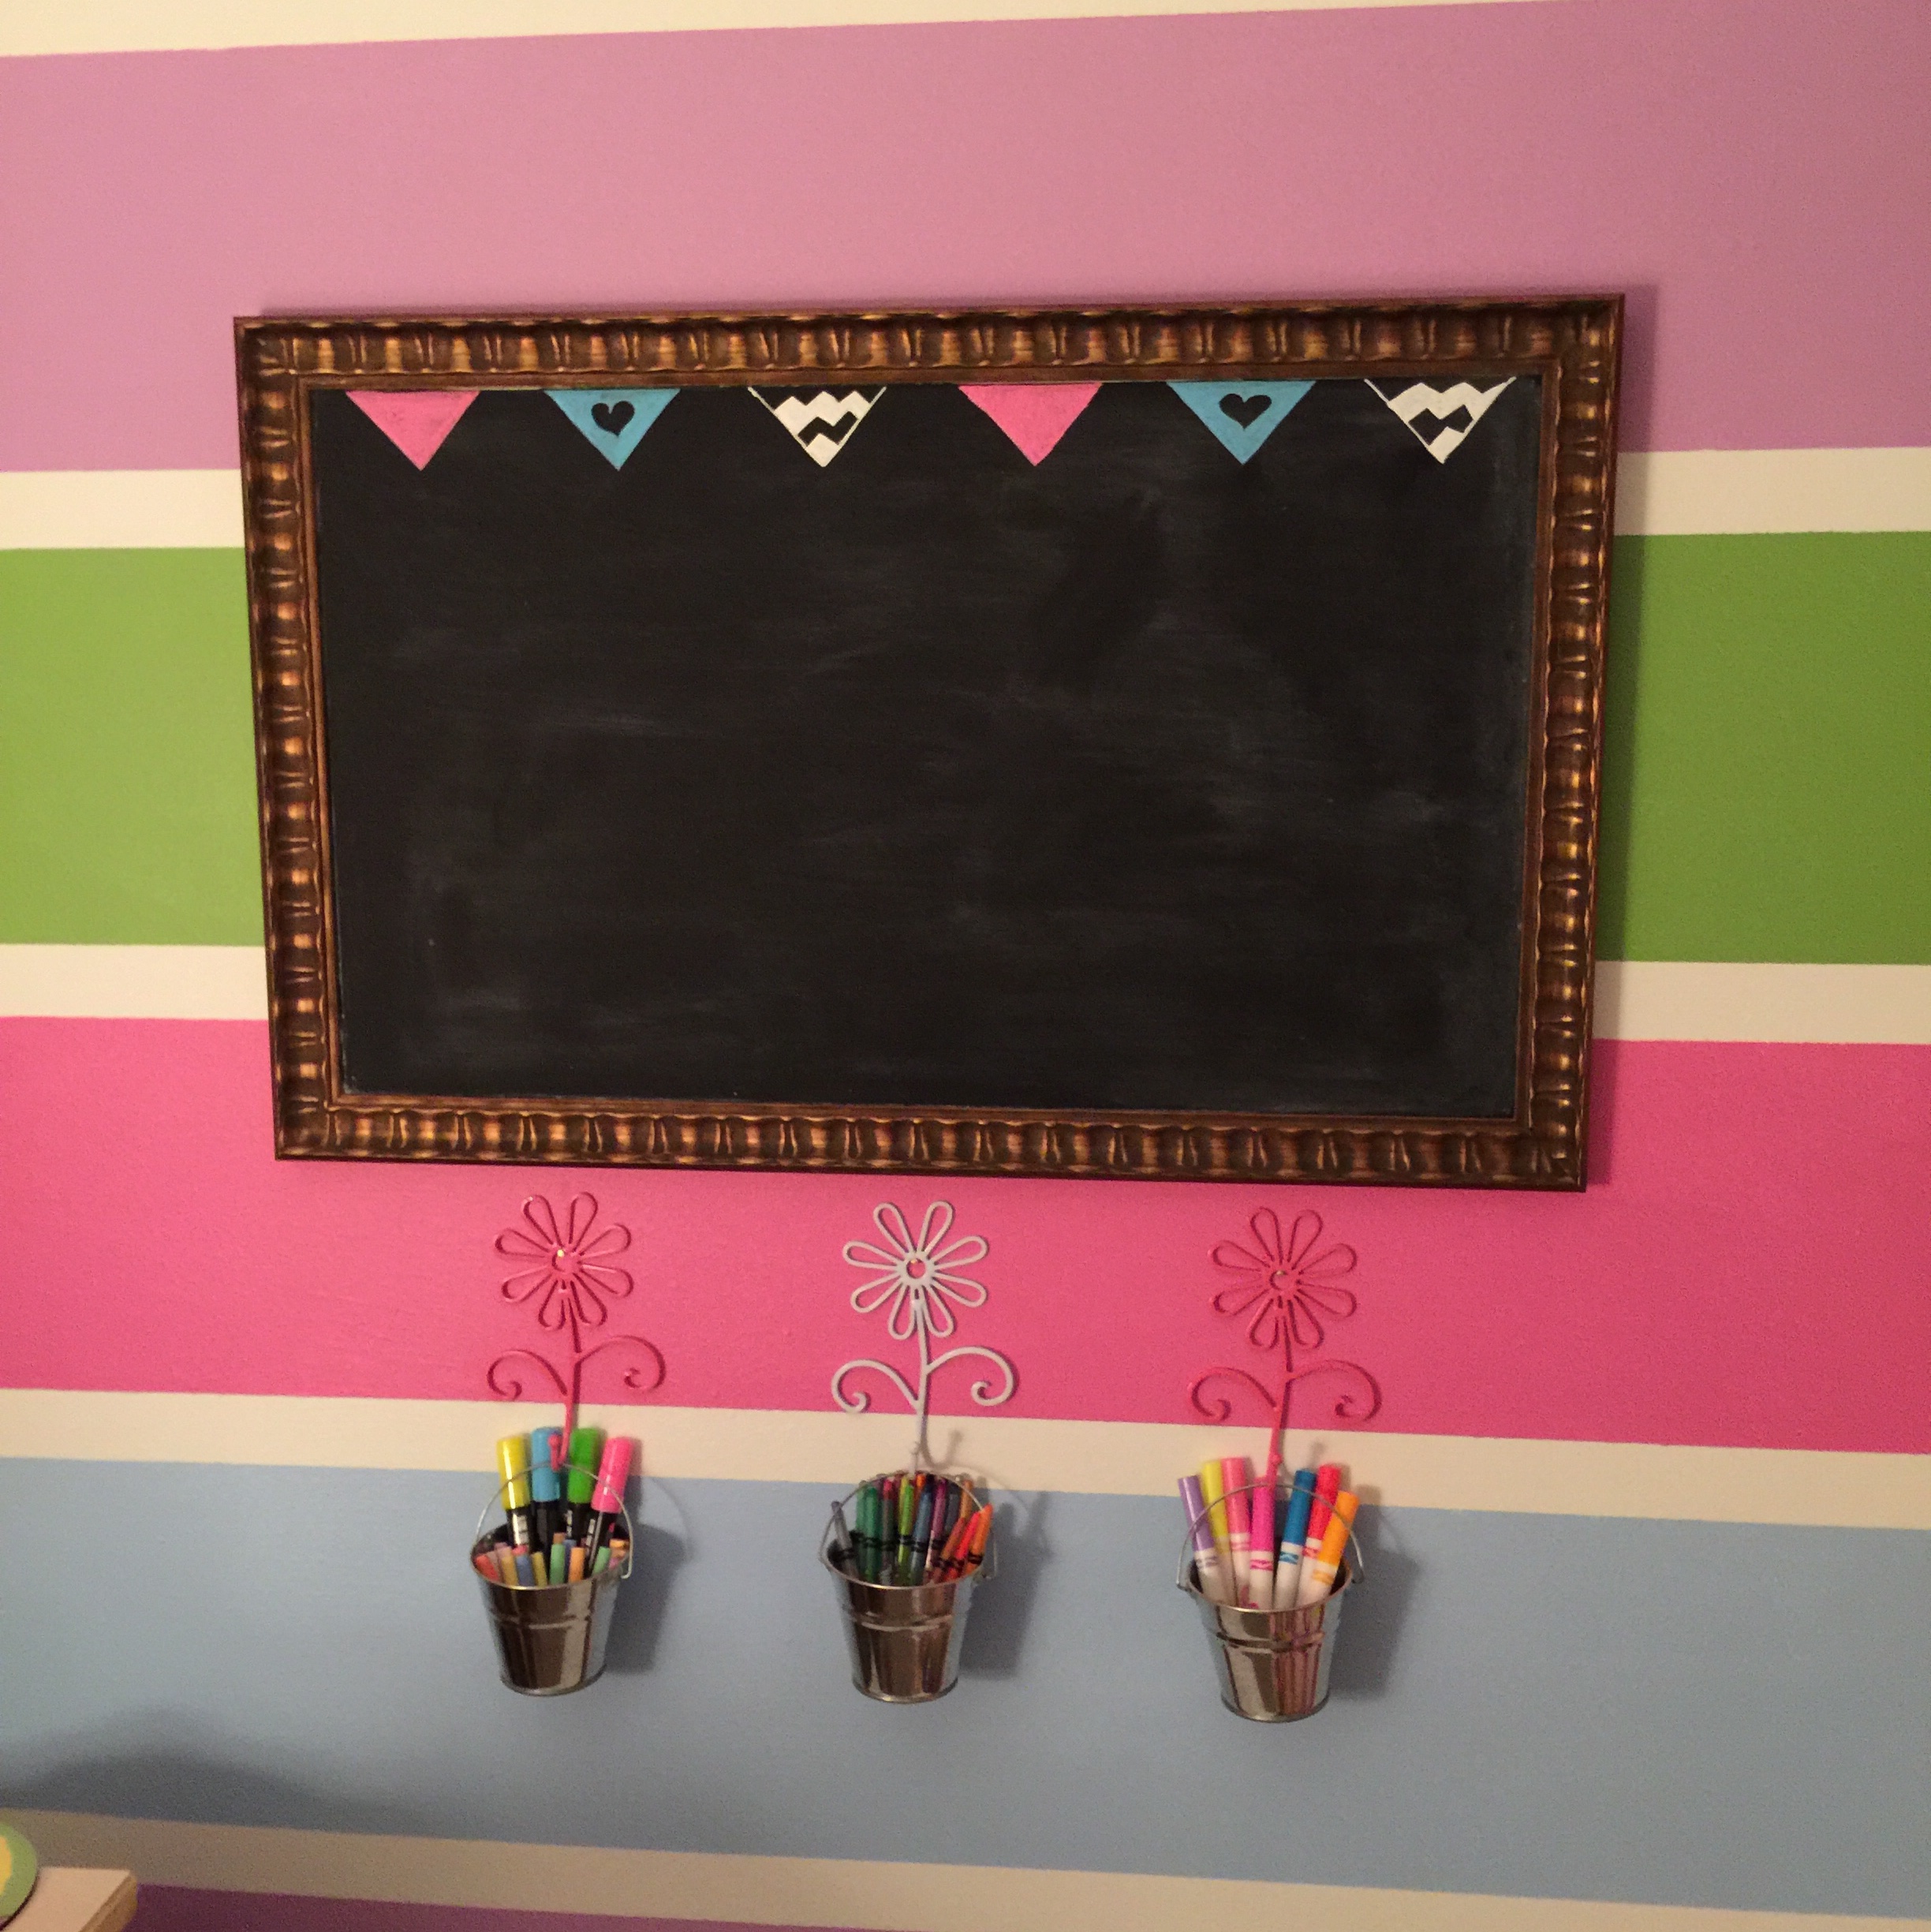
Hobby Lobby had these cute little daisy hangers and they were great for hanging these metal buckets. I am thinking about spray painting the two pink ones, since they fall right on the pink stripe (didn’t realize this would happen until it was time to hang everything!).
And are you ready for a shot that isn’t staged? Yeah… this is what her room really looks like most days. Autumn is a little tornado right now! I really can’t wait to finish this space and declutter it (again and again!).
And, now that my son has been seeing all of the work I’ve been doing on Autumn’s room, he wants HIS room redone now. I told him he’s going to have to wait a bit. lol. 🙂
Linked up with:
Fluster’s Creative Muster
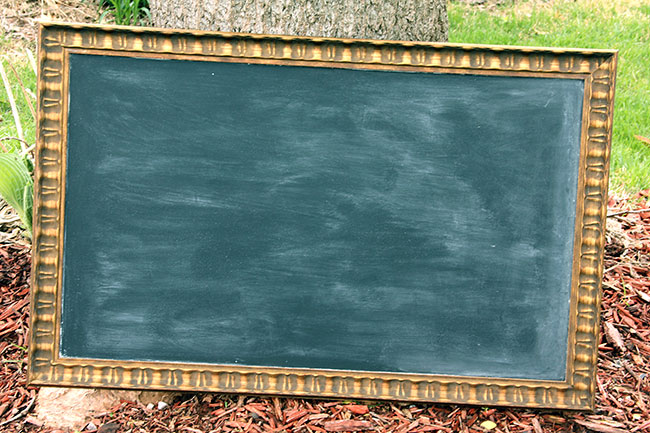
And, ta-da! You have a really nice chalkboard!!!
My daughters room is really girly, so I wanted to make the chalkboard a little more girly. I did this by taking some bright chalkboard markers and I added a banner to the top! I cut a triangle shape out of paper and outlined it, so that each triangle was the same size.I did each triangle a little different… I actually got this idea from a chalkboard I saw at Hobby Lobby! I love recreating Hobby Lobby stuff, that store is full of inspiration!
I filled three buckets full of art drawing goodies… only one bucket has chalkboard items in it, but the other buckets are full of markers and colored pencils that she can use at her desk.
It was fun browsing the art aisle in Hobby Lobby… I got her some chalk markers, a box of rainbow colored chalk, twist colored pencils in multi-colors and spring colored markers! She loved them!
Hobby Lobby had these cute little daisy hangers and they were great for hanging these metal buckets. I am thinking about spray painting the two pink ones, since they fall right on the pink stripe (didn’t realize this would happen until it was time to hang everything!).
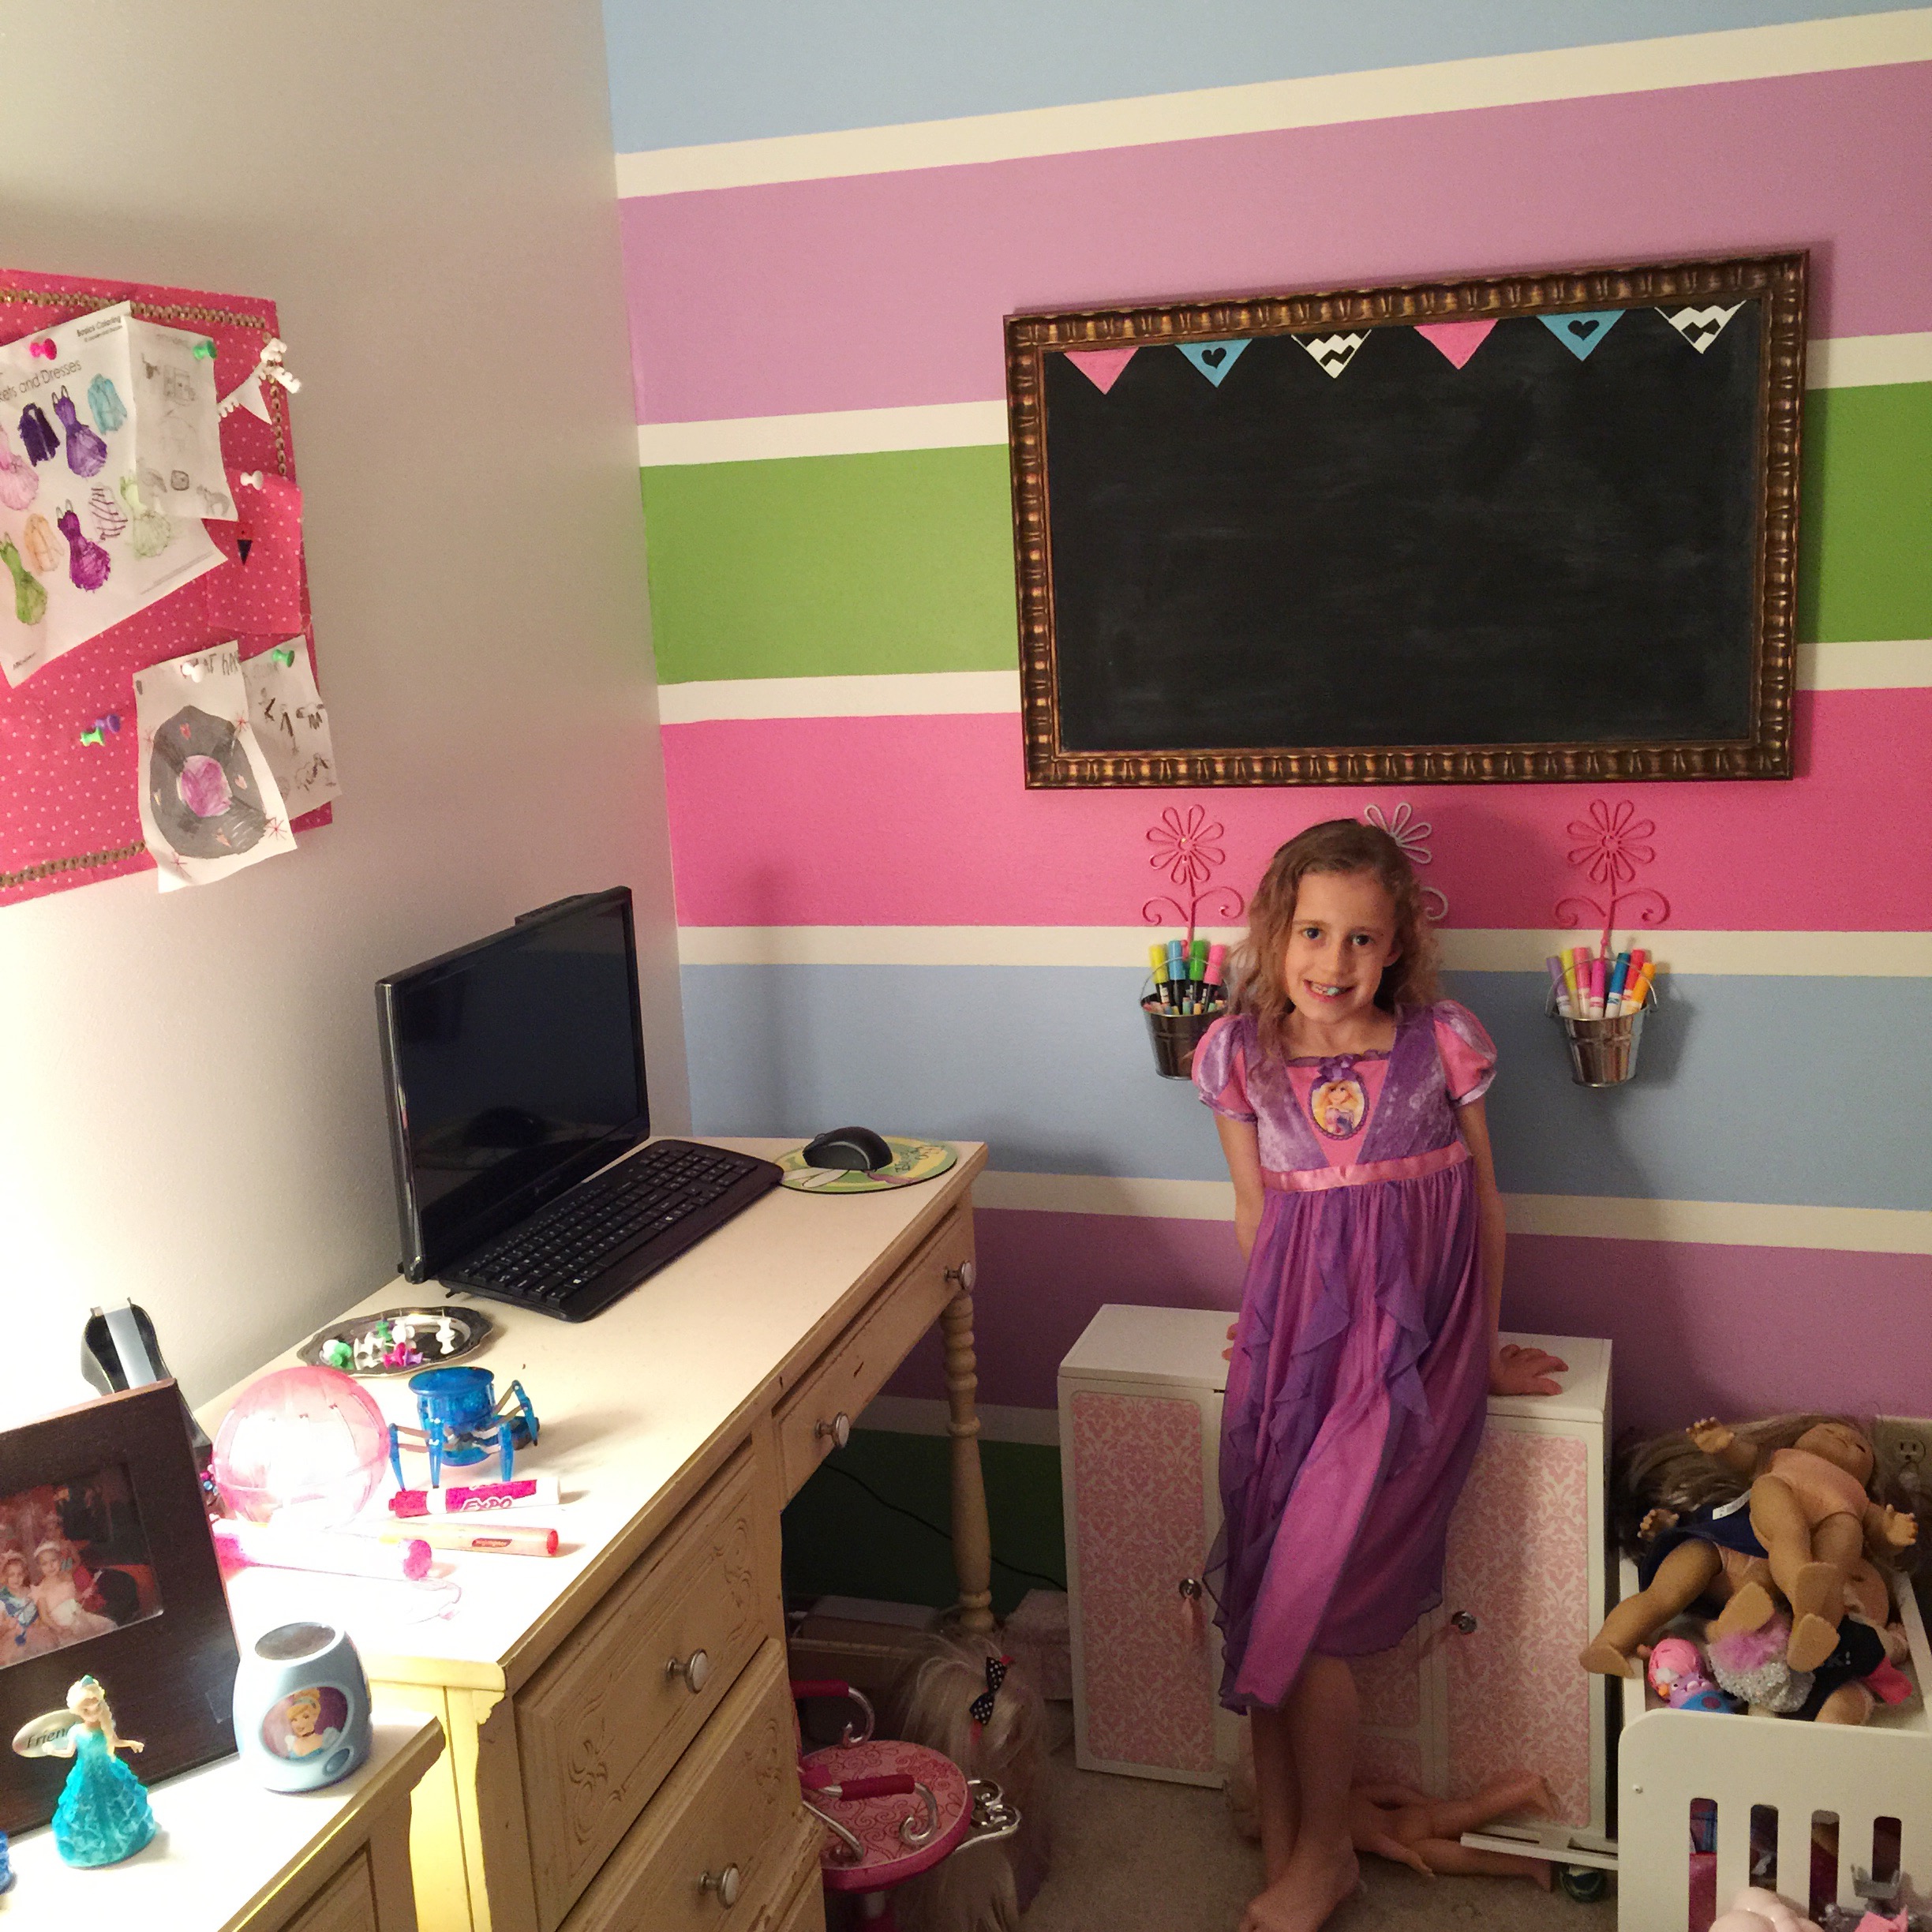
And are you ready for a shot that isn’t staged? Yeah… this is what her room really looks like most days. Autumn is a little tornado right now! I really can’t wait to finish this space and declutter it (again and again!).
And, now that my son has been seeing all of the work I’ve been doing on Autumn’s room, he wants HIS room redone now. I told him he’s going to have to wait a bit. lol. 🙂
Linked up with:
Fluster’s Creative Muster
Hit Me With Your Best Shot
Worthwhile Wednesday
Creative Spark Link Party
Tuesday Talk
Moonlight & Mason Jars
A Little Bit of Everything
Your Turn to Shine
Pin crazy Thursdays
Inspiration Gallery
Craft Frenzy Fridays
Mix It Up Friday
Best of the Weekend
Frugal Crafty Home Blog Hop
Monday Funday Link Party
Totally Terrific Tuesday
Lou Lou Girls Fabulous Party
Snickerdoodle Sunday
Our Favorite Things Pinterest Pin Party
Two Uses Tuesday
Party in your PJ’s

