Hi Everyone! For those of you who don’t know me, I’m Jill from Doused in Pink! My blog, Doused in Pink is all about wearable style, beauty and DIY home decor. I stepped away from blogging last fall but miss it from time to time. When Carrie and I were chatting about her summer vacations, I offered to guest post for her. It’s the perfect way for me to get my blogging fix and help her out at the same time!
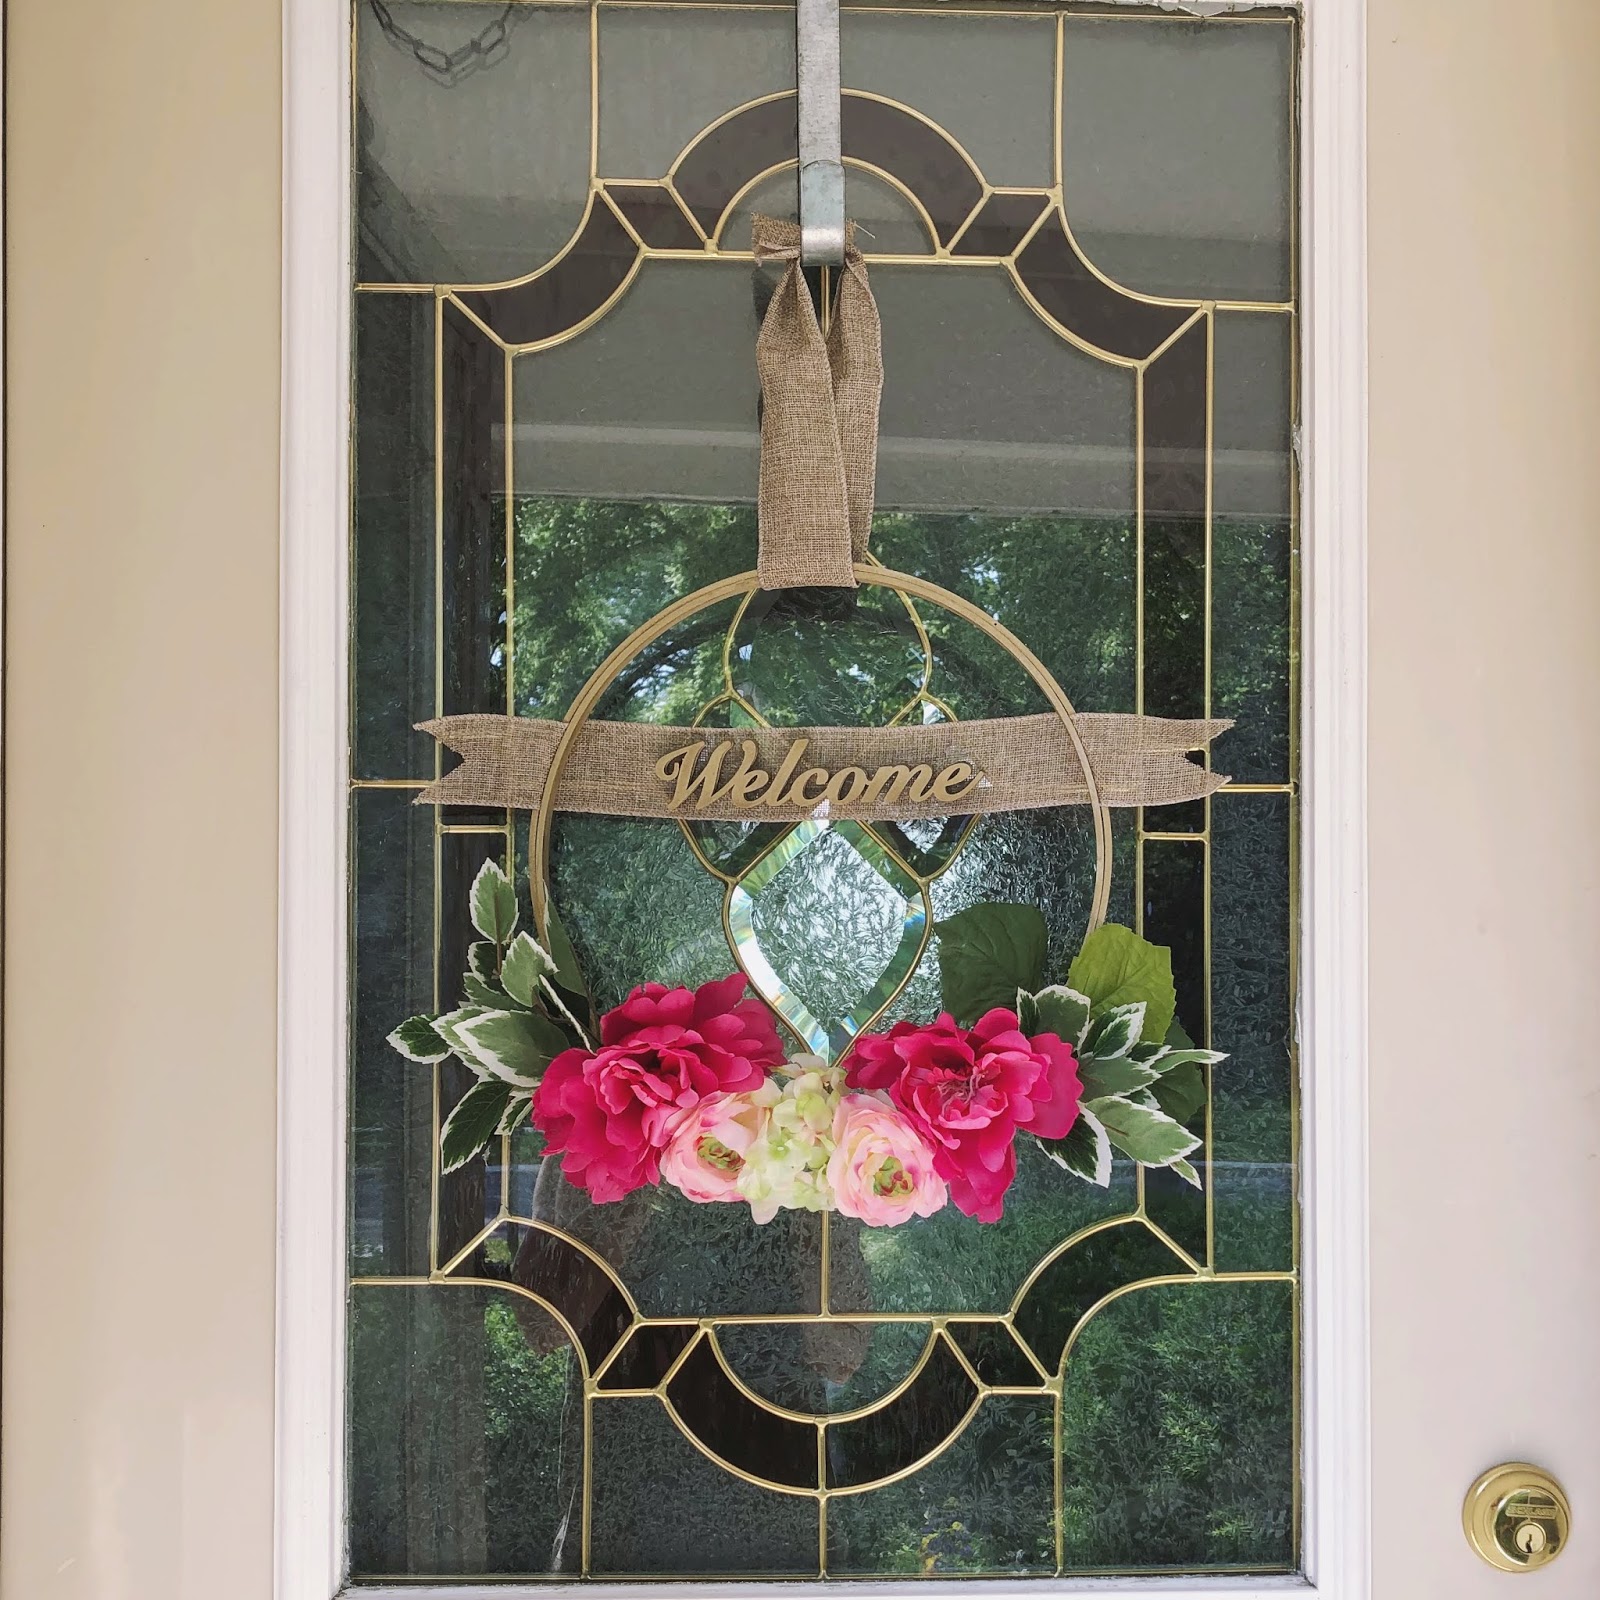
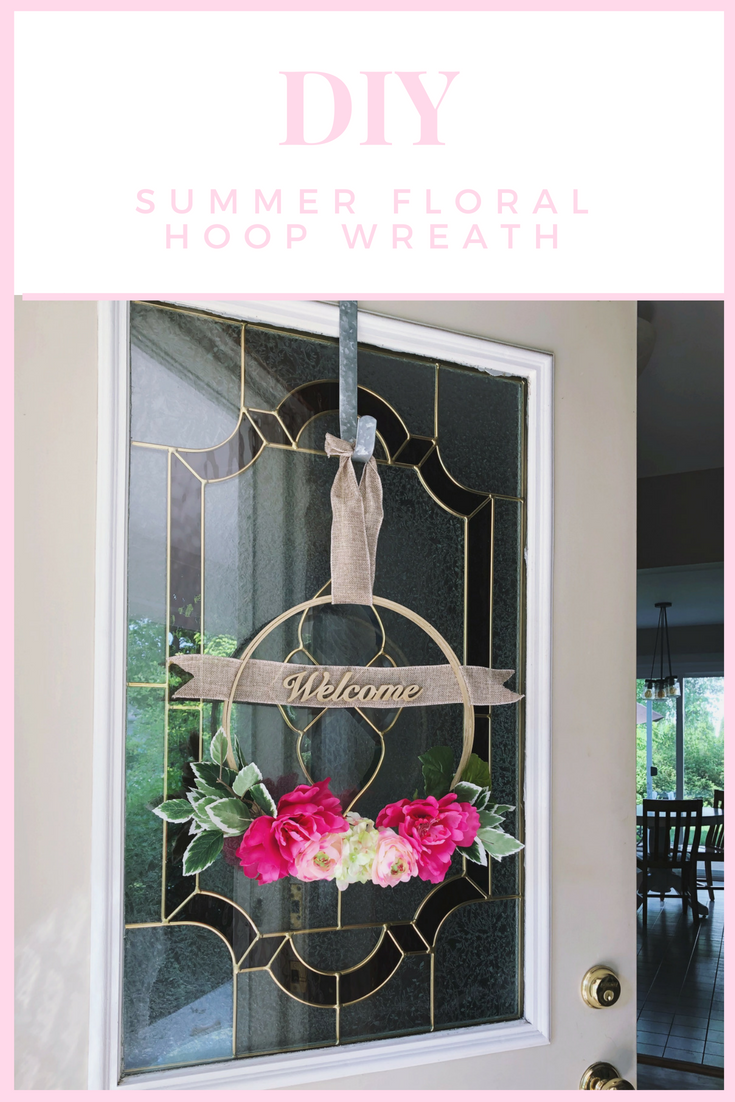
I don’t know about you, but I’m kinda obsessed with wreaths! They are a simple way to update your home for any season or occasion. I’ve been seeing embroidery hoop wreaths everywhere (see Carrie’s here and here) and since I had a stash of hoops from making streamer chandeliers for my daughter’s birthday party a few years ago, I decided it was time to make a hoop wreath myself.
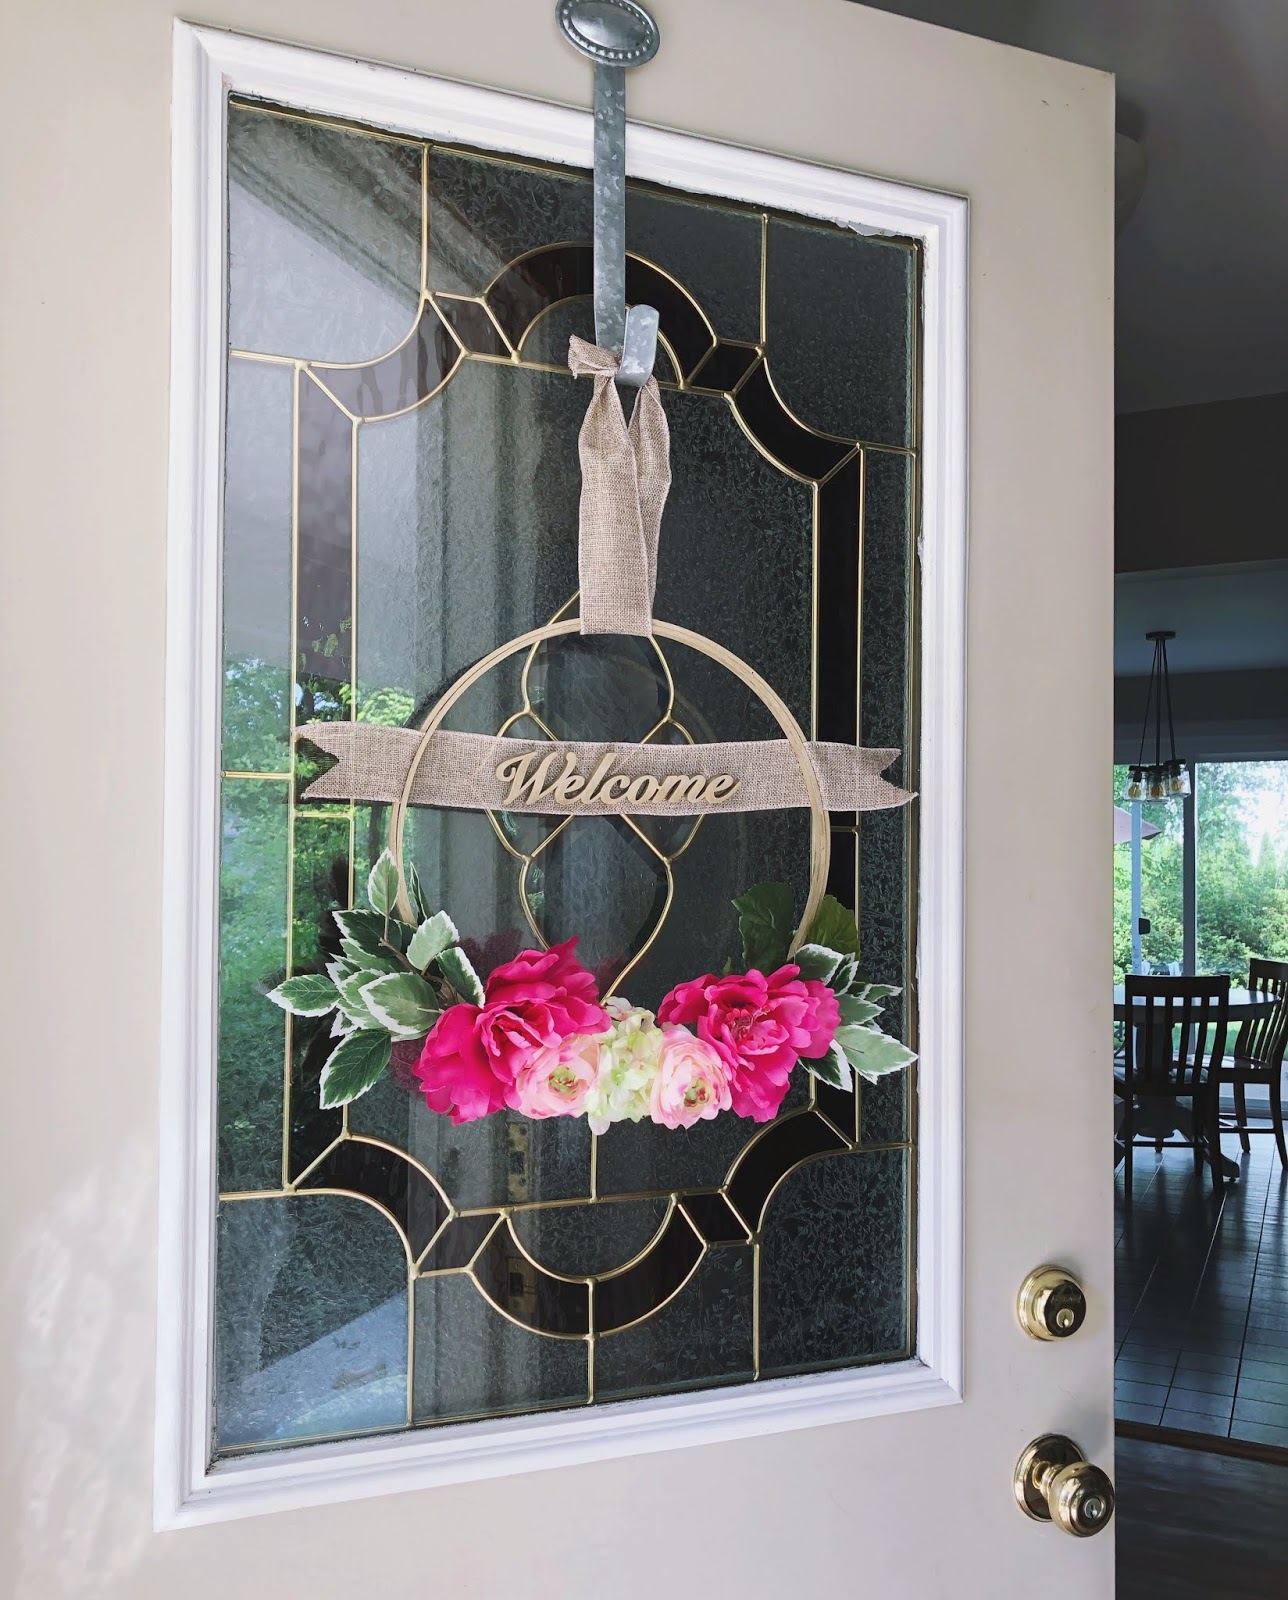
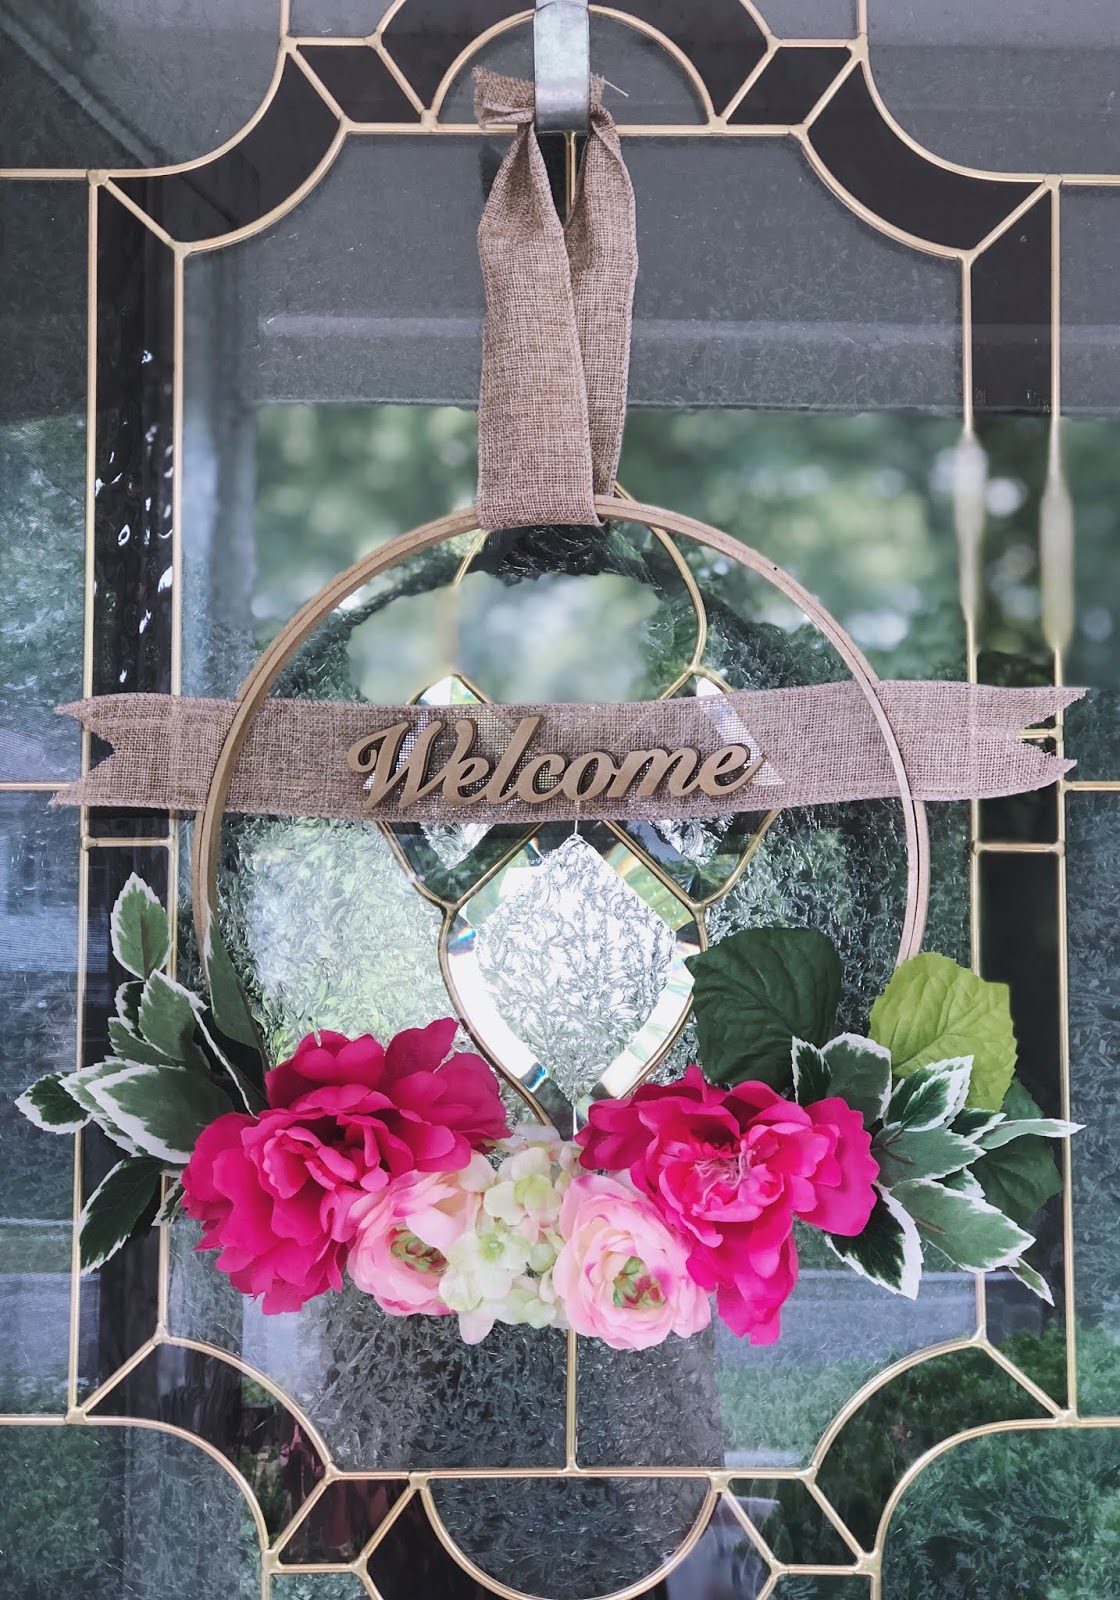
This was probably one of the easiest wreath’s I’ve made and it turned out super cute! Scroll down for the tutorial!
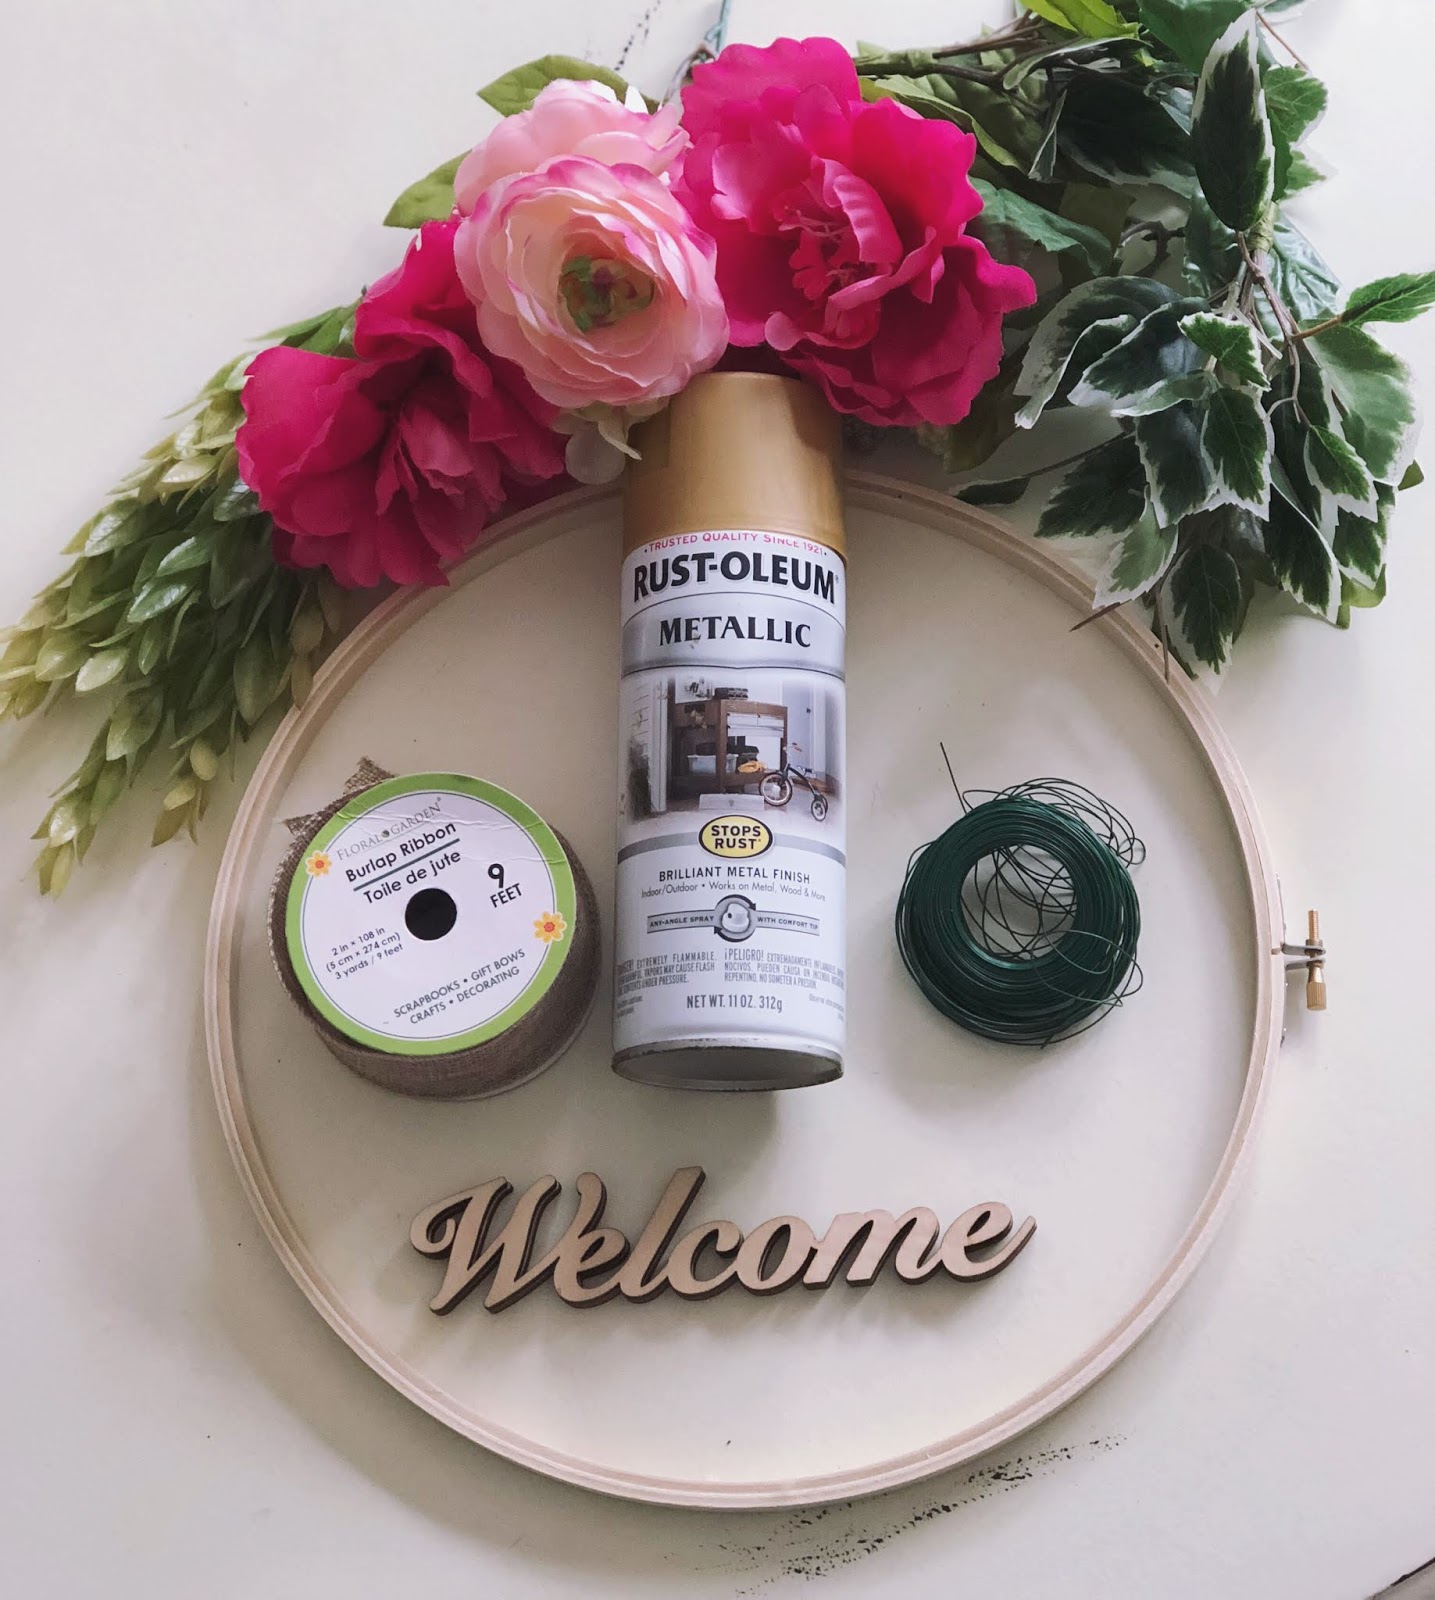
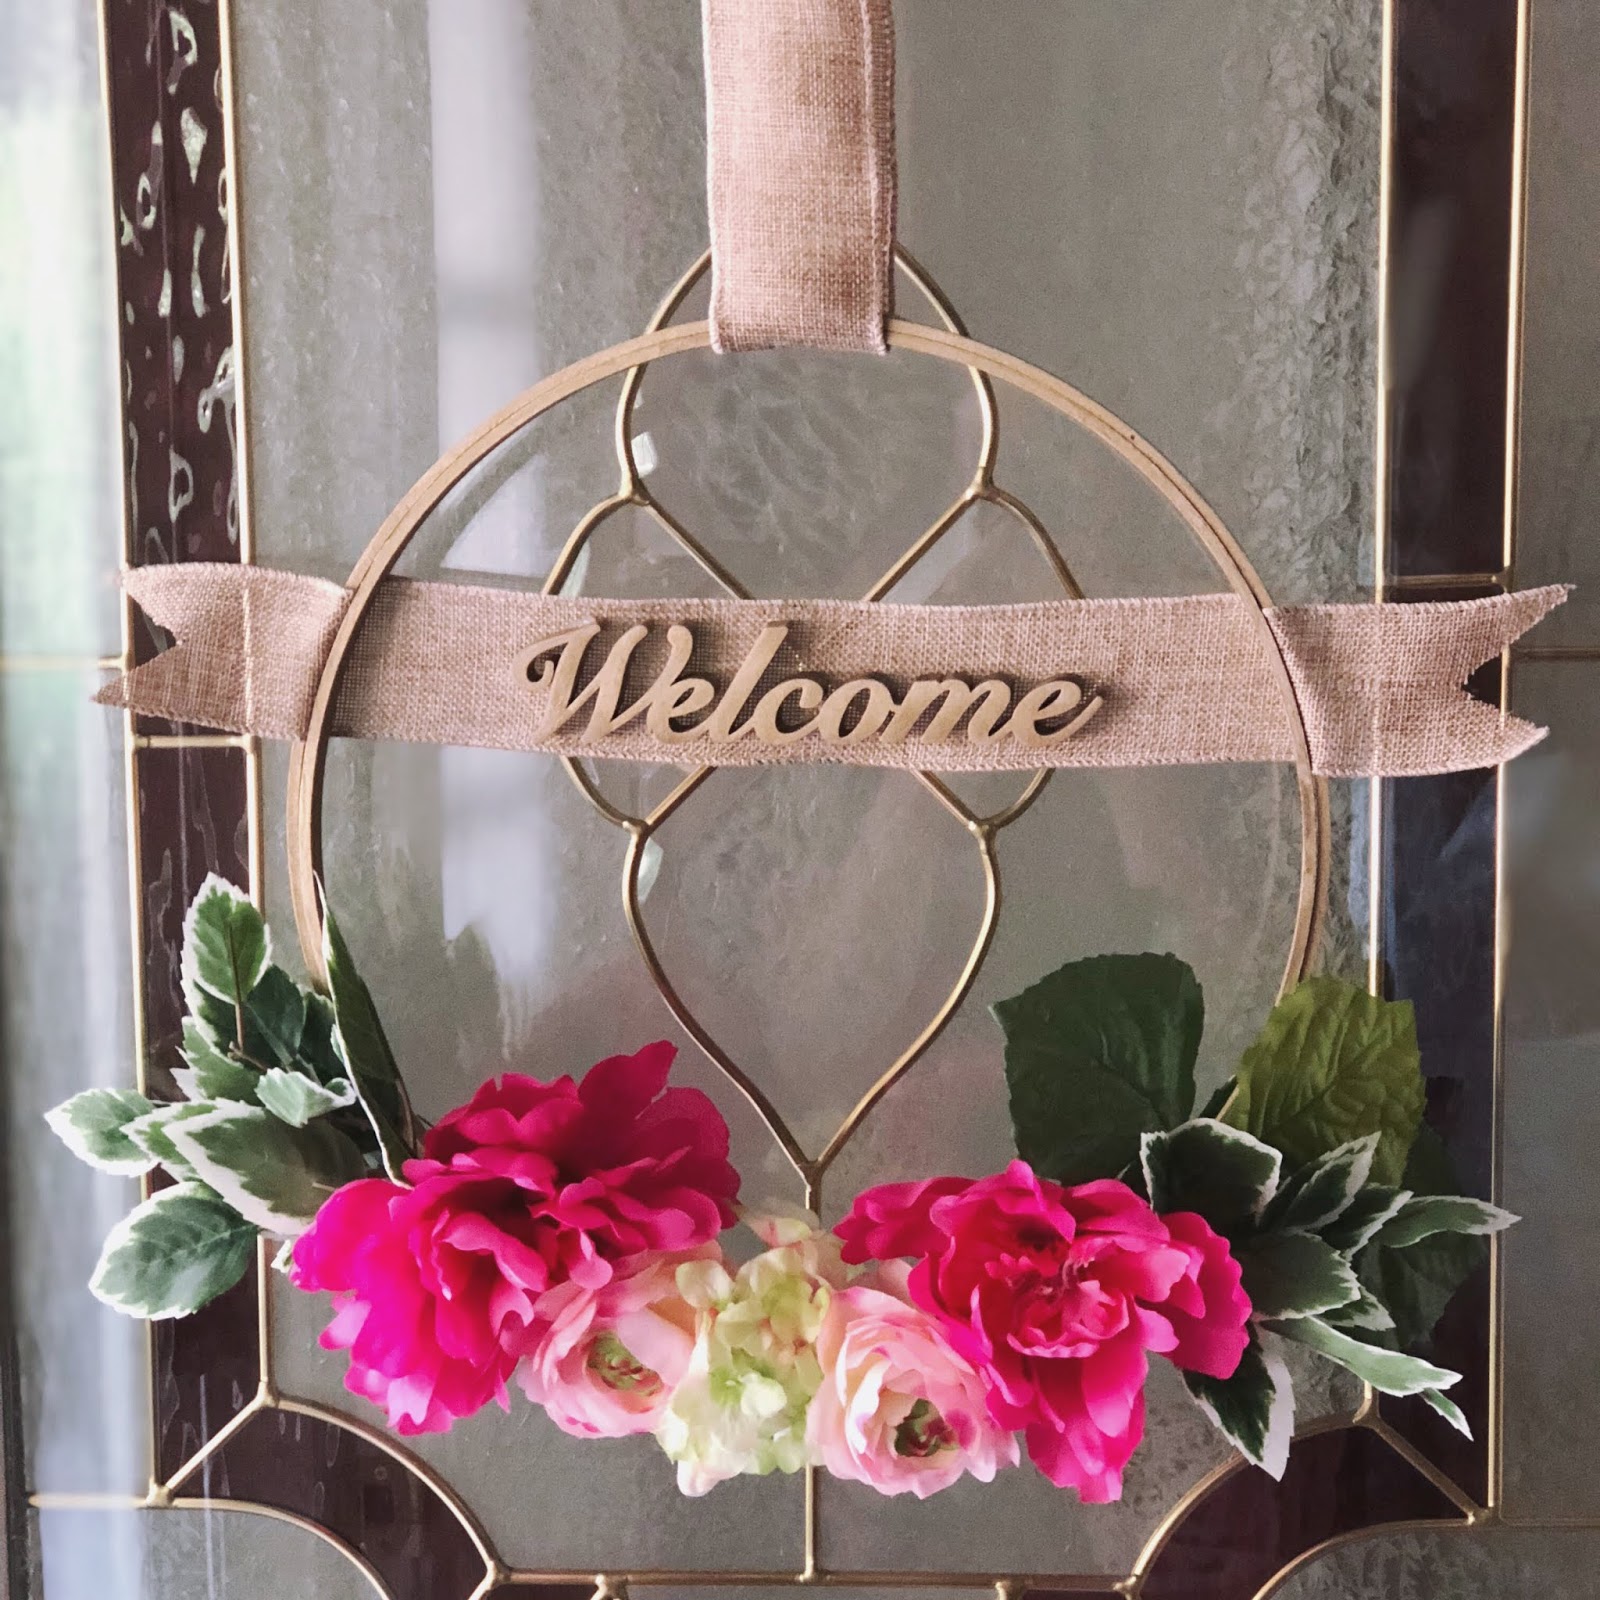
Spray paint your embroidery hoop and wood sign. I sprayed mine with a matte gold and liked how it gave the wreath a more finished look. Spray with any paint you have on hand or keep it natural! Allow to dry.
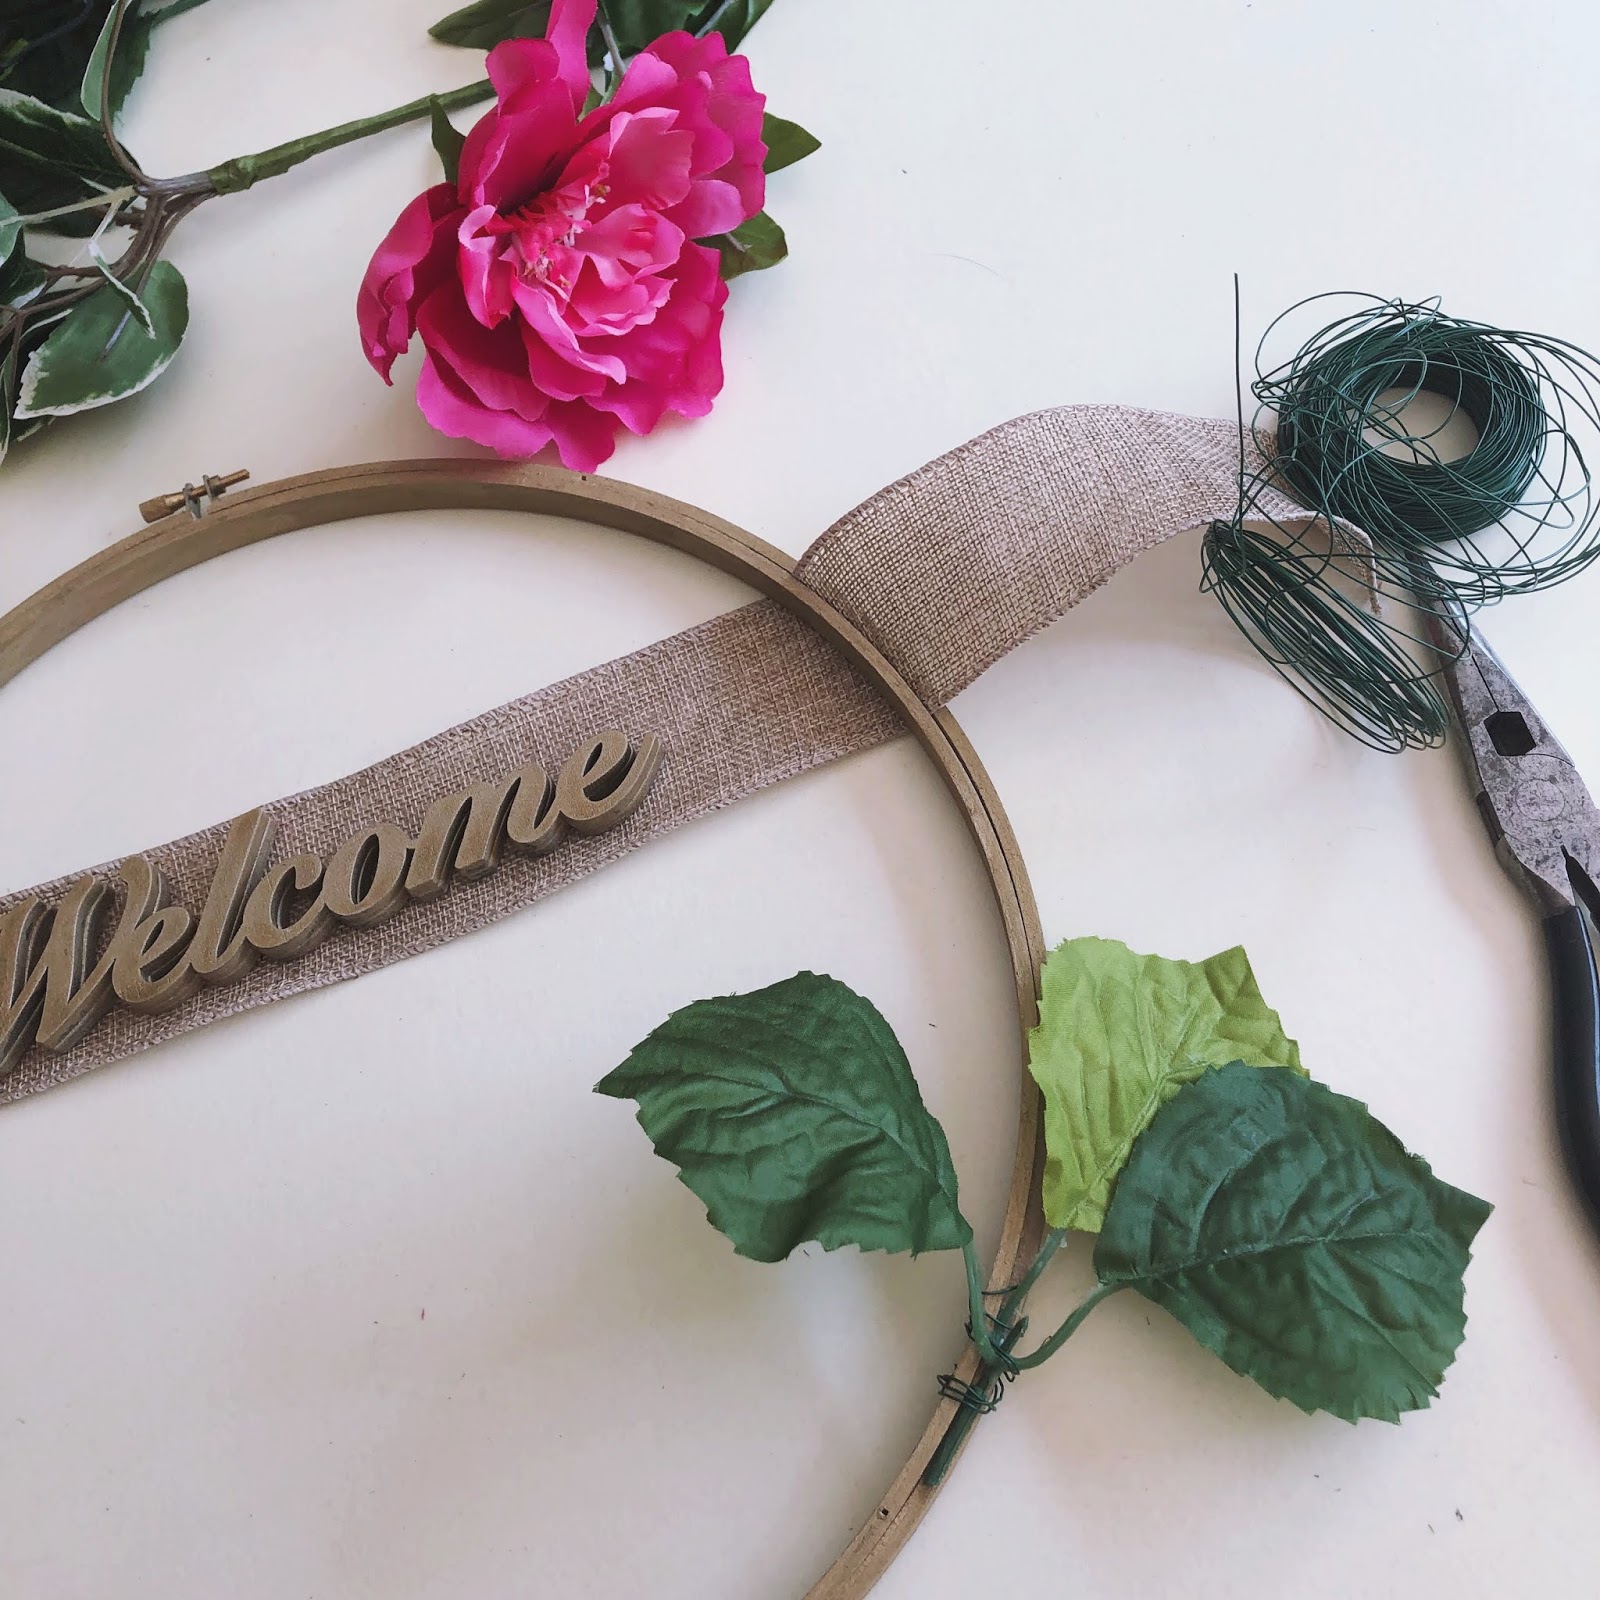
Cut a piece of ribbon wider than the hoop. Glue the wood sign to the center of the ribbon. Unscrew the top ring on the embroidery hoop to separate the hoop. Lay the ribbon with the wooden sign centered and about 3/4 of the way to the top. Reassemble the hoop. Trim the excess ribbon to your liking.
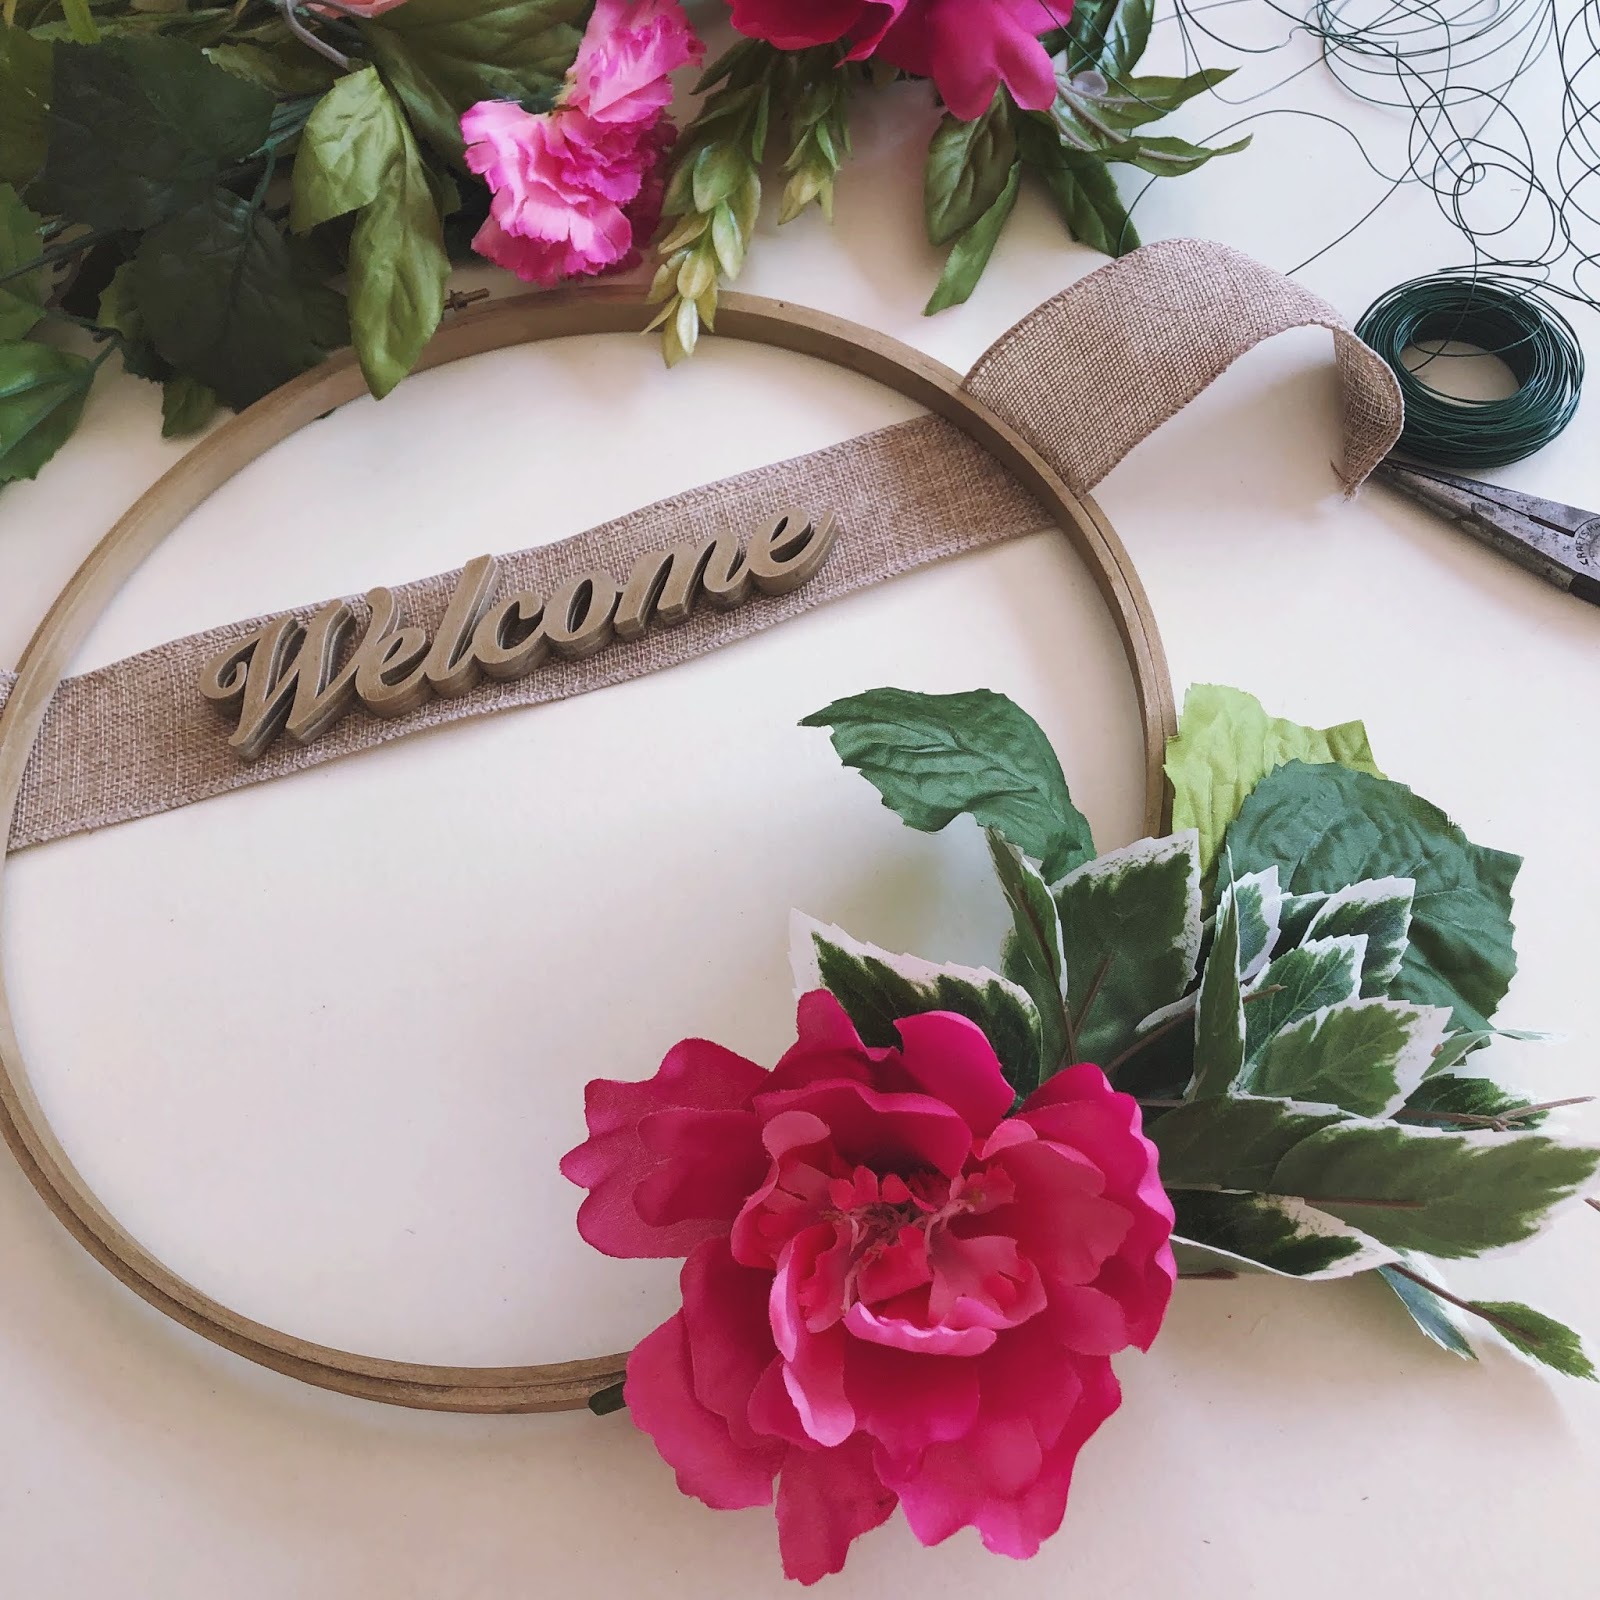
Separate your flowers, leaves and stems. Place the leaves down first then layer the flowers on top. Secure with floral wire.

There is no right or wrong way to do this! Rearrange the placing until it looks right to you.
If you liked this post, check out my spring, fall and holiday wreaths! I’d love to stay in touch! You can follow me on Instagram where I share everyday outfits, Pinterest or like my Facebook page!