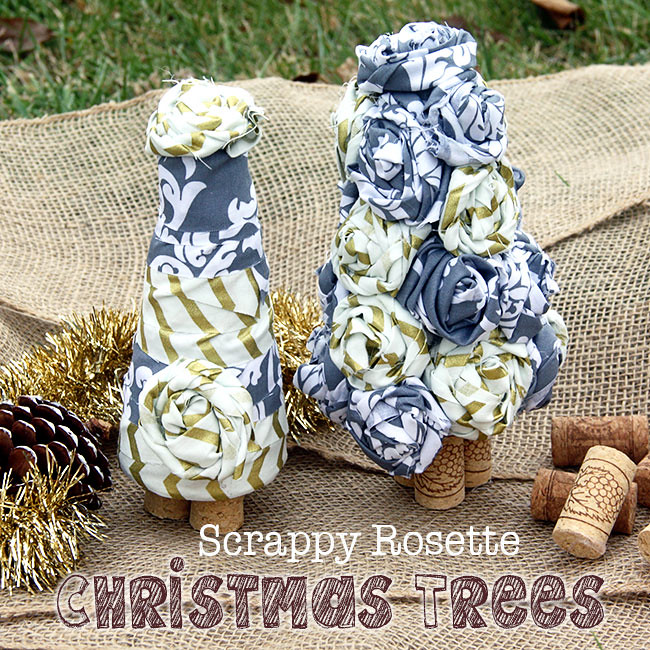
Every Christmas I enjoy making a different kind of mini-Christmas tree. This year I knew I wanted to make something metallic/gold with greys… I was in Hobby Lobby and came across a beautiful gold chevron striped fabric and matched it with another fabric that was grey. I have always loved rosettes and decided to make some scrappy rosette trees. The second tree has less rosettes and more ‘scraps’ on it. I really love how these two trees compliment each other really well, but each have their own look and feel. I took some photos of these trees outside, because the lighting was poor in the house today. I will let the photos do the talking…

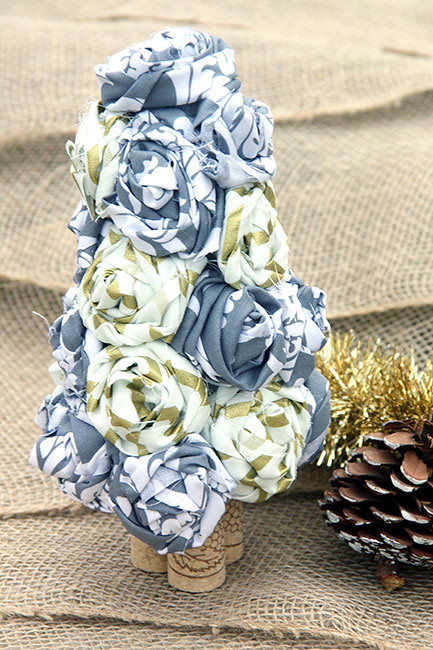
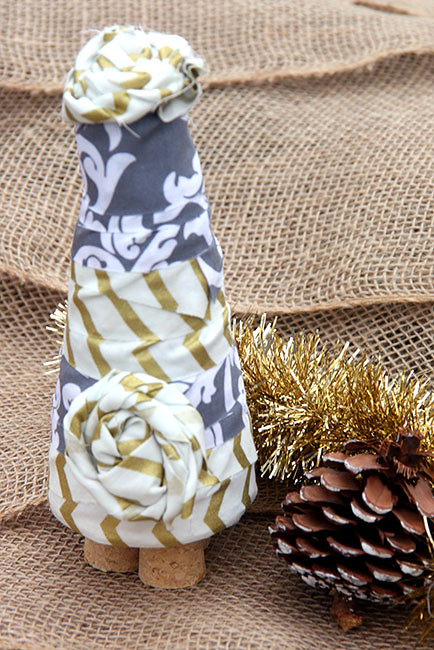
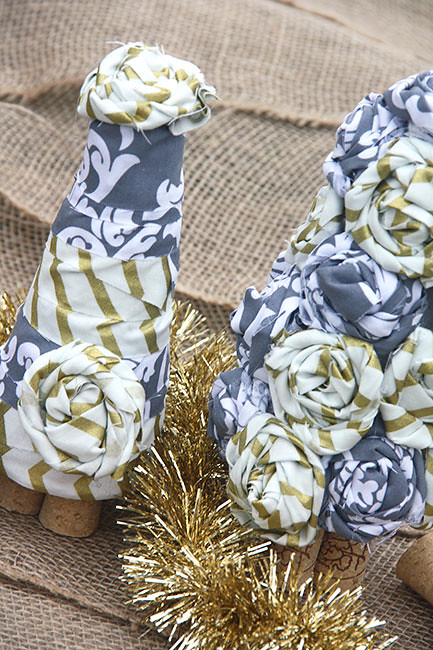
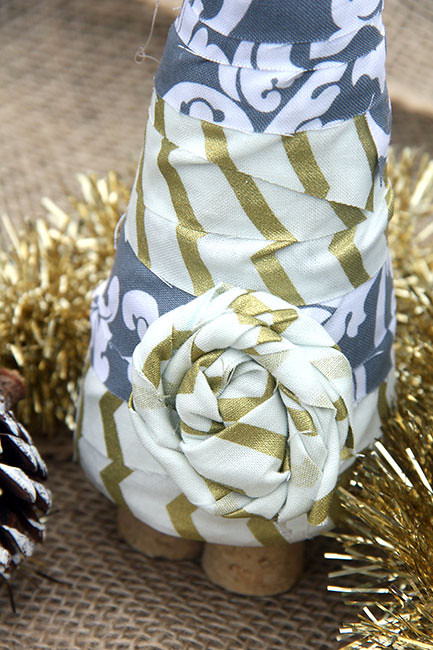
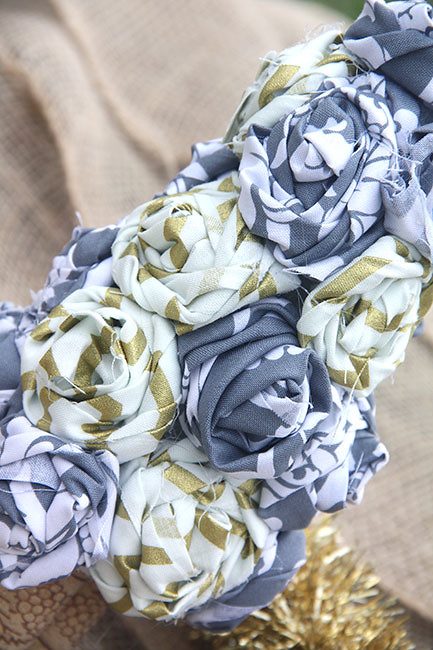
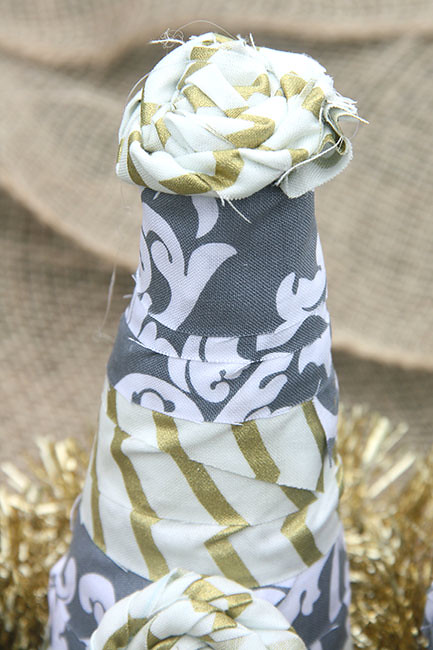
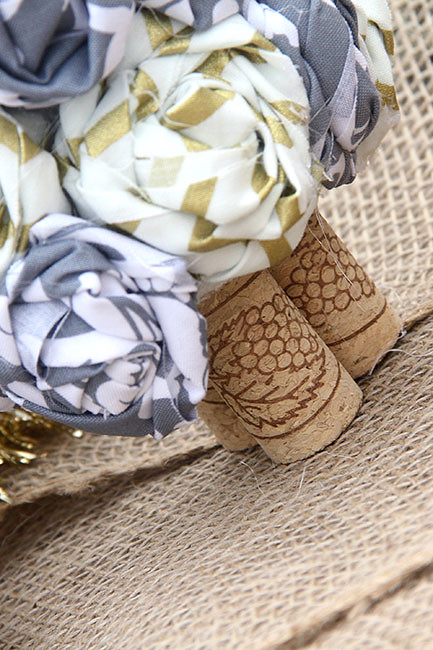
For these trees, I knew I wanted them to be gold with grey… I selected the fabric from Hobby Lobby with two different patterns. I originally was going to make two trees with rosettes, but after spending over an hour making rosettes, I realized I only had enough to put on one of the trees with a few leftovers… SO, I decided to make the second tree a little different with scraps of fabric and I love how it turned out. For the base of the trees I used wine corks. Didn’t these trees turn out adorable?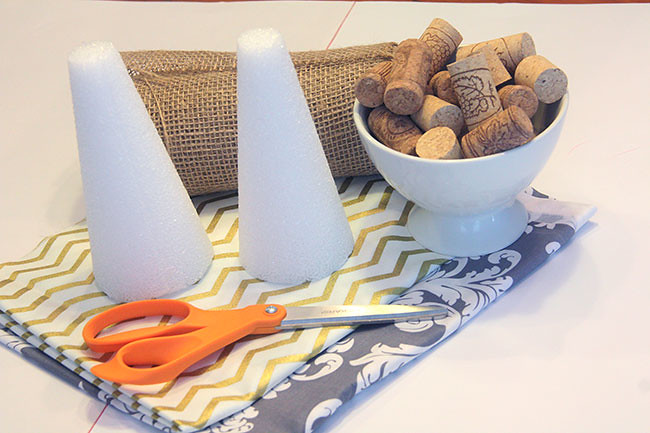
The supplies were really simple for this craft. Two styrofoam trees (they sold them in 2-packs at Hobby Lobby), wine corks, burlap (optional) and fabric scissors.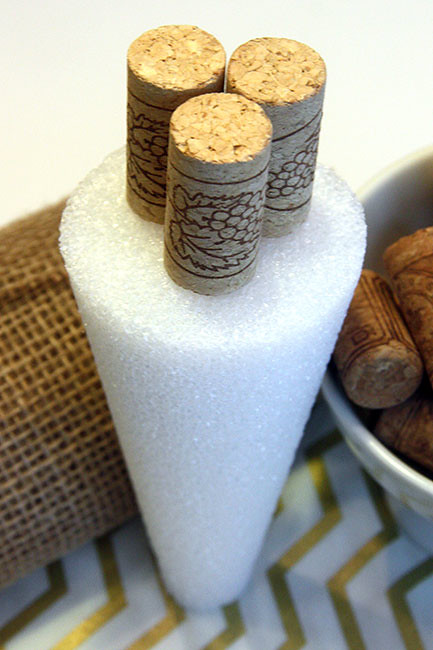
First I glued a set of three wine corks onto the bottom of each ‘tree’.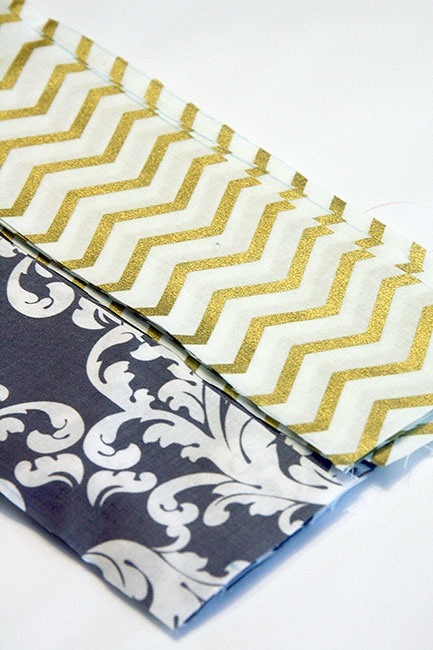
Then I cut the fabric into 22″ x 3″ strips.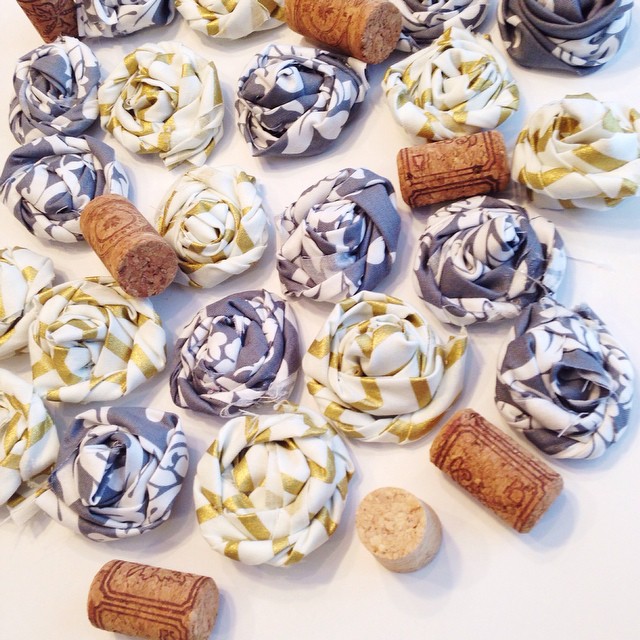
Then I spent the next hour making rosettes. I have a great tutorial on how to make rosettes on another blog post I did, which you can see by clicking HERE. Then, just hot glue the rosettes to the tree! I put a rosette on the top of each tree as a topper, but you could also make a bow. For the scrappy tree, I wrapped it with burlap and then wrapped the scraps of fabric around it (hot glued them on each end) and added a rosette to the top and side of it. I was really happy with how both of these trees came out and I may incorporate them into my coffee table tray decor for Christmas if they work.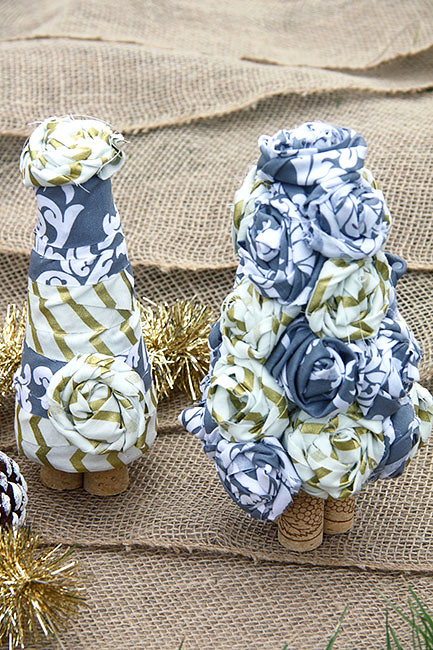
I hope you enjoyed this craft. If you interested in seeing more of my Christmas crafts or my Holiday Home Tour with several other bloggers this Wednesday, I would love to have you stop by Curly Crafty Mom. I also have two link ups each week, a fashion one called What Wives Wear and a craft/DIY link up called Motivational Monday. Hope you have a blessed Christmas and thanks for reading along with me today!
Linked up with:
Totally Terrific Tuesday
Bloggers Who Have Inspired Me
Hit Me With Your Best Shot
Worthwhile Wednesdays
Work It Wednesday
Moonlight & Mason Jars
Create Thursday It Thursday
Craft Frenzy Friday
Inspiration Gallery
Best of the Weekend
Sweet Haute
Snickerdoodle Sunday
Share Your Creativity
Found & Foraged
Your Turn to Shine Link Party
Frugal Crafty Home Blog Hop
Your Designs This Time
