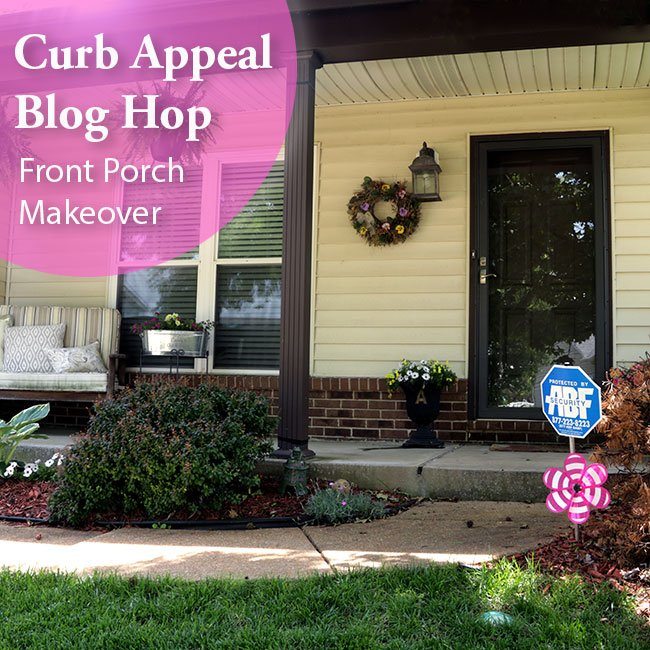
 It is Week 2 of the Curb Appeal Blog Hop! Last week I shared the ‘before’ photos of our front porch and my ideas on making it look more appealing. You can see Week 1’s post by clicking HERE.
This week I am sharing a couple of projects we took on over Memorial Day. It seems whenever there is a long holiday, my husband and I land up painting SOMETHING. Usually it is a room, but this time I painted our front door and my husband stained the bench that is on our front porch (oh, did it need it!). As a bonus, he even stained the mailbox!
Before Photo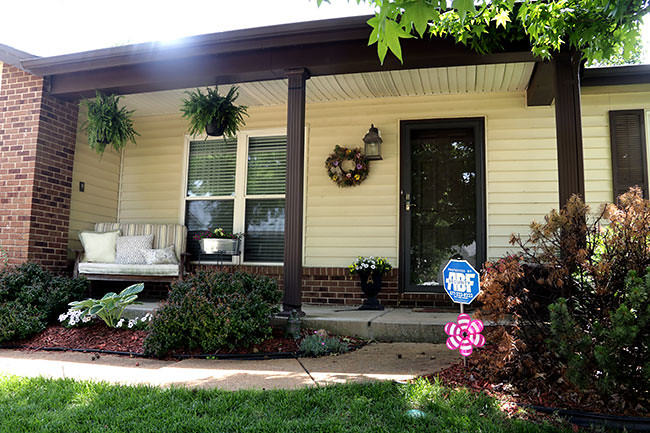
After Photo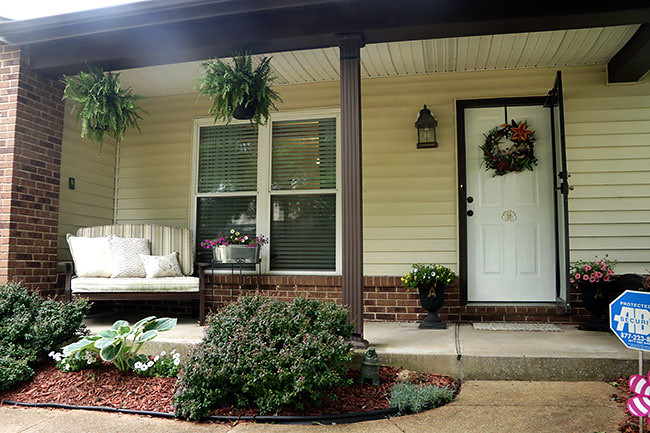
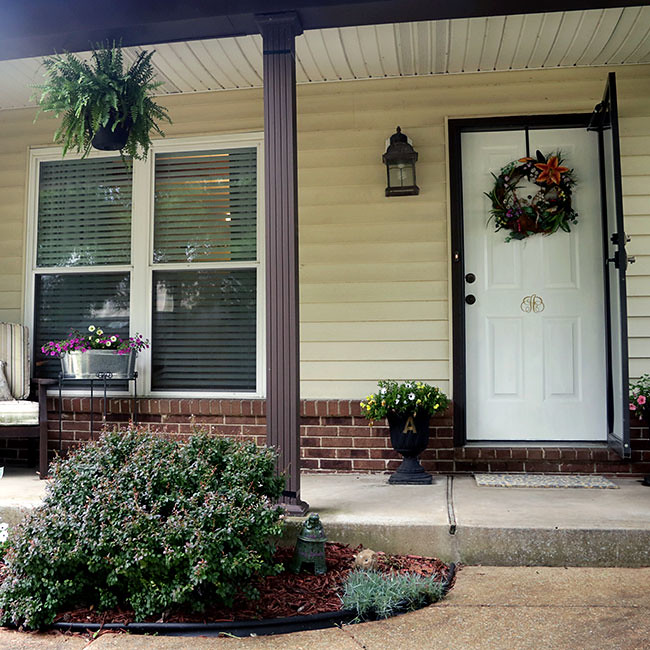
Doesn’t the white door make a HUUUUUGE difference?!! The bench is also stained, but I put the old cushion back on it until the new one arrives from Amazon.
More After Photos (and then I’ll explain how we did everything!)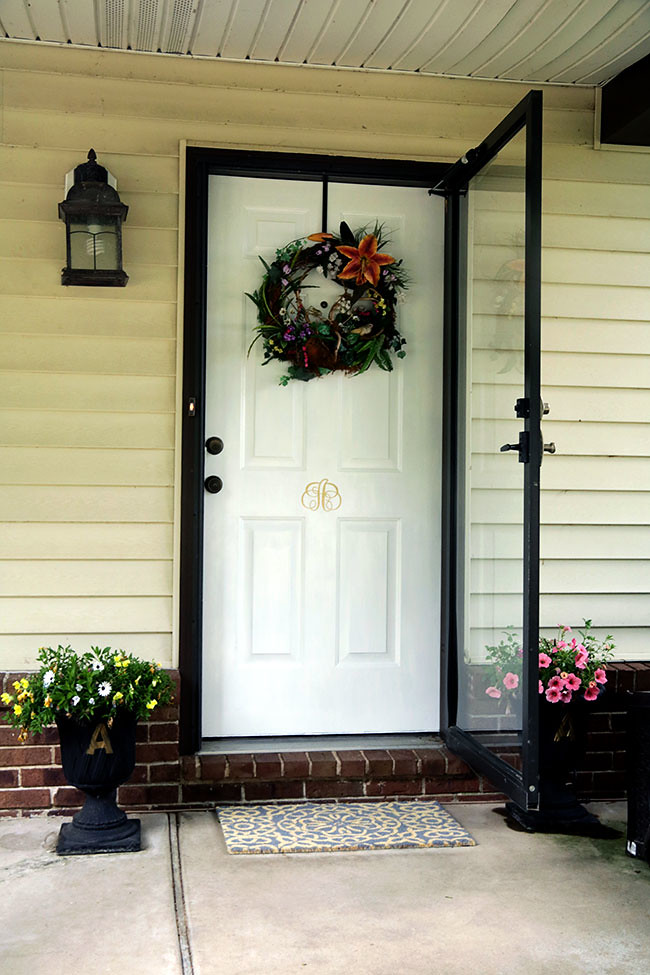
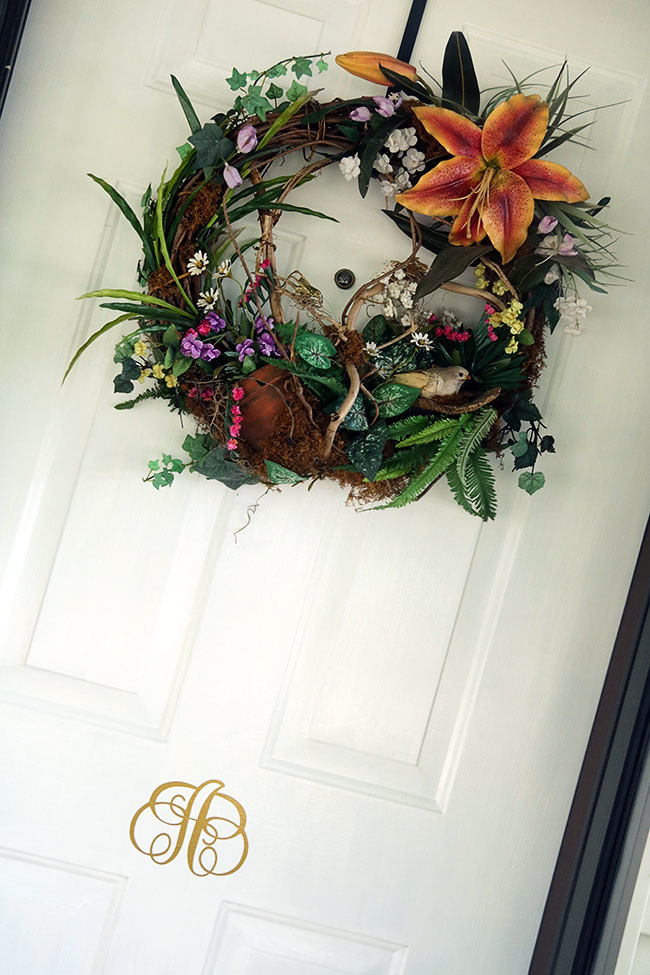
I moved the wreath from hanging it on the siding to the front door. However, this wreath is too ‘thick’ and I can’t close our storm door when it is hanging on the door! Bummer! So, I will be on the lookout for a new wreath to purchase, since I don’t have time to DIY one right now. I am tired of hanging a wreath on the siding, because the birds ALWAYS make a nest in it and get my wreath dirty! As cute as it is to see little baby birds hatch from eggs, the clean up afterwards is not worth it!
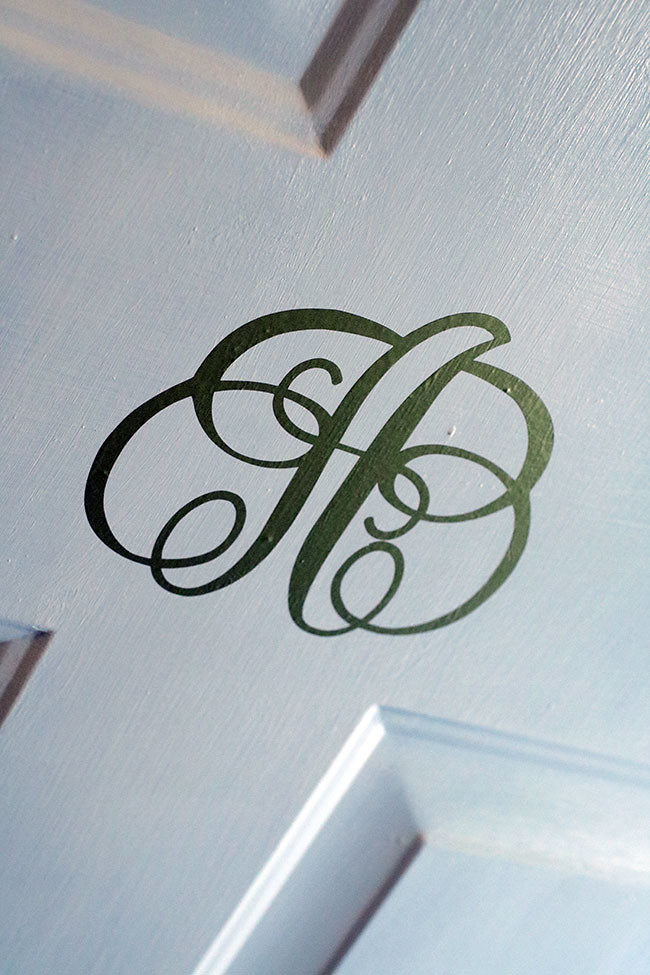
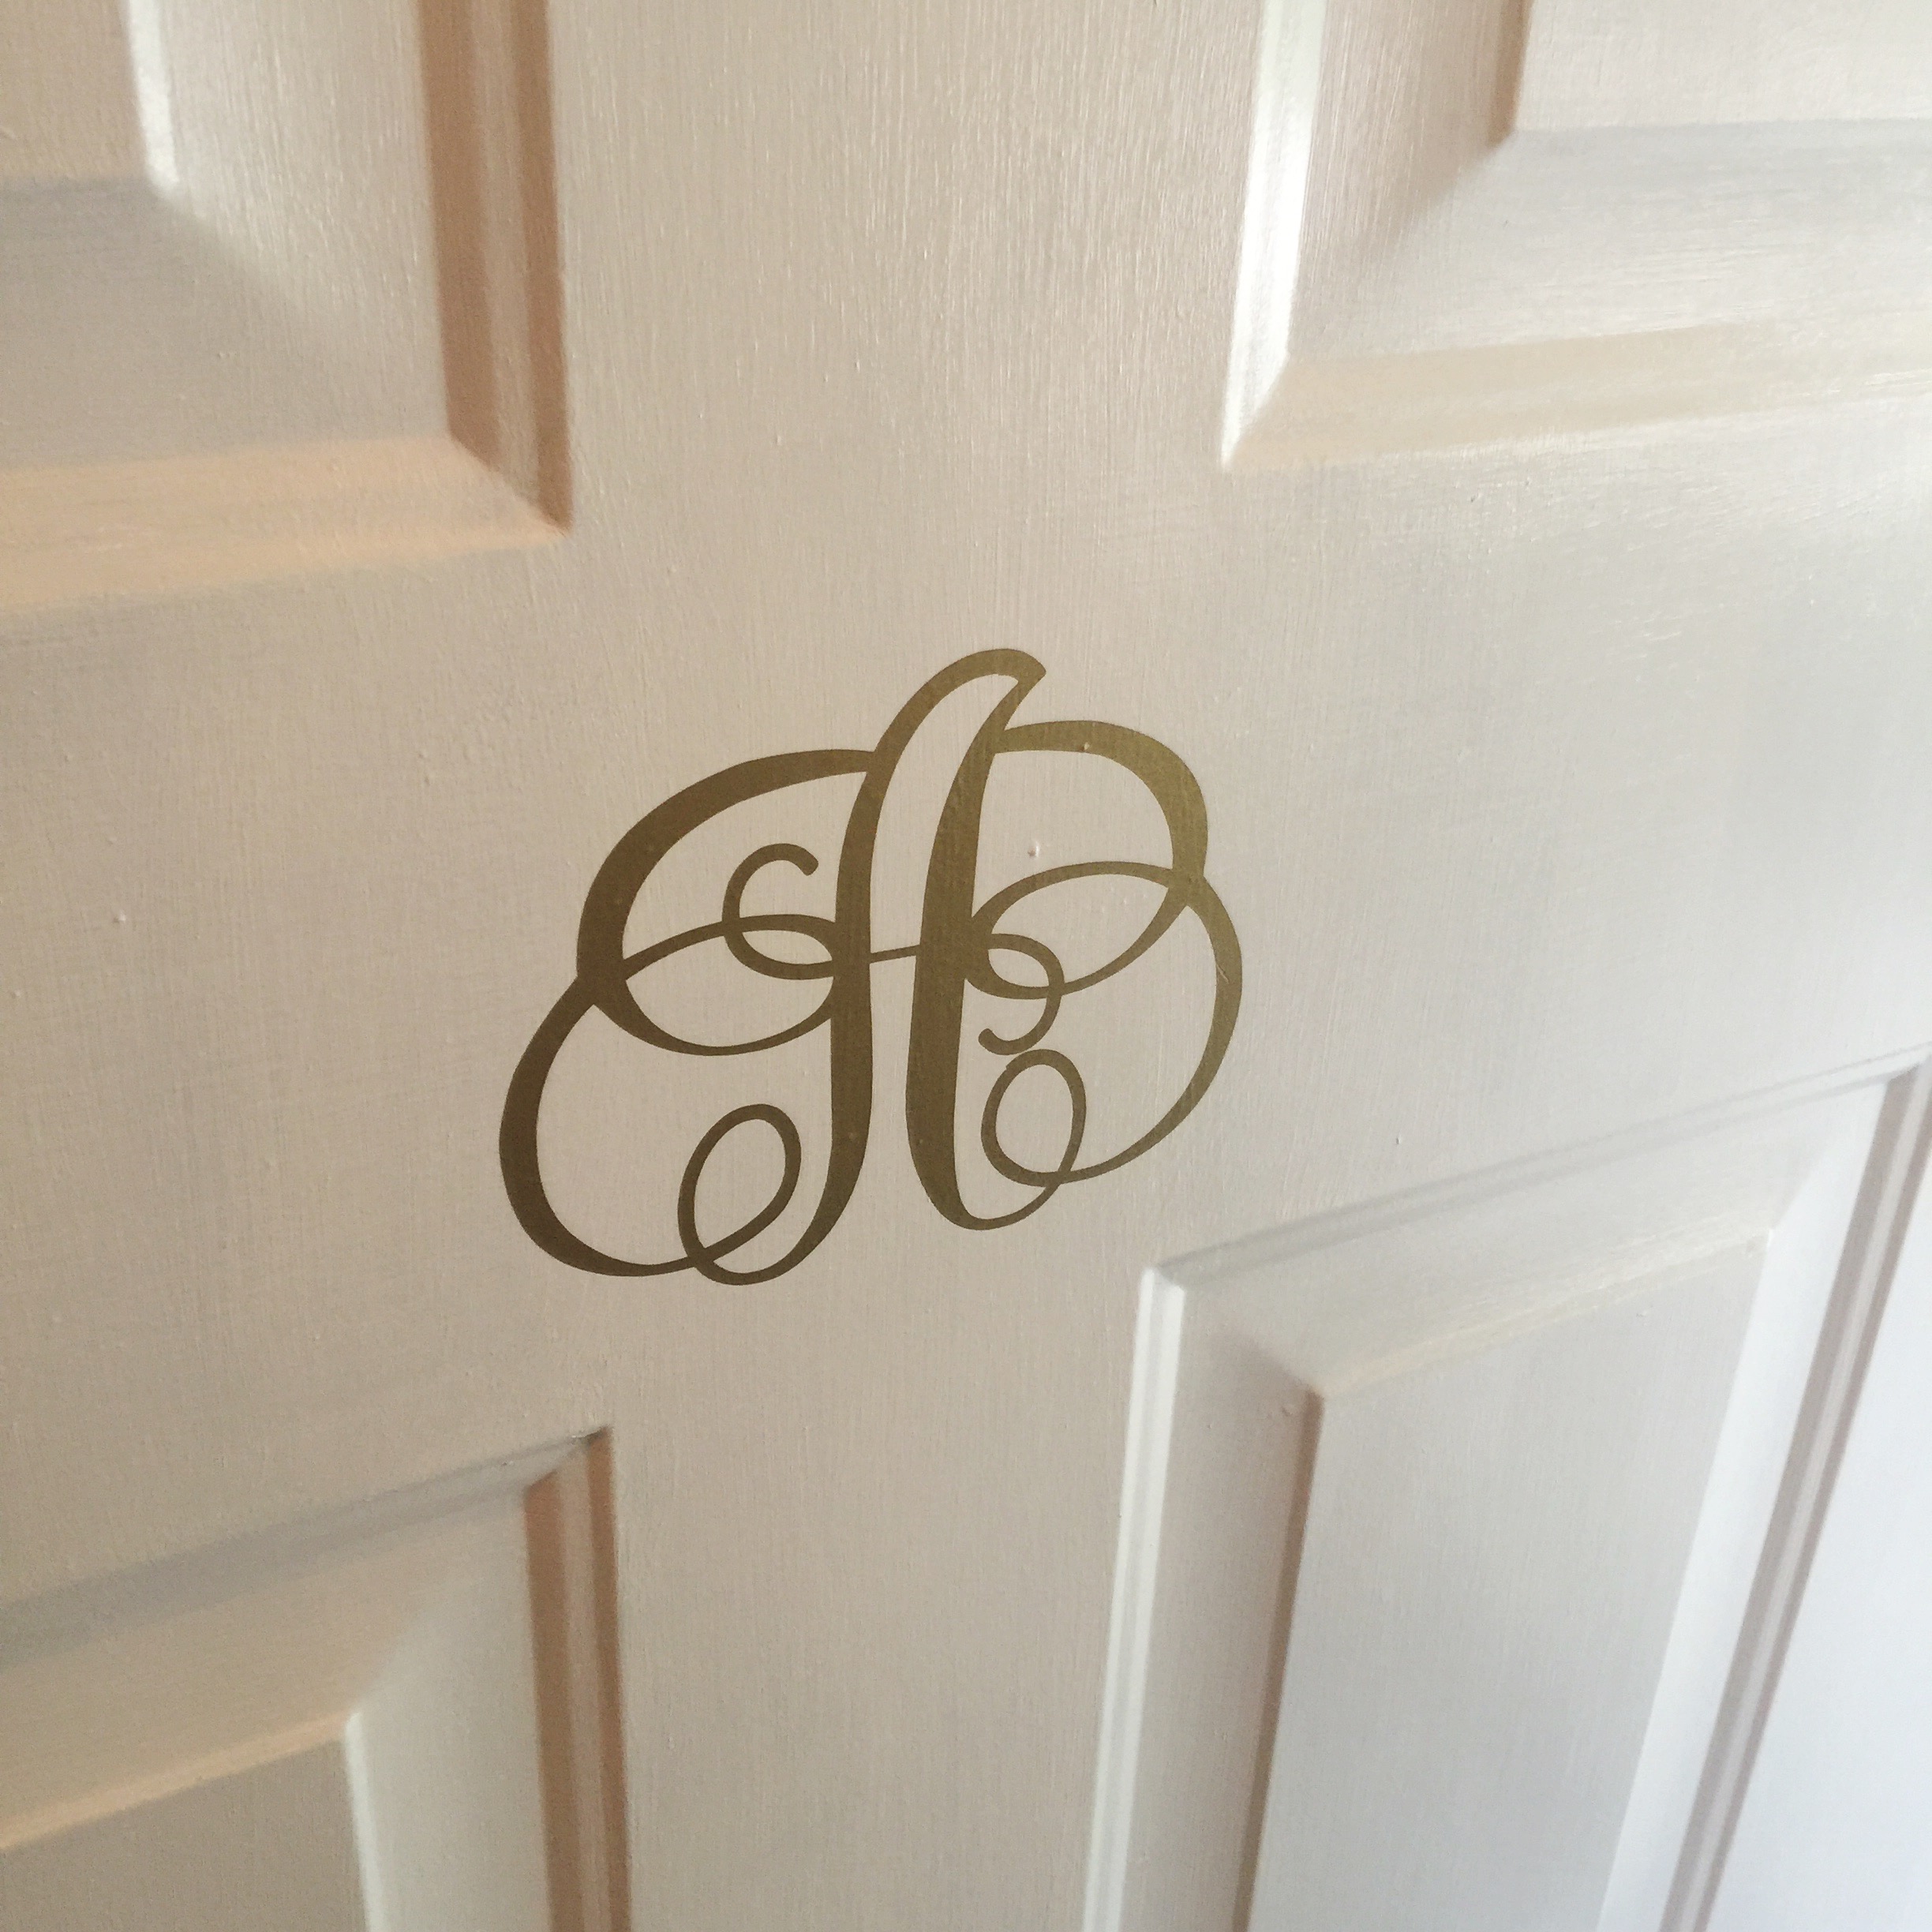
You’ll also see I added a decal to the door with gold vinyl that Pro World provided me. I have been wanting a decal on our front door and after much looking around on Pinterst, I knew I wanted an initial monogram on our door! I am really pleased with how it turned out!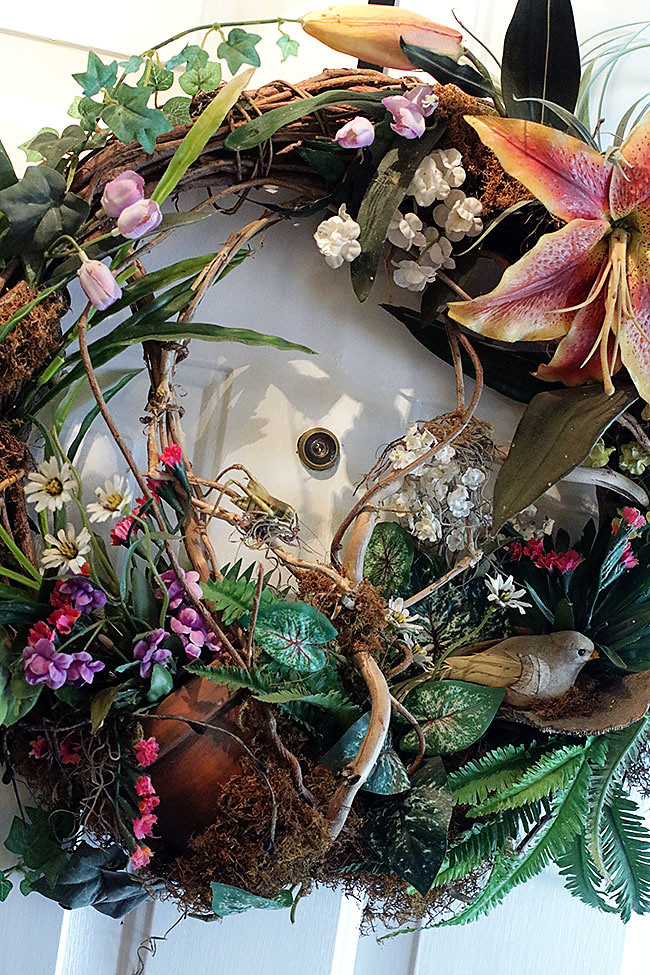
Sadly, I will have be putting this summer wreath back into storage in our basement. In past summers I have hung it on the house. I am bummed it won’t work out on our door!
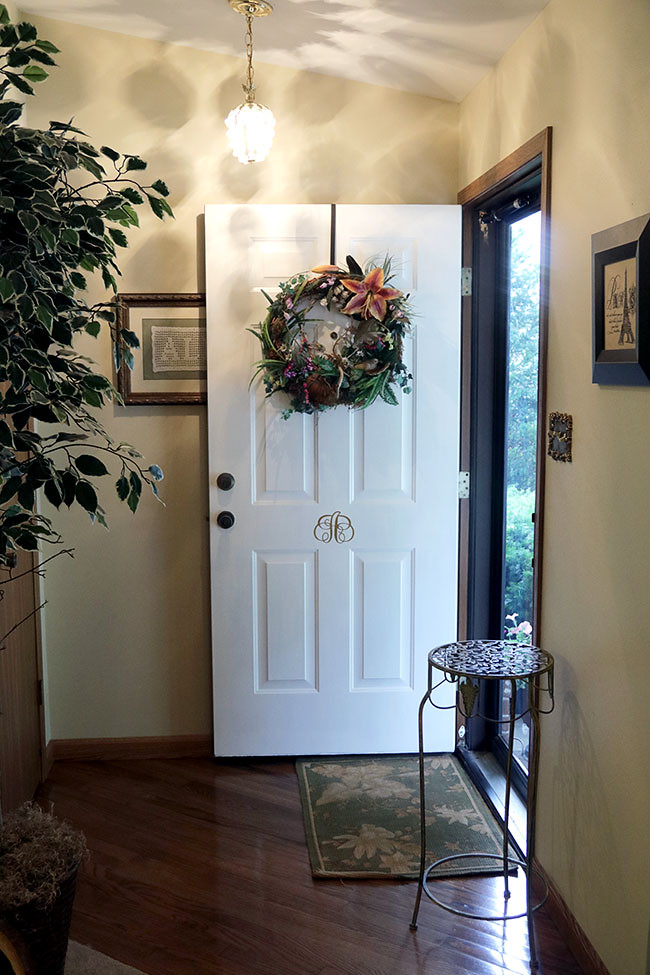
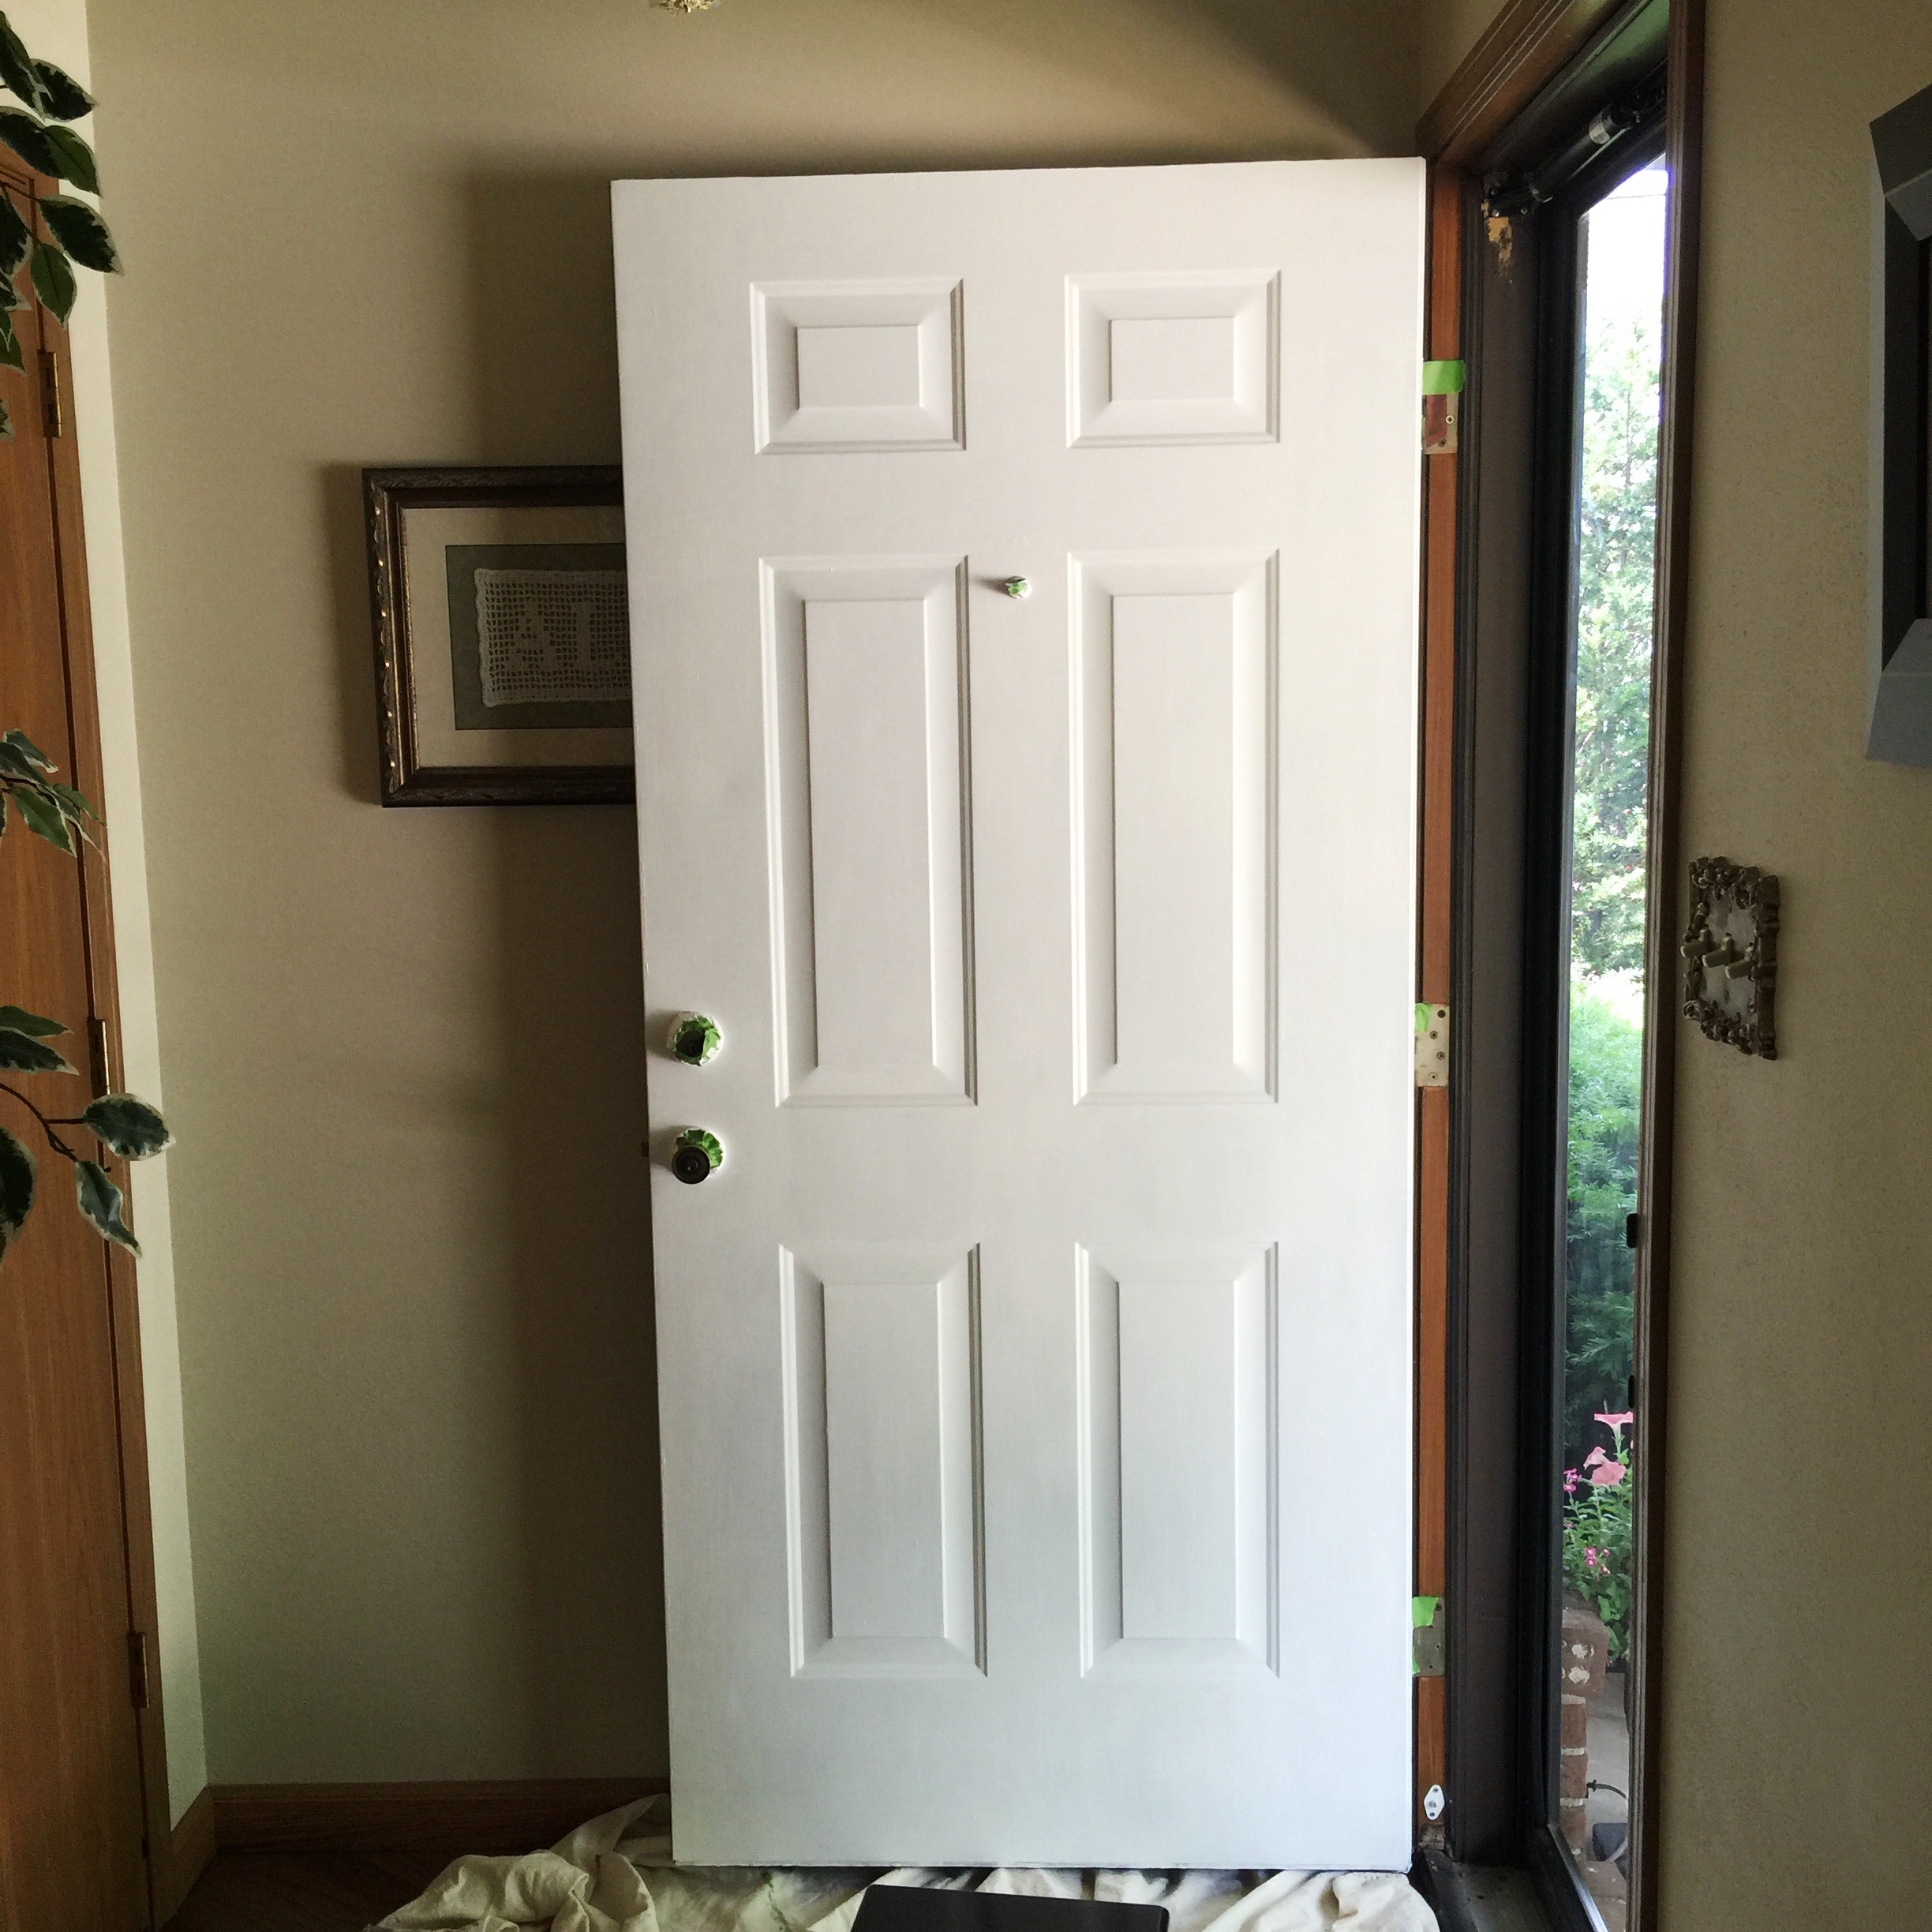
Here is what our new white door looks like from the inside of our home.
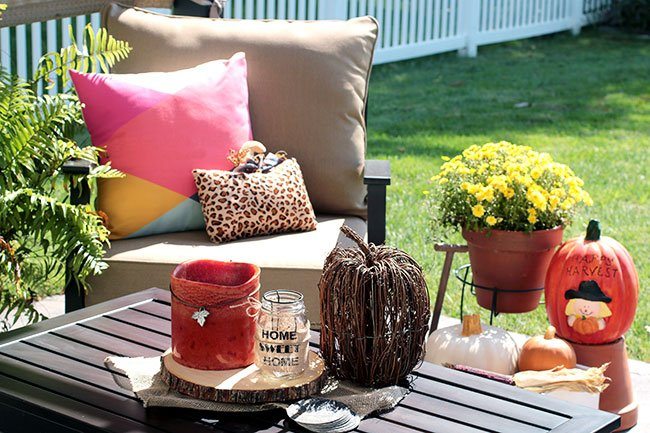
I will share more detail shots of the bench once I get the new seat cover and I ‘might’ change the pillows on it to something else. Now, let me get into the details on how we updated the front door and bench.
Painting the Front Door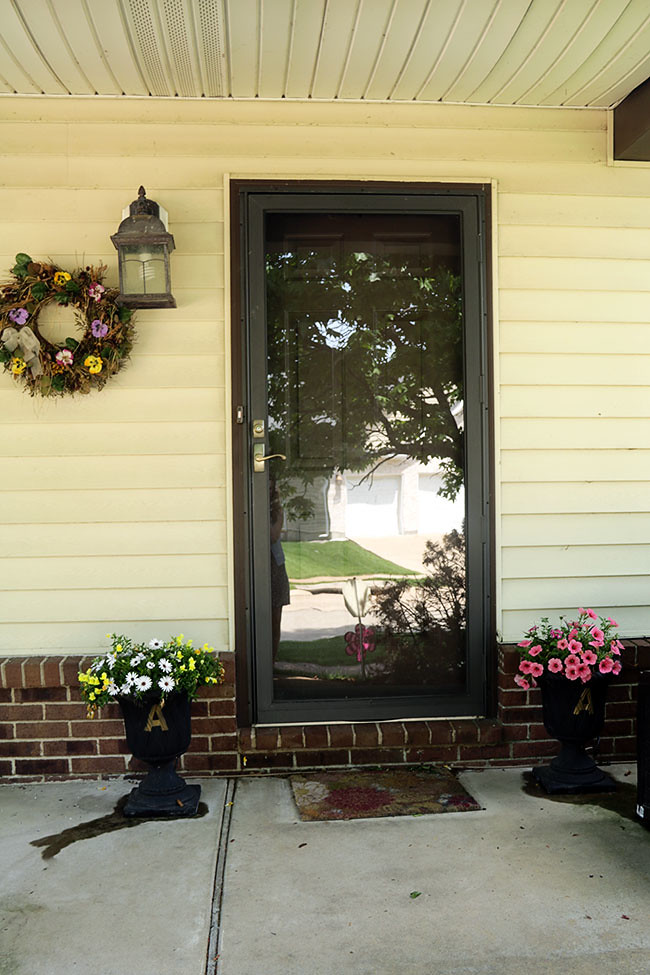
I have been wanting to paint the front door white for quite some time. The brown storm door over the brown door is just TOO dark.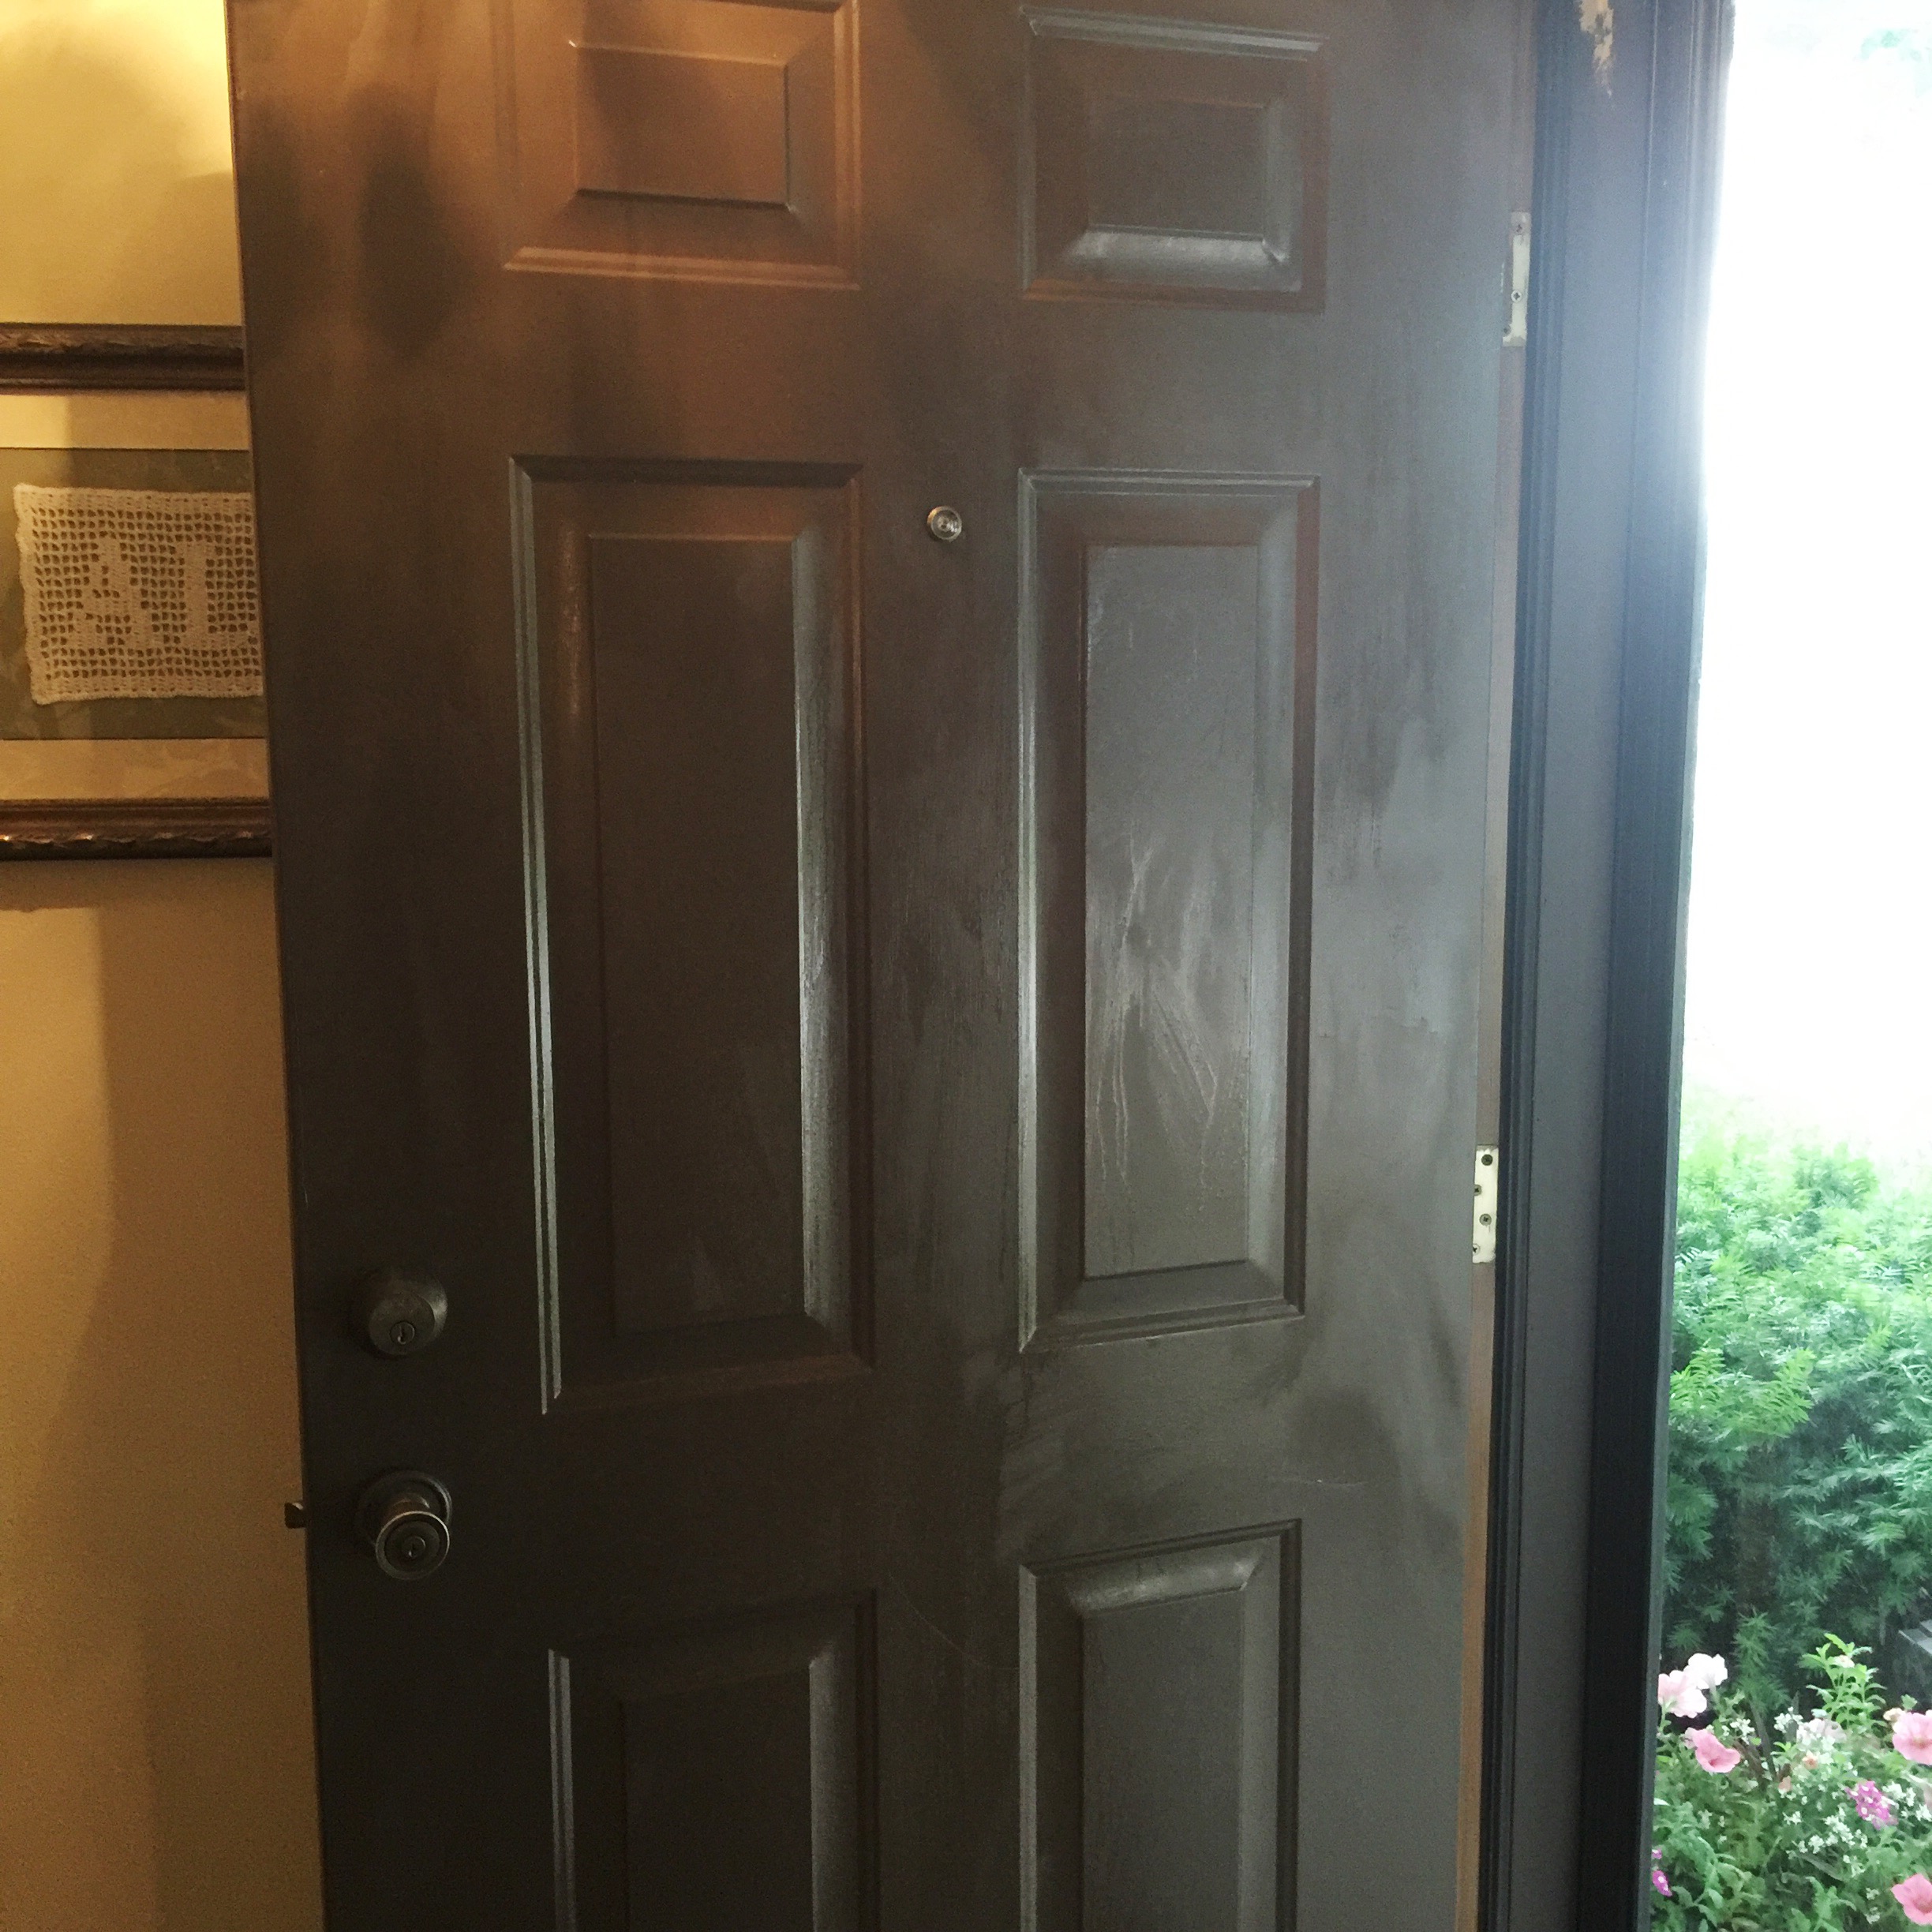
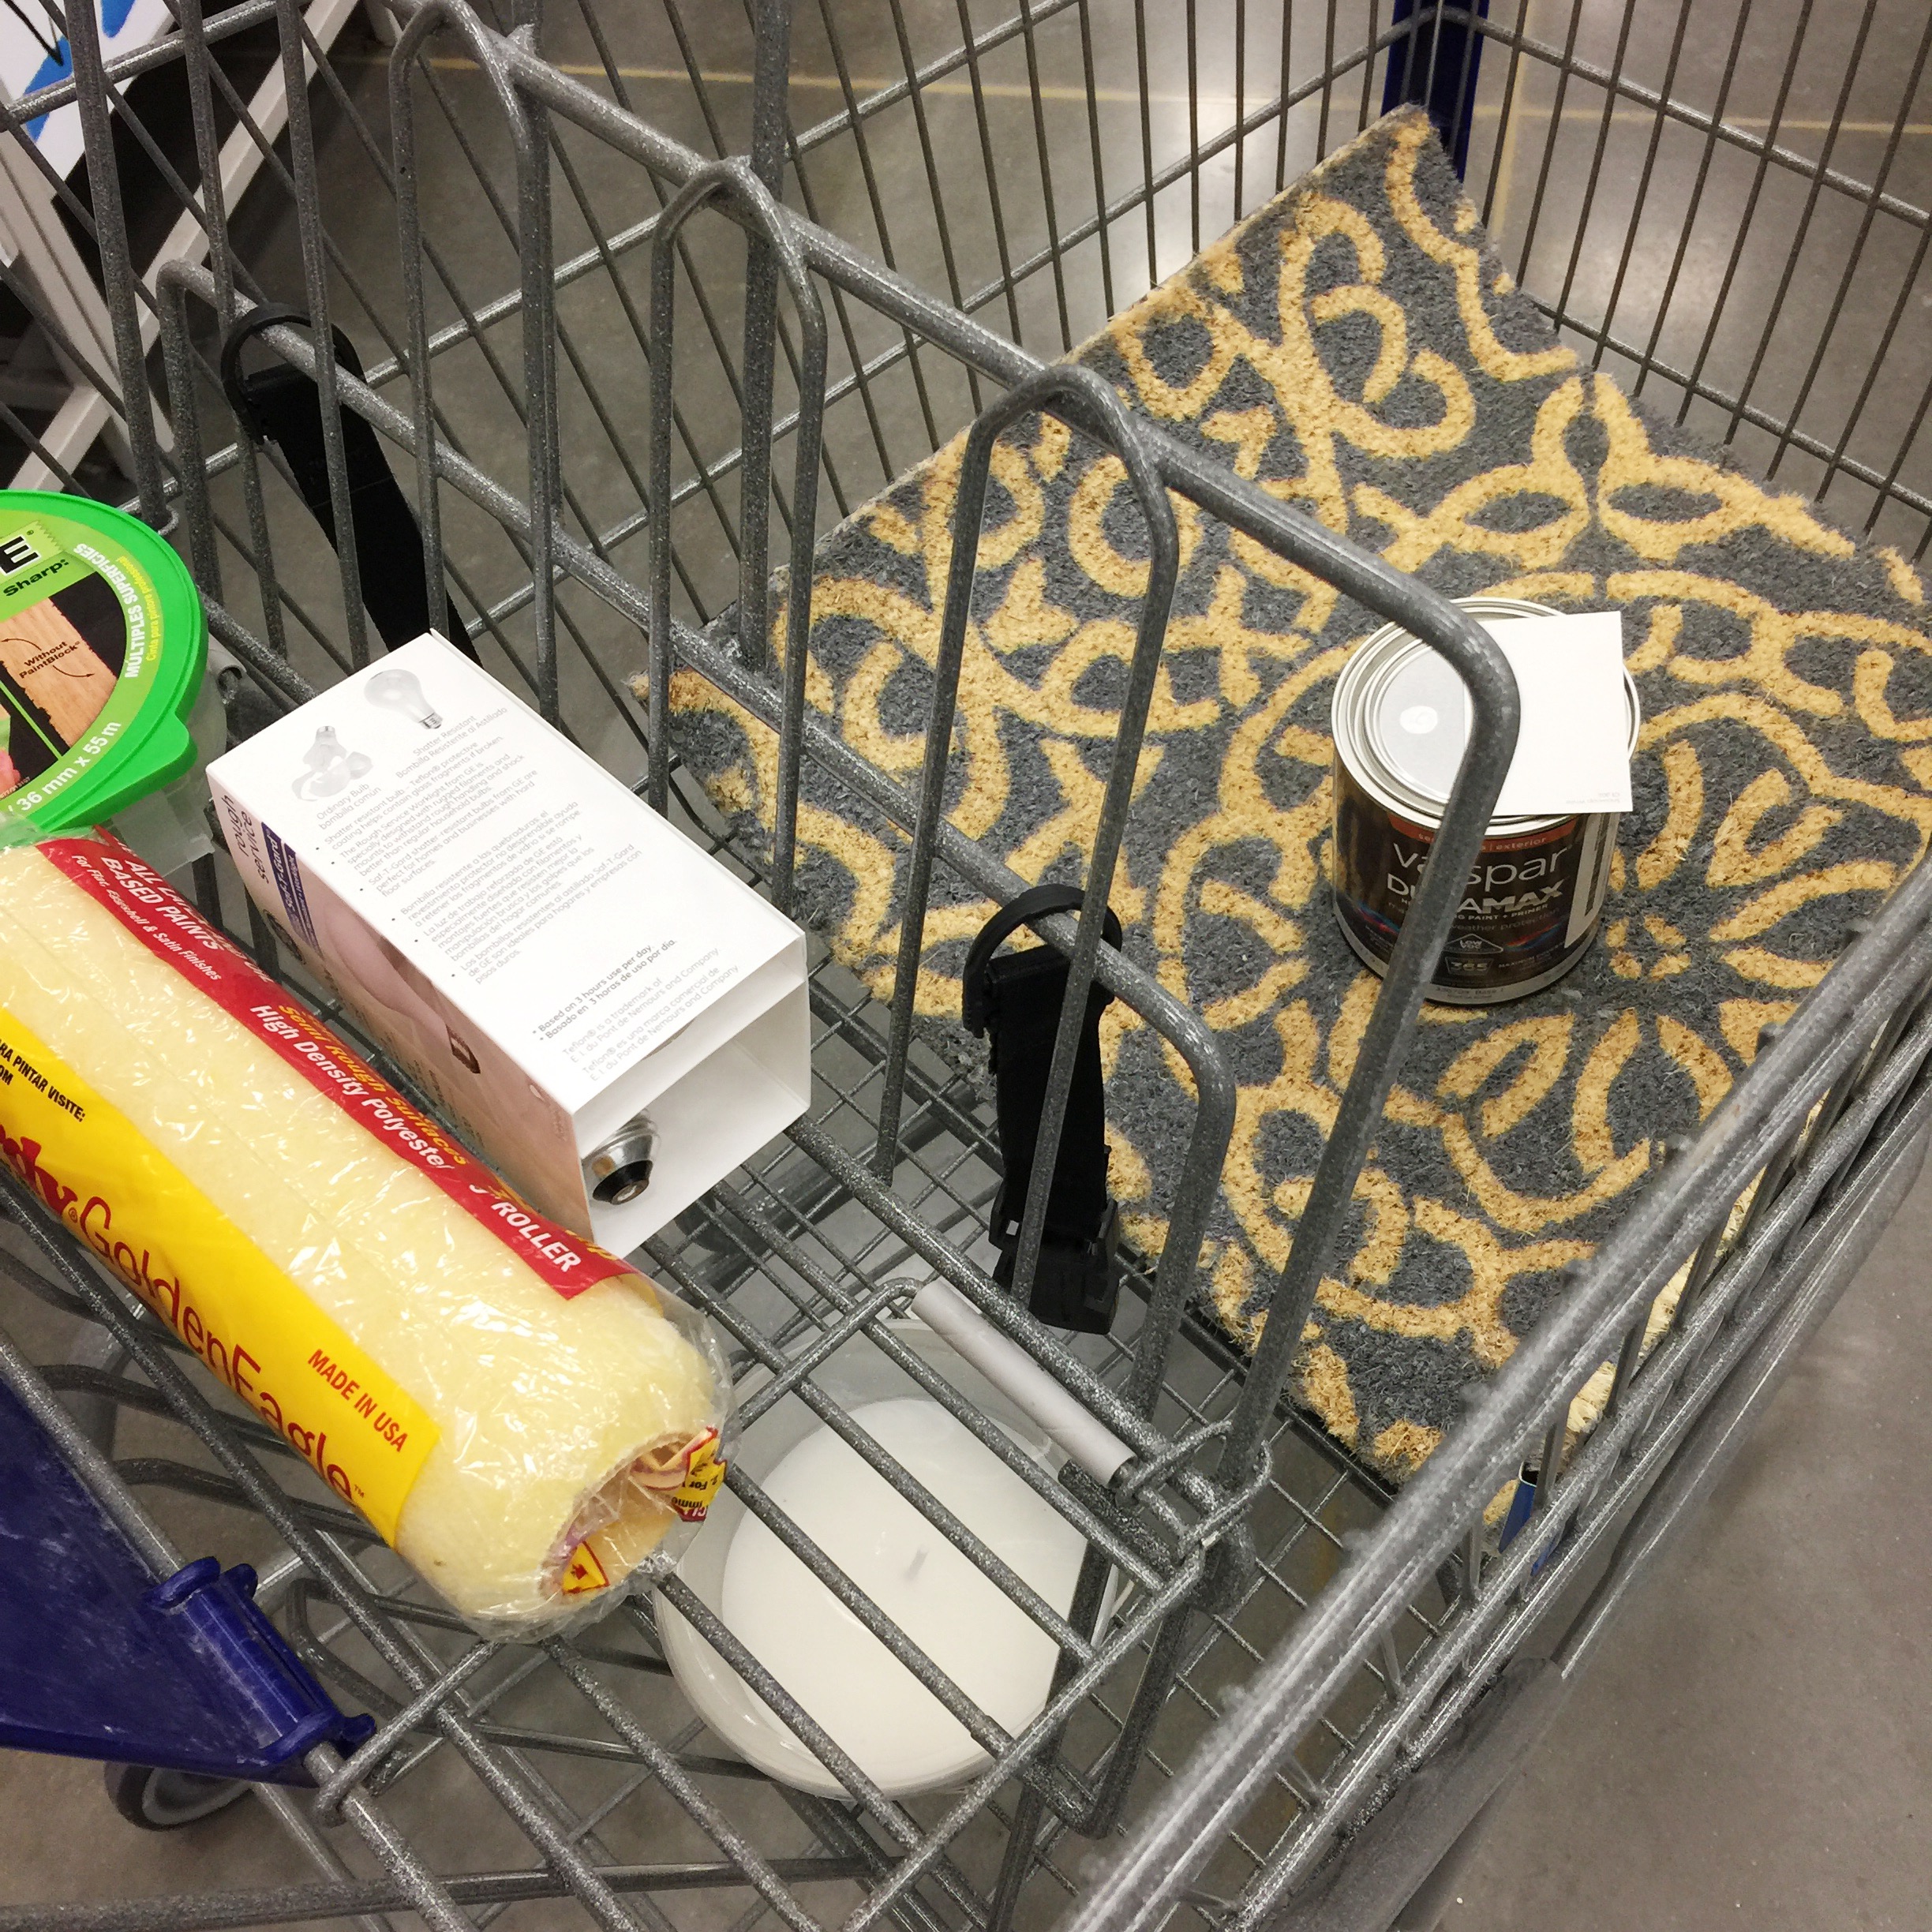
On Friday afternoon, I washed the door with a sponge and water. No soap. Then, my husband and I headed to Lowes on Friday night after dinner. I never, ever go to Lowes on a Saturday morning to get things I need for a paint project. It is always SO crowded in the paint department on Saturday mornings, because everyone else is starting a project, too! Take my advice and go on Friday evening, you’ll only have 1-2 people in front of you. Since Lowes has some home decor items, I picked up a new door mat while there, too! And a 100 watt bulb for the outdoor wall light that we are receiving from Lamps Plus later this week.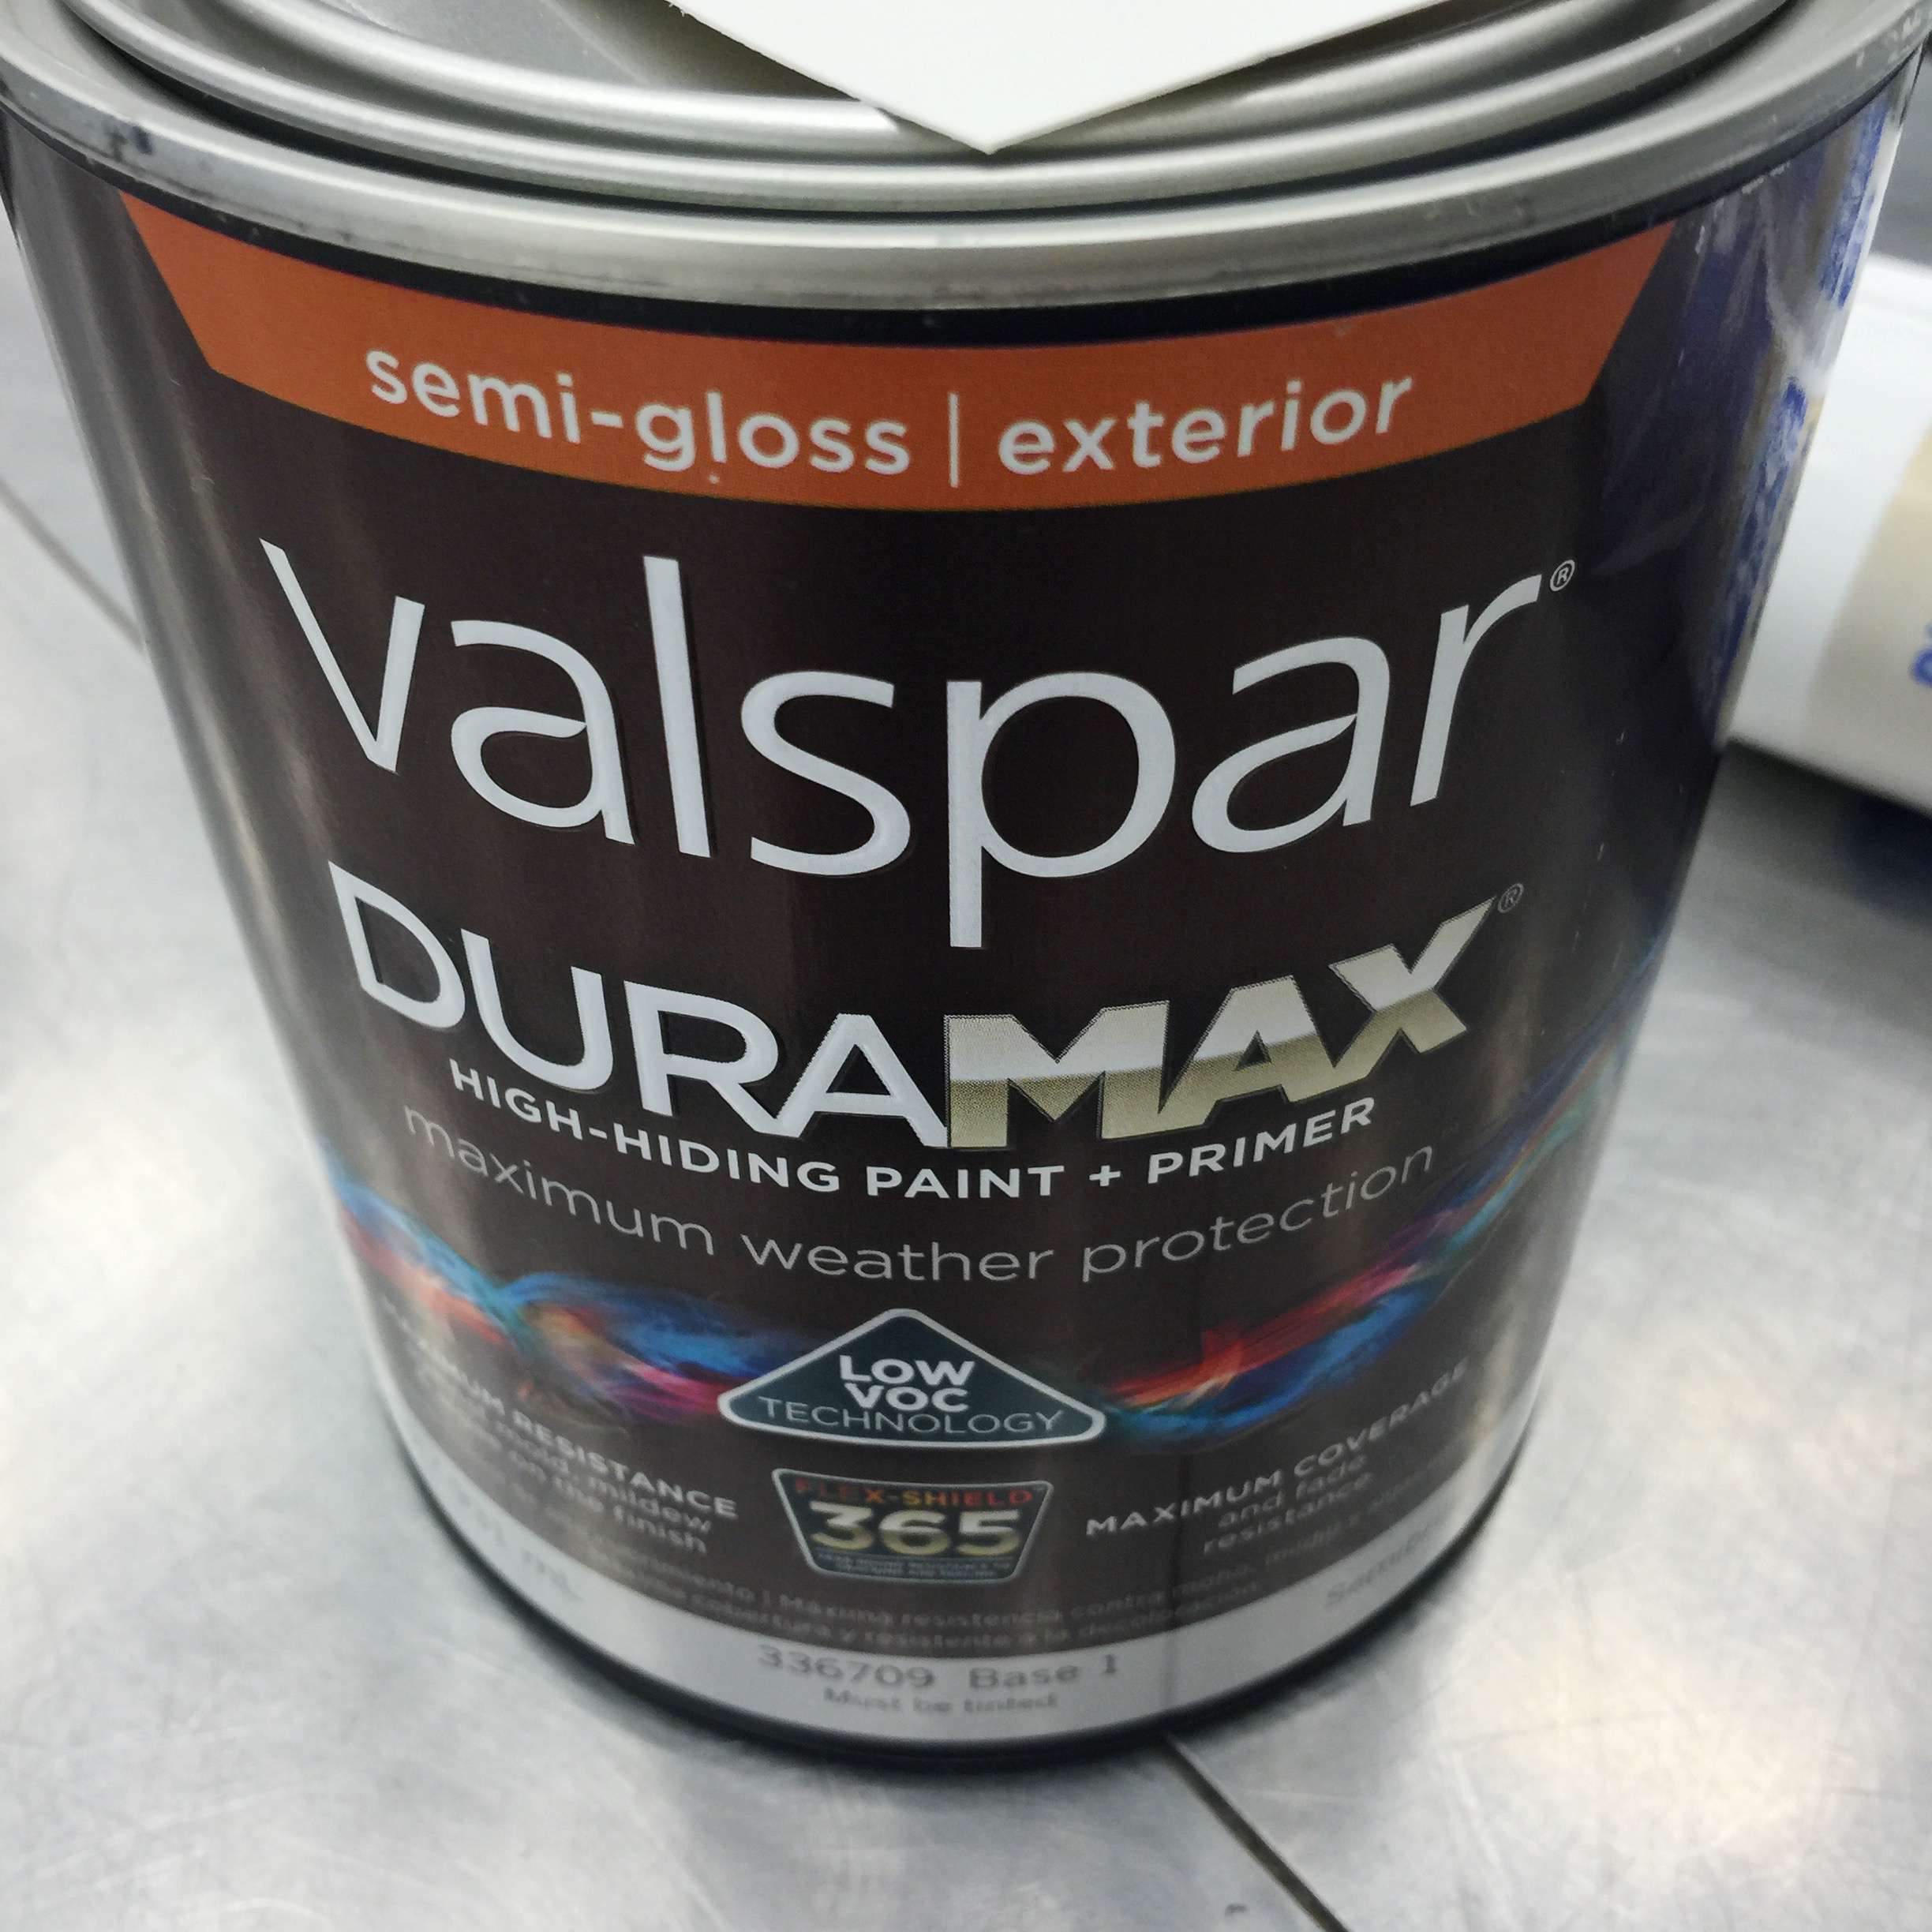
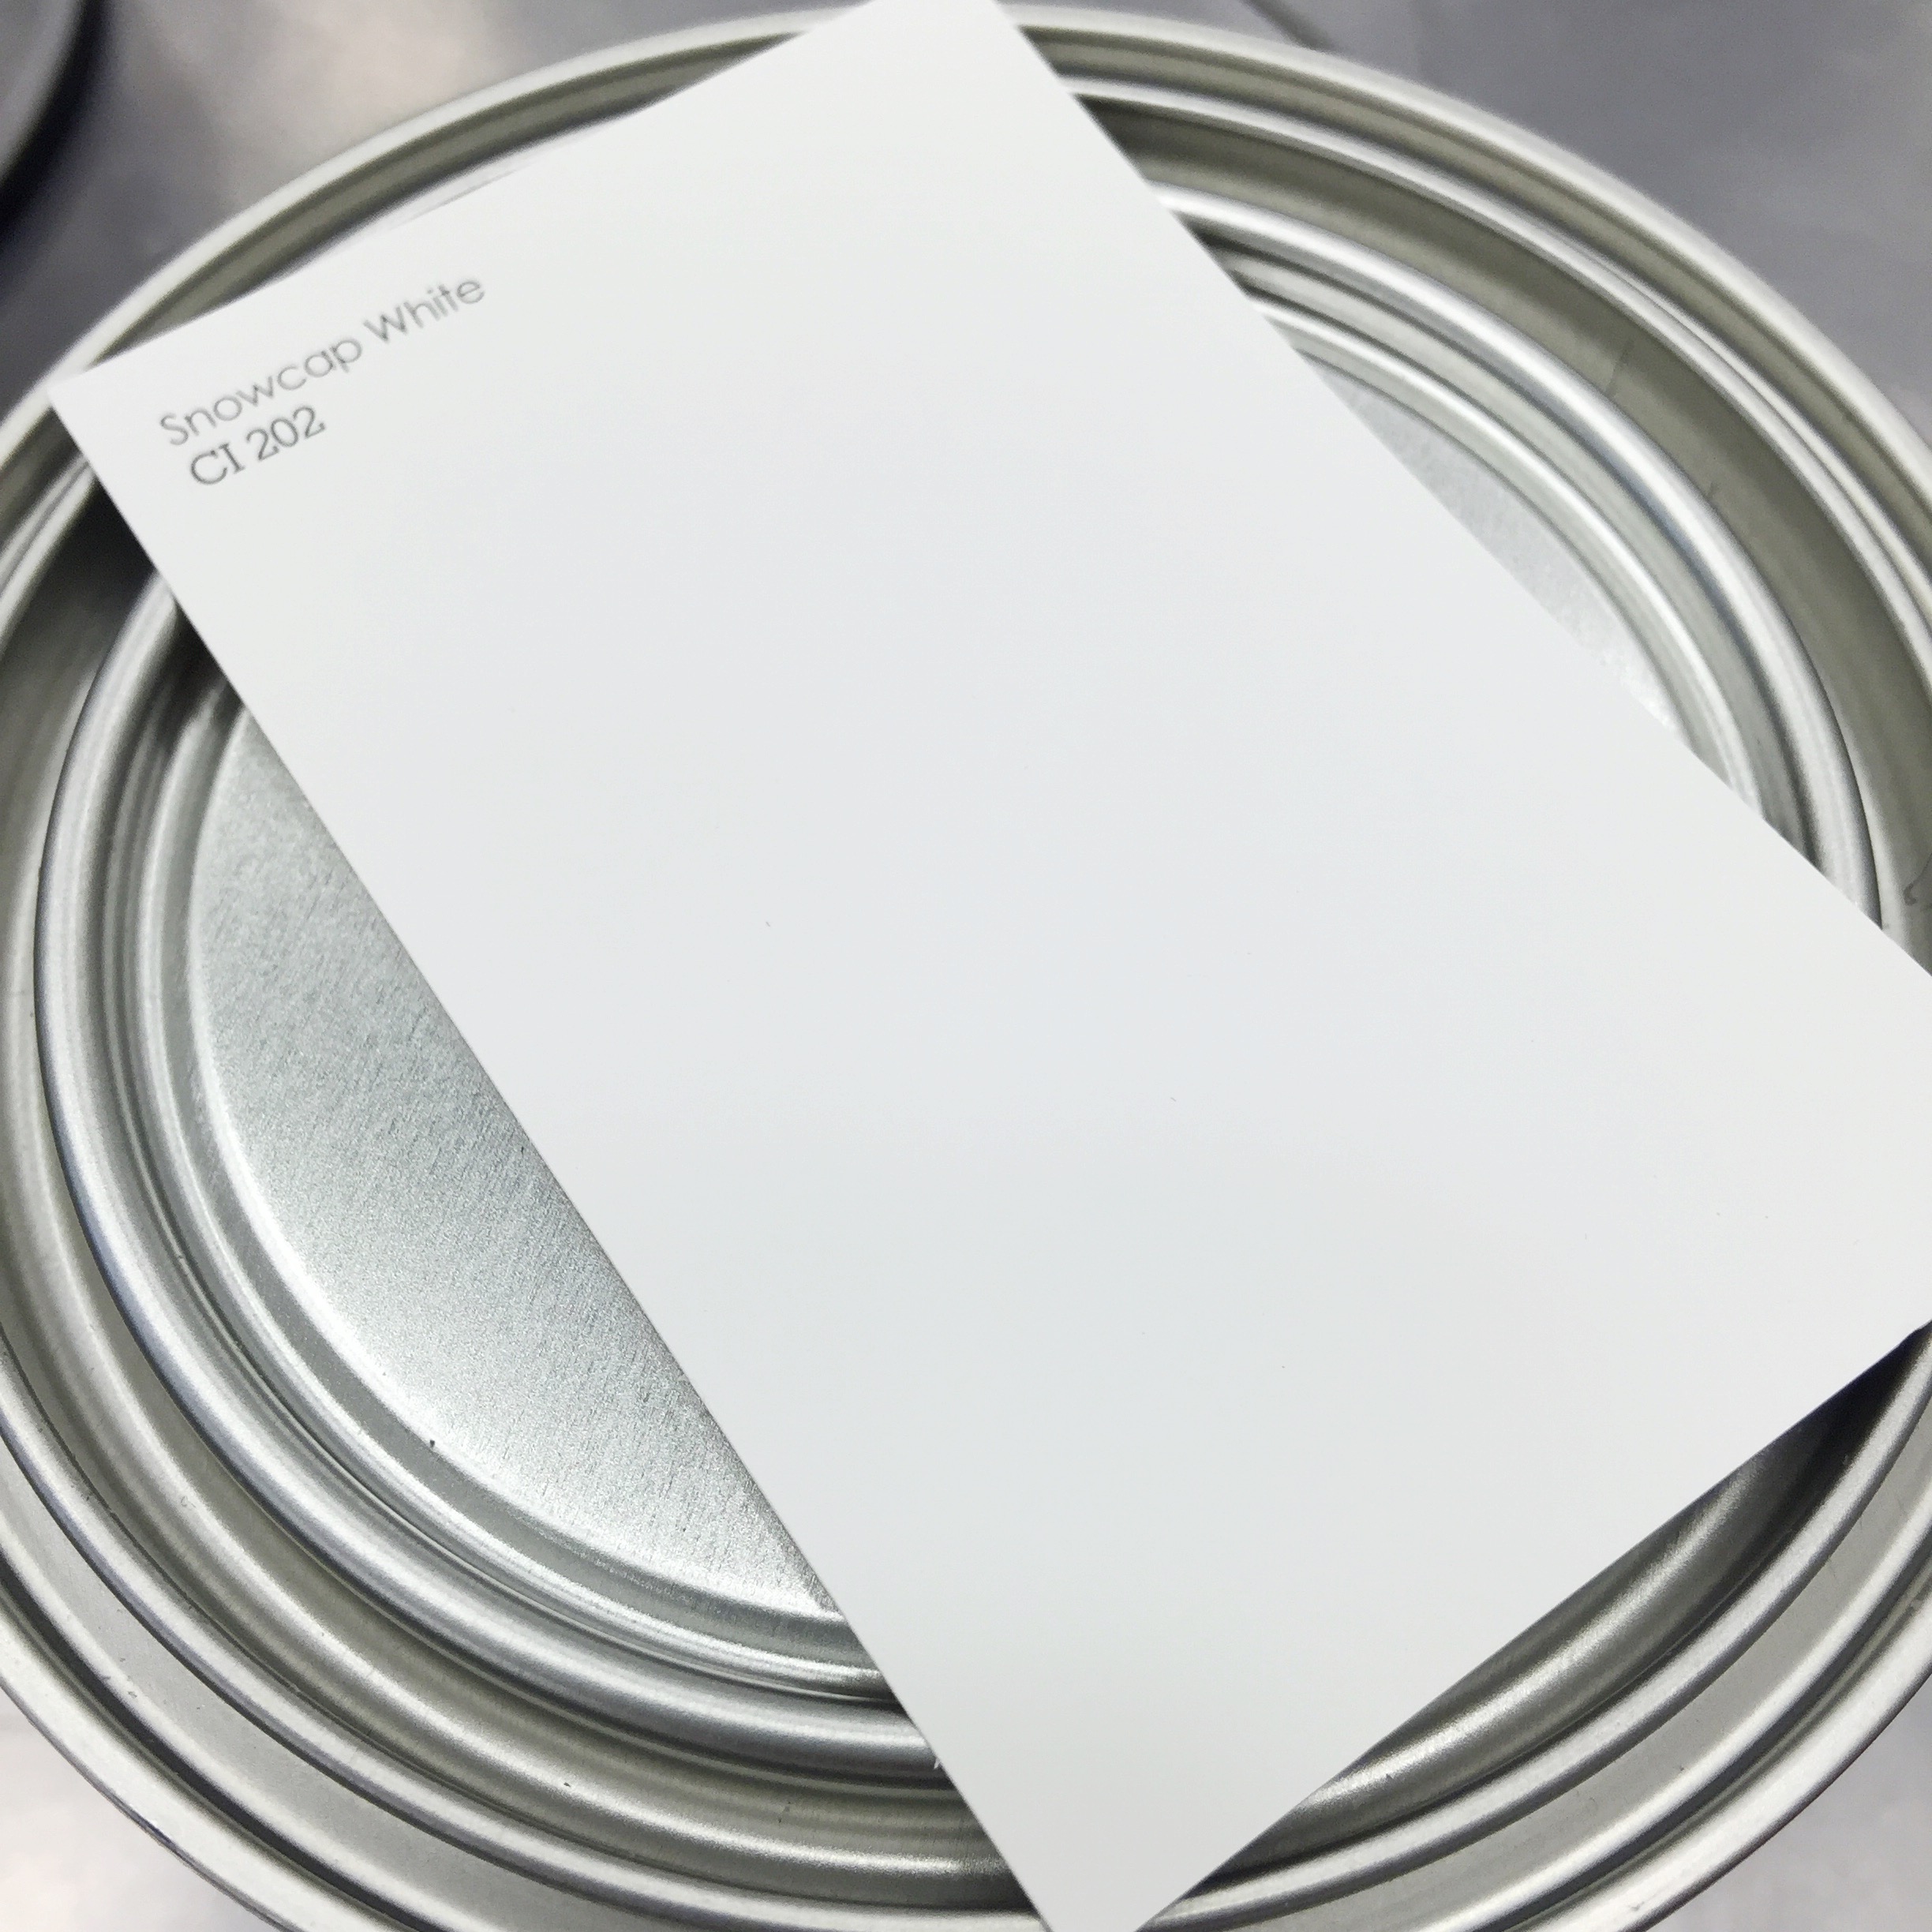
At Lowes, I purchased their Valspar semi-gloss EXTERIOR paint and the color I selected for our door was Snowcap White.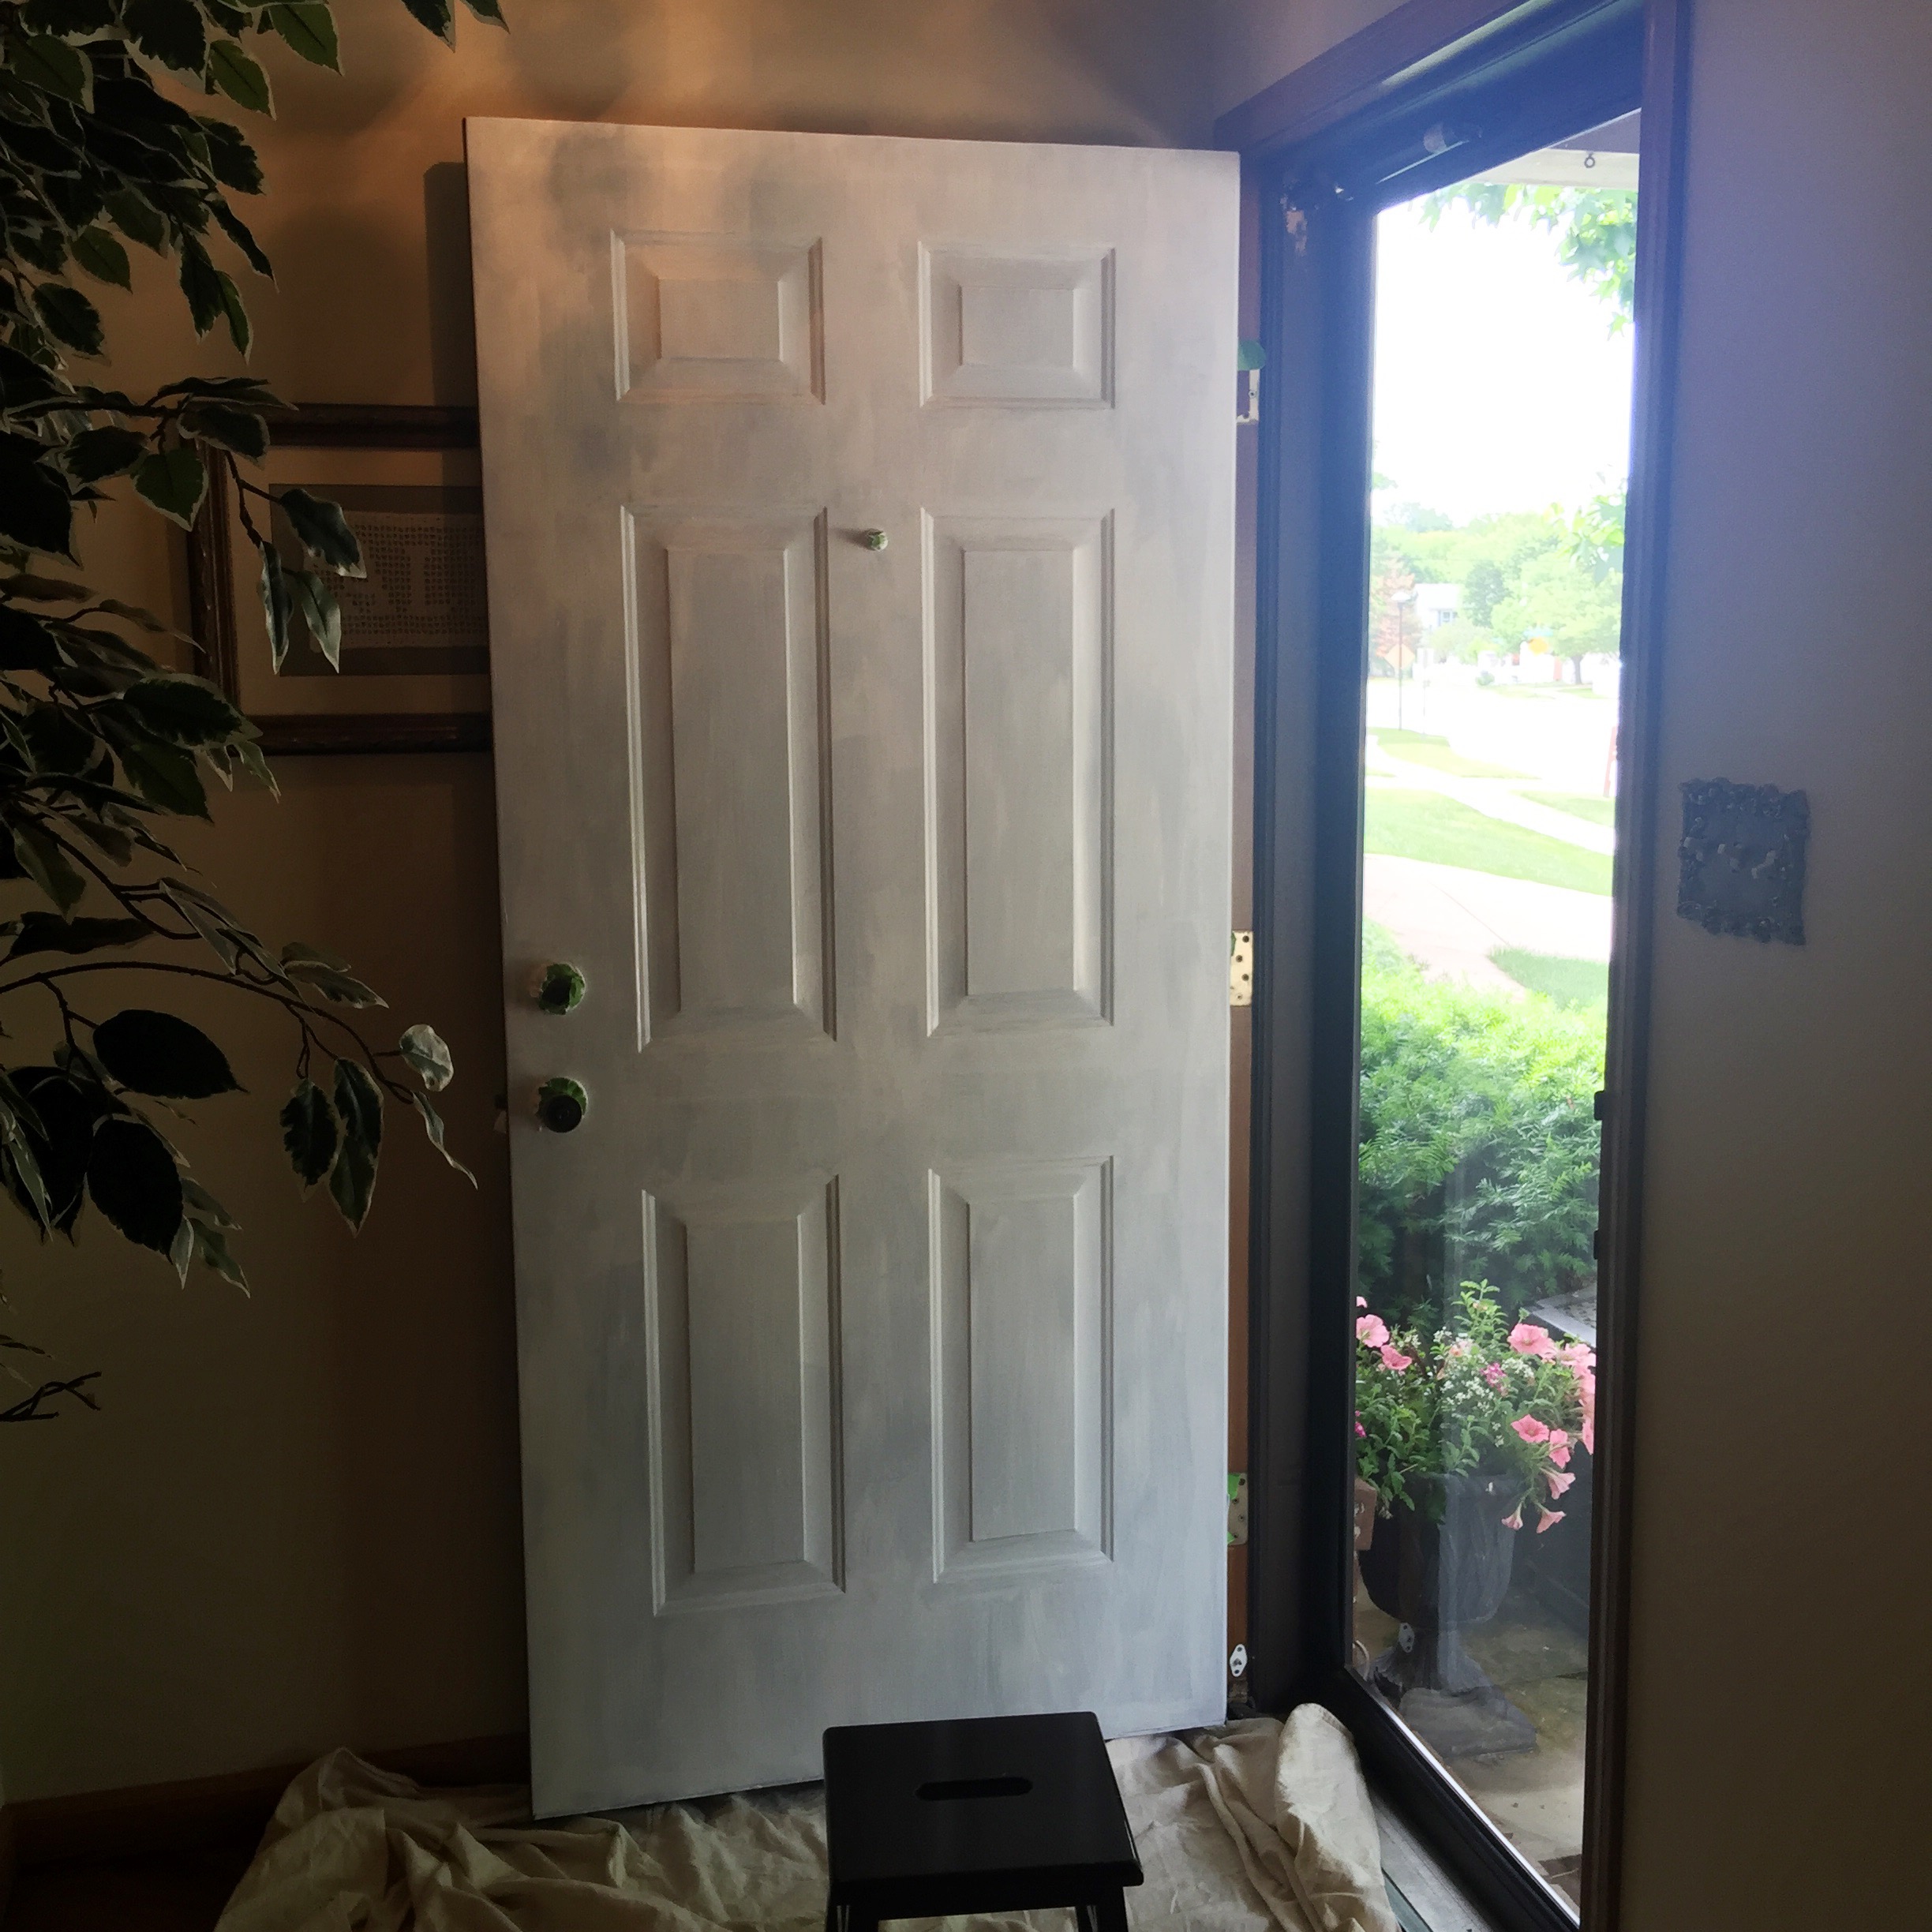
I did two coats of primer (1 hour dry time between each coat) and two coats of the white paint (4 hours dry time between each coat).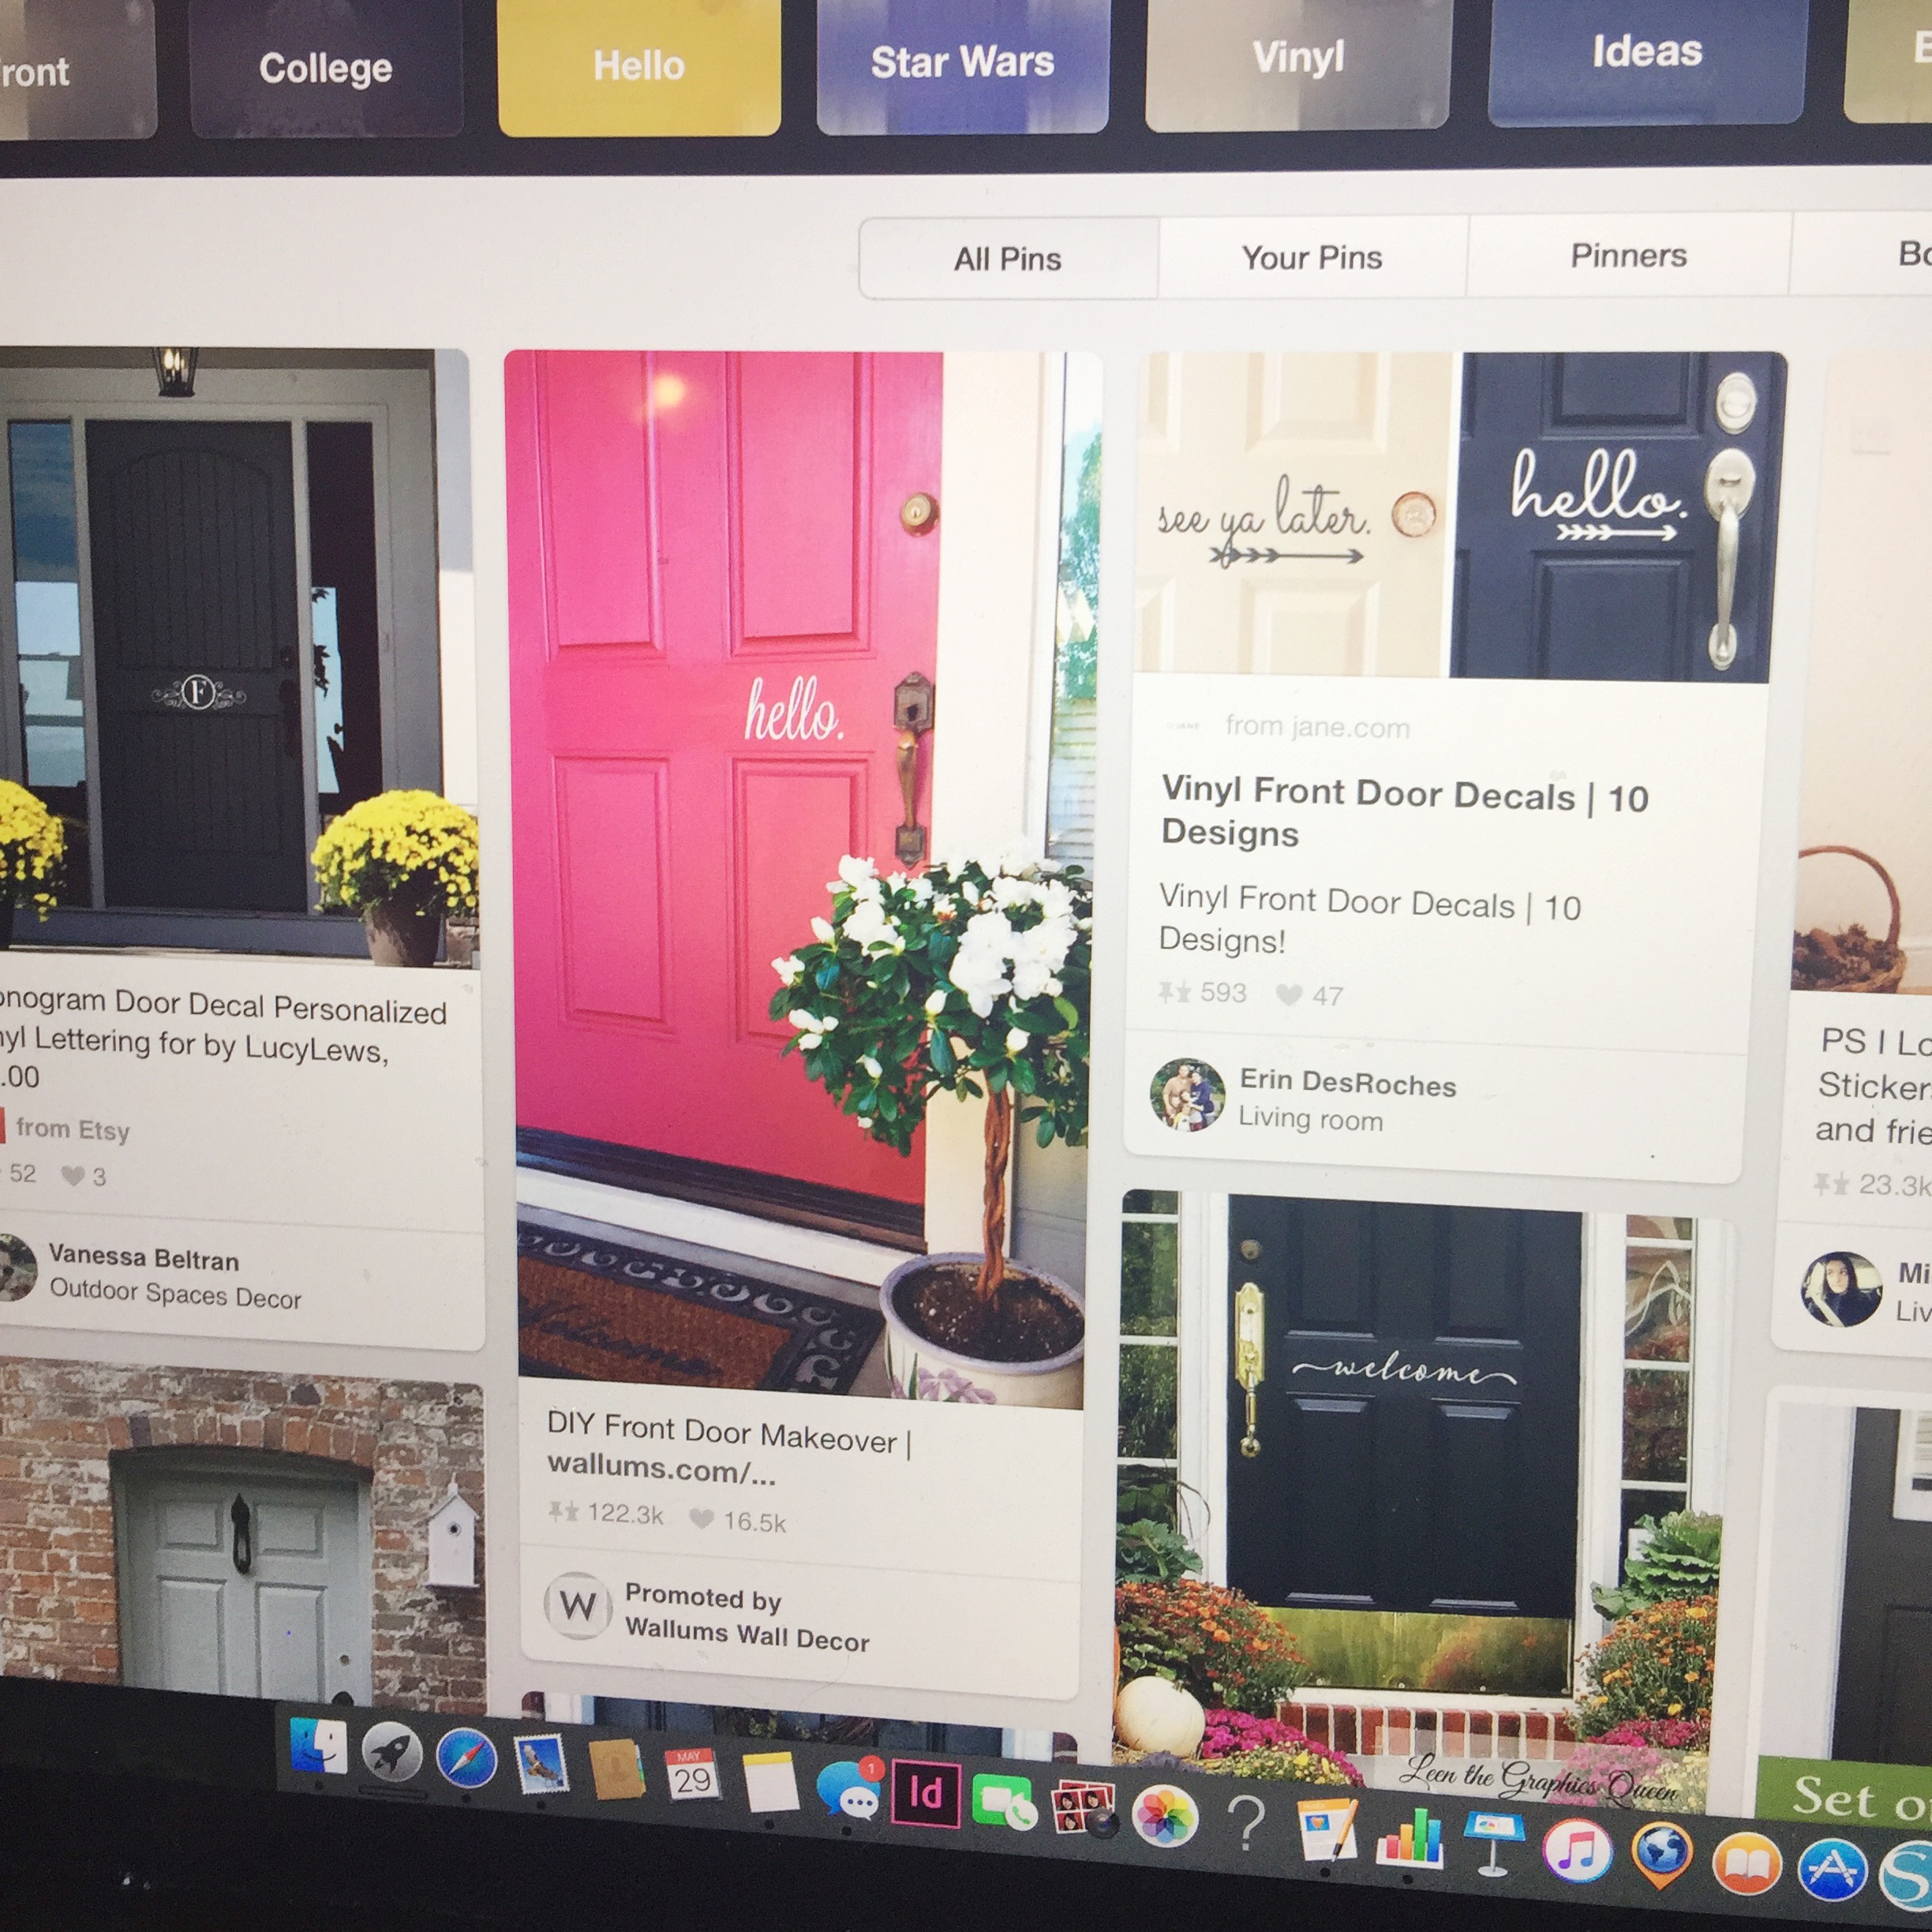
After I painted our door, I knew I wanted to add one of these cute decals on my door. I have gold vinyl and Silhouette machine, so I knew I could whip one up myself.
Adding a Decal to Our Door
If you don’t have a Silhouette machine, the easiest way to get a vinyl door decal is to buy one from off of Etsy for around $10-15. I have been using my Silhouette machine for over a year now, so I knew I could whip up my own in 15 minutes.
I used Pro World’s FDC Ultra High Gloss Sign Vinyl in the Gold color.

I measured my door to figure out what size to make the vinyl decal. I then set it to ‘cut edge’, vinyl and my blade was at 3.
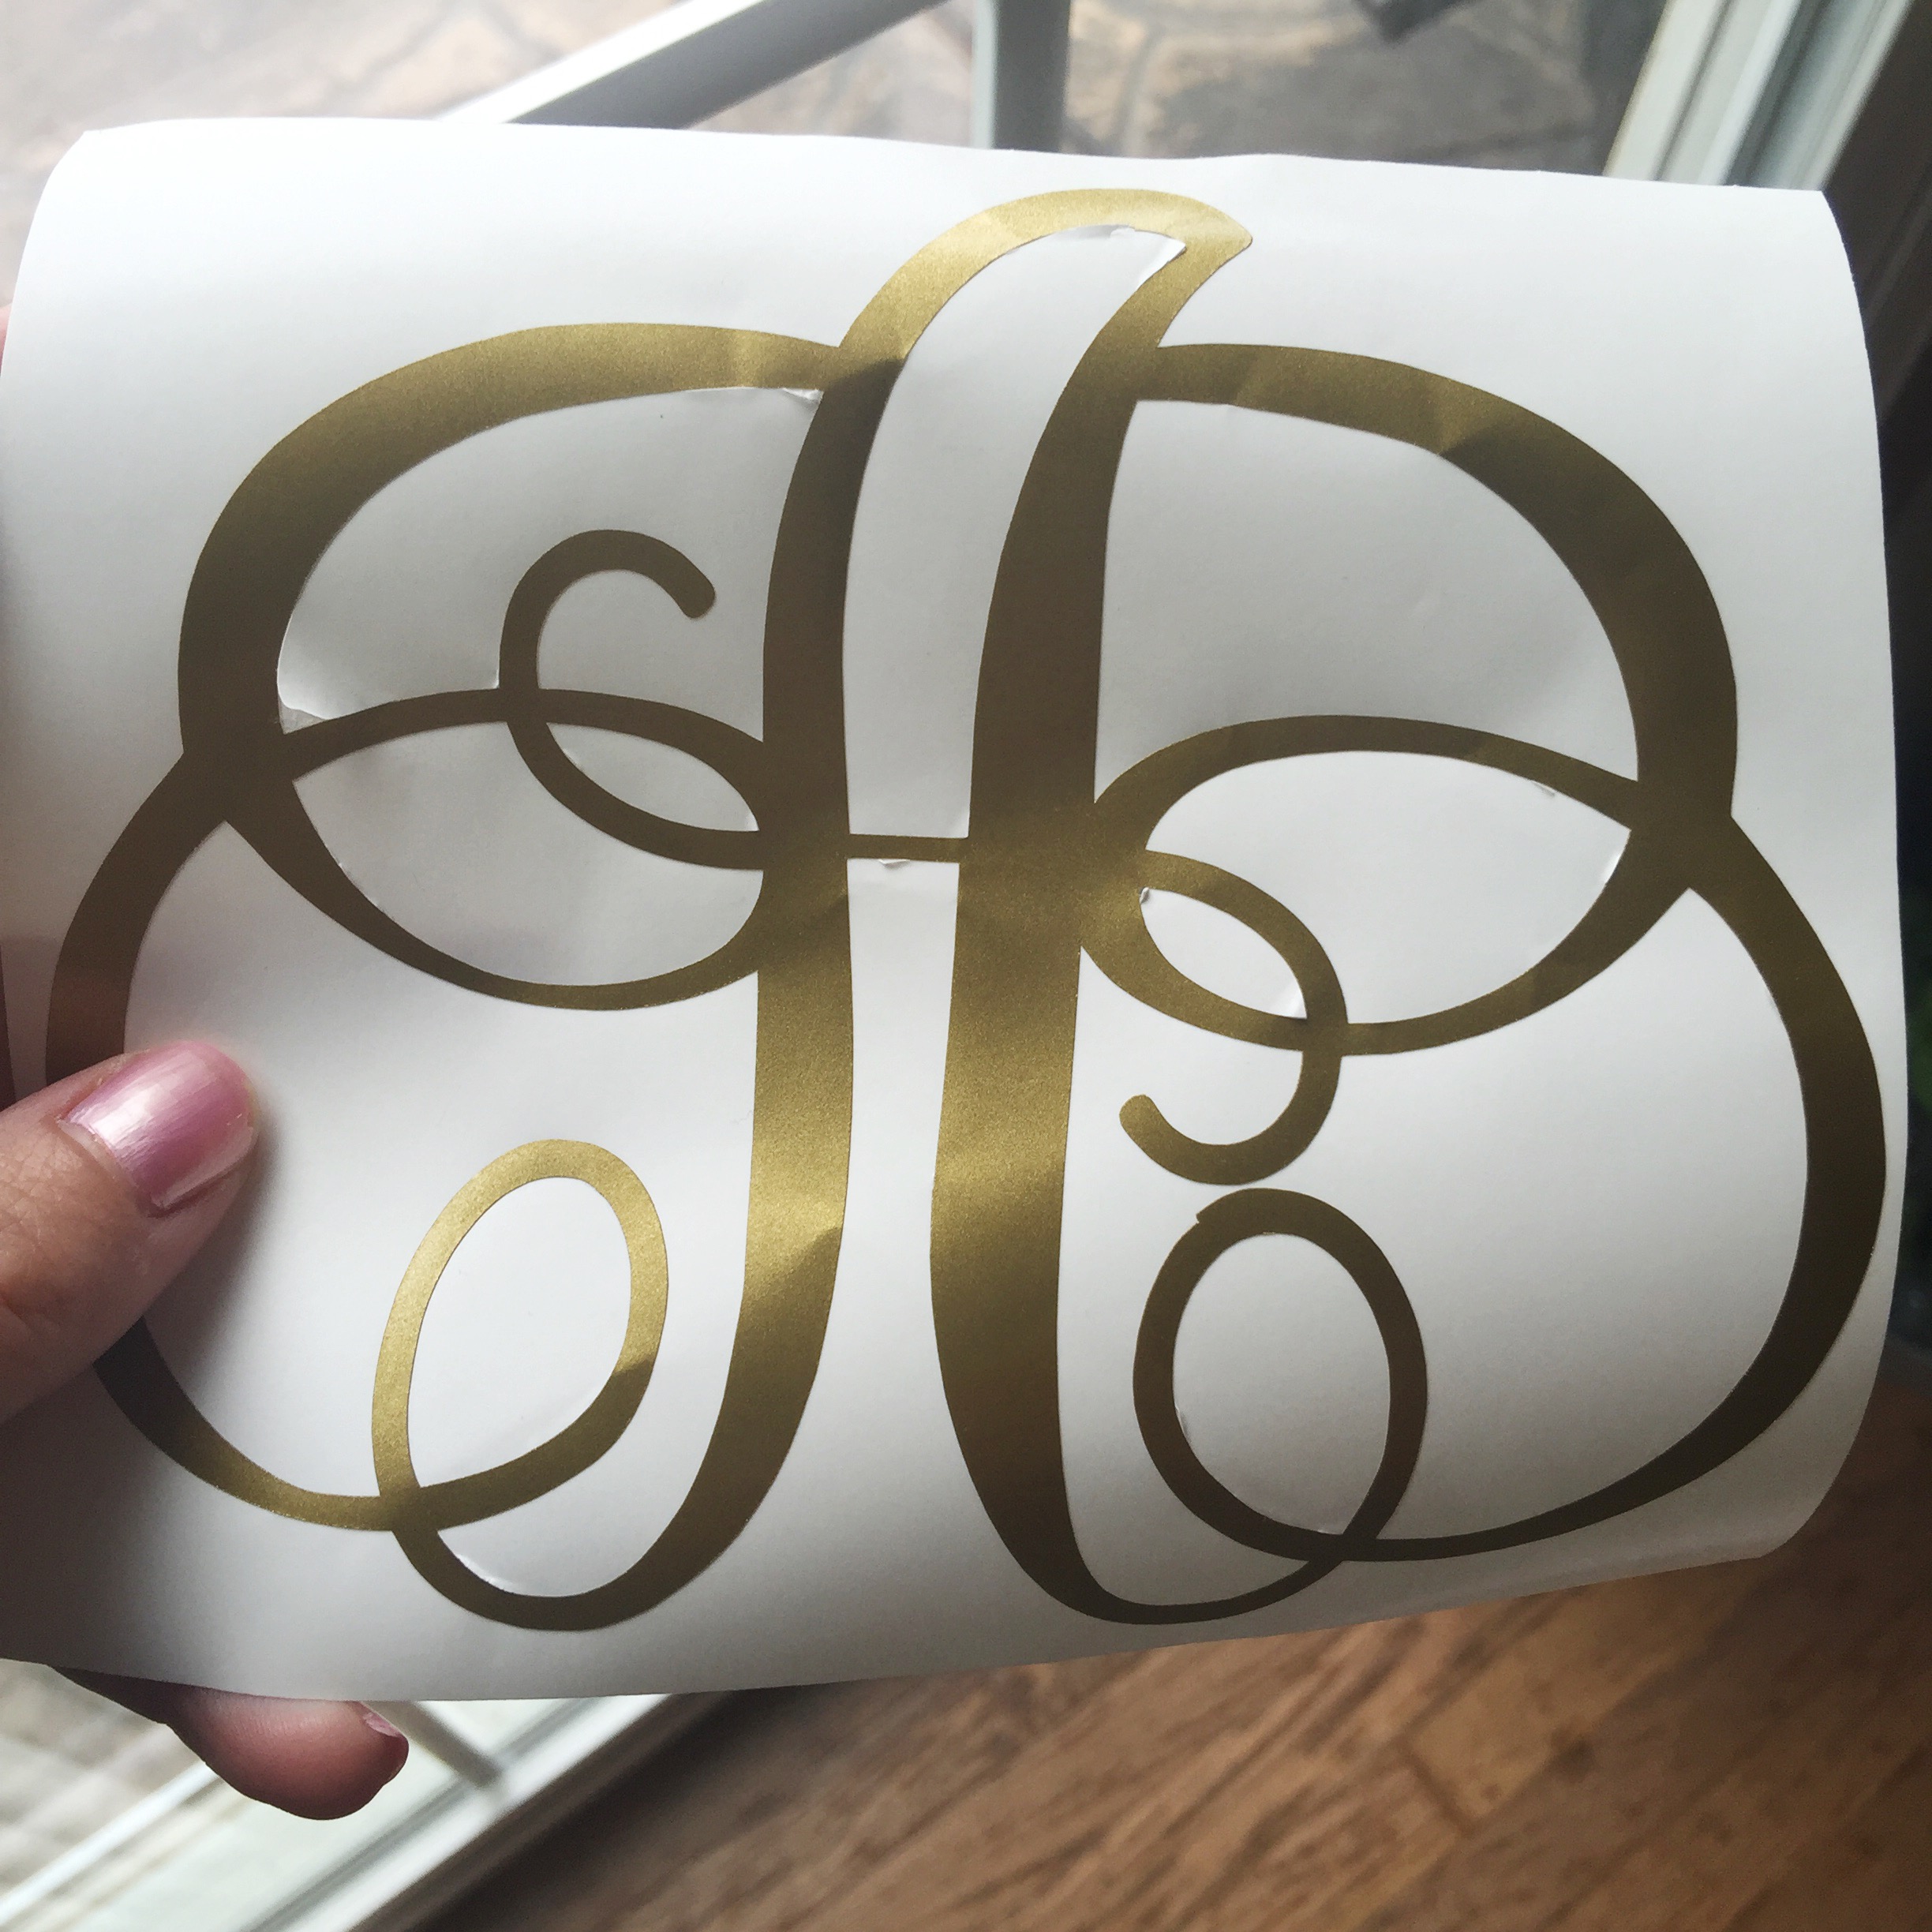
After the vinyl prints, remove the vinyl in all of the negative areas. Then, take your transfer paper and peel off the white solid side to reveal the sticky side of the transfer paper. Place your vinyl design (vinyl side onto sticky side of transfer paper) onto the transfer paper and smooth it out. Pull the white paper that the vinyl was on off of the transfer paper. You’ll see that your vinyl design is now on the transfer paper!
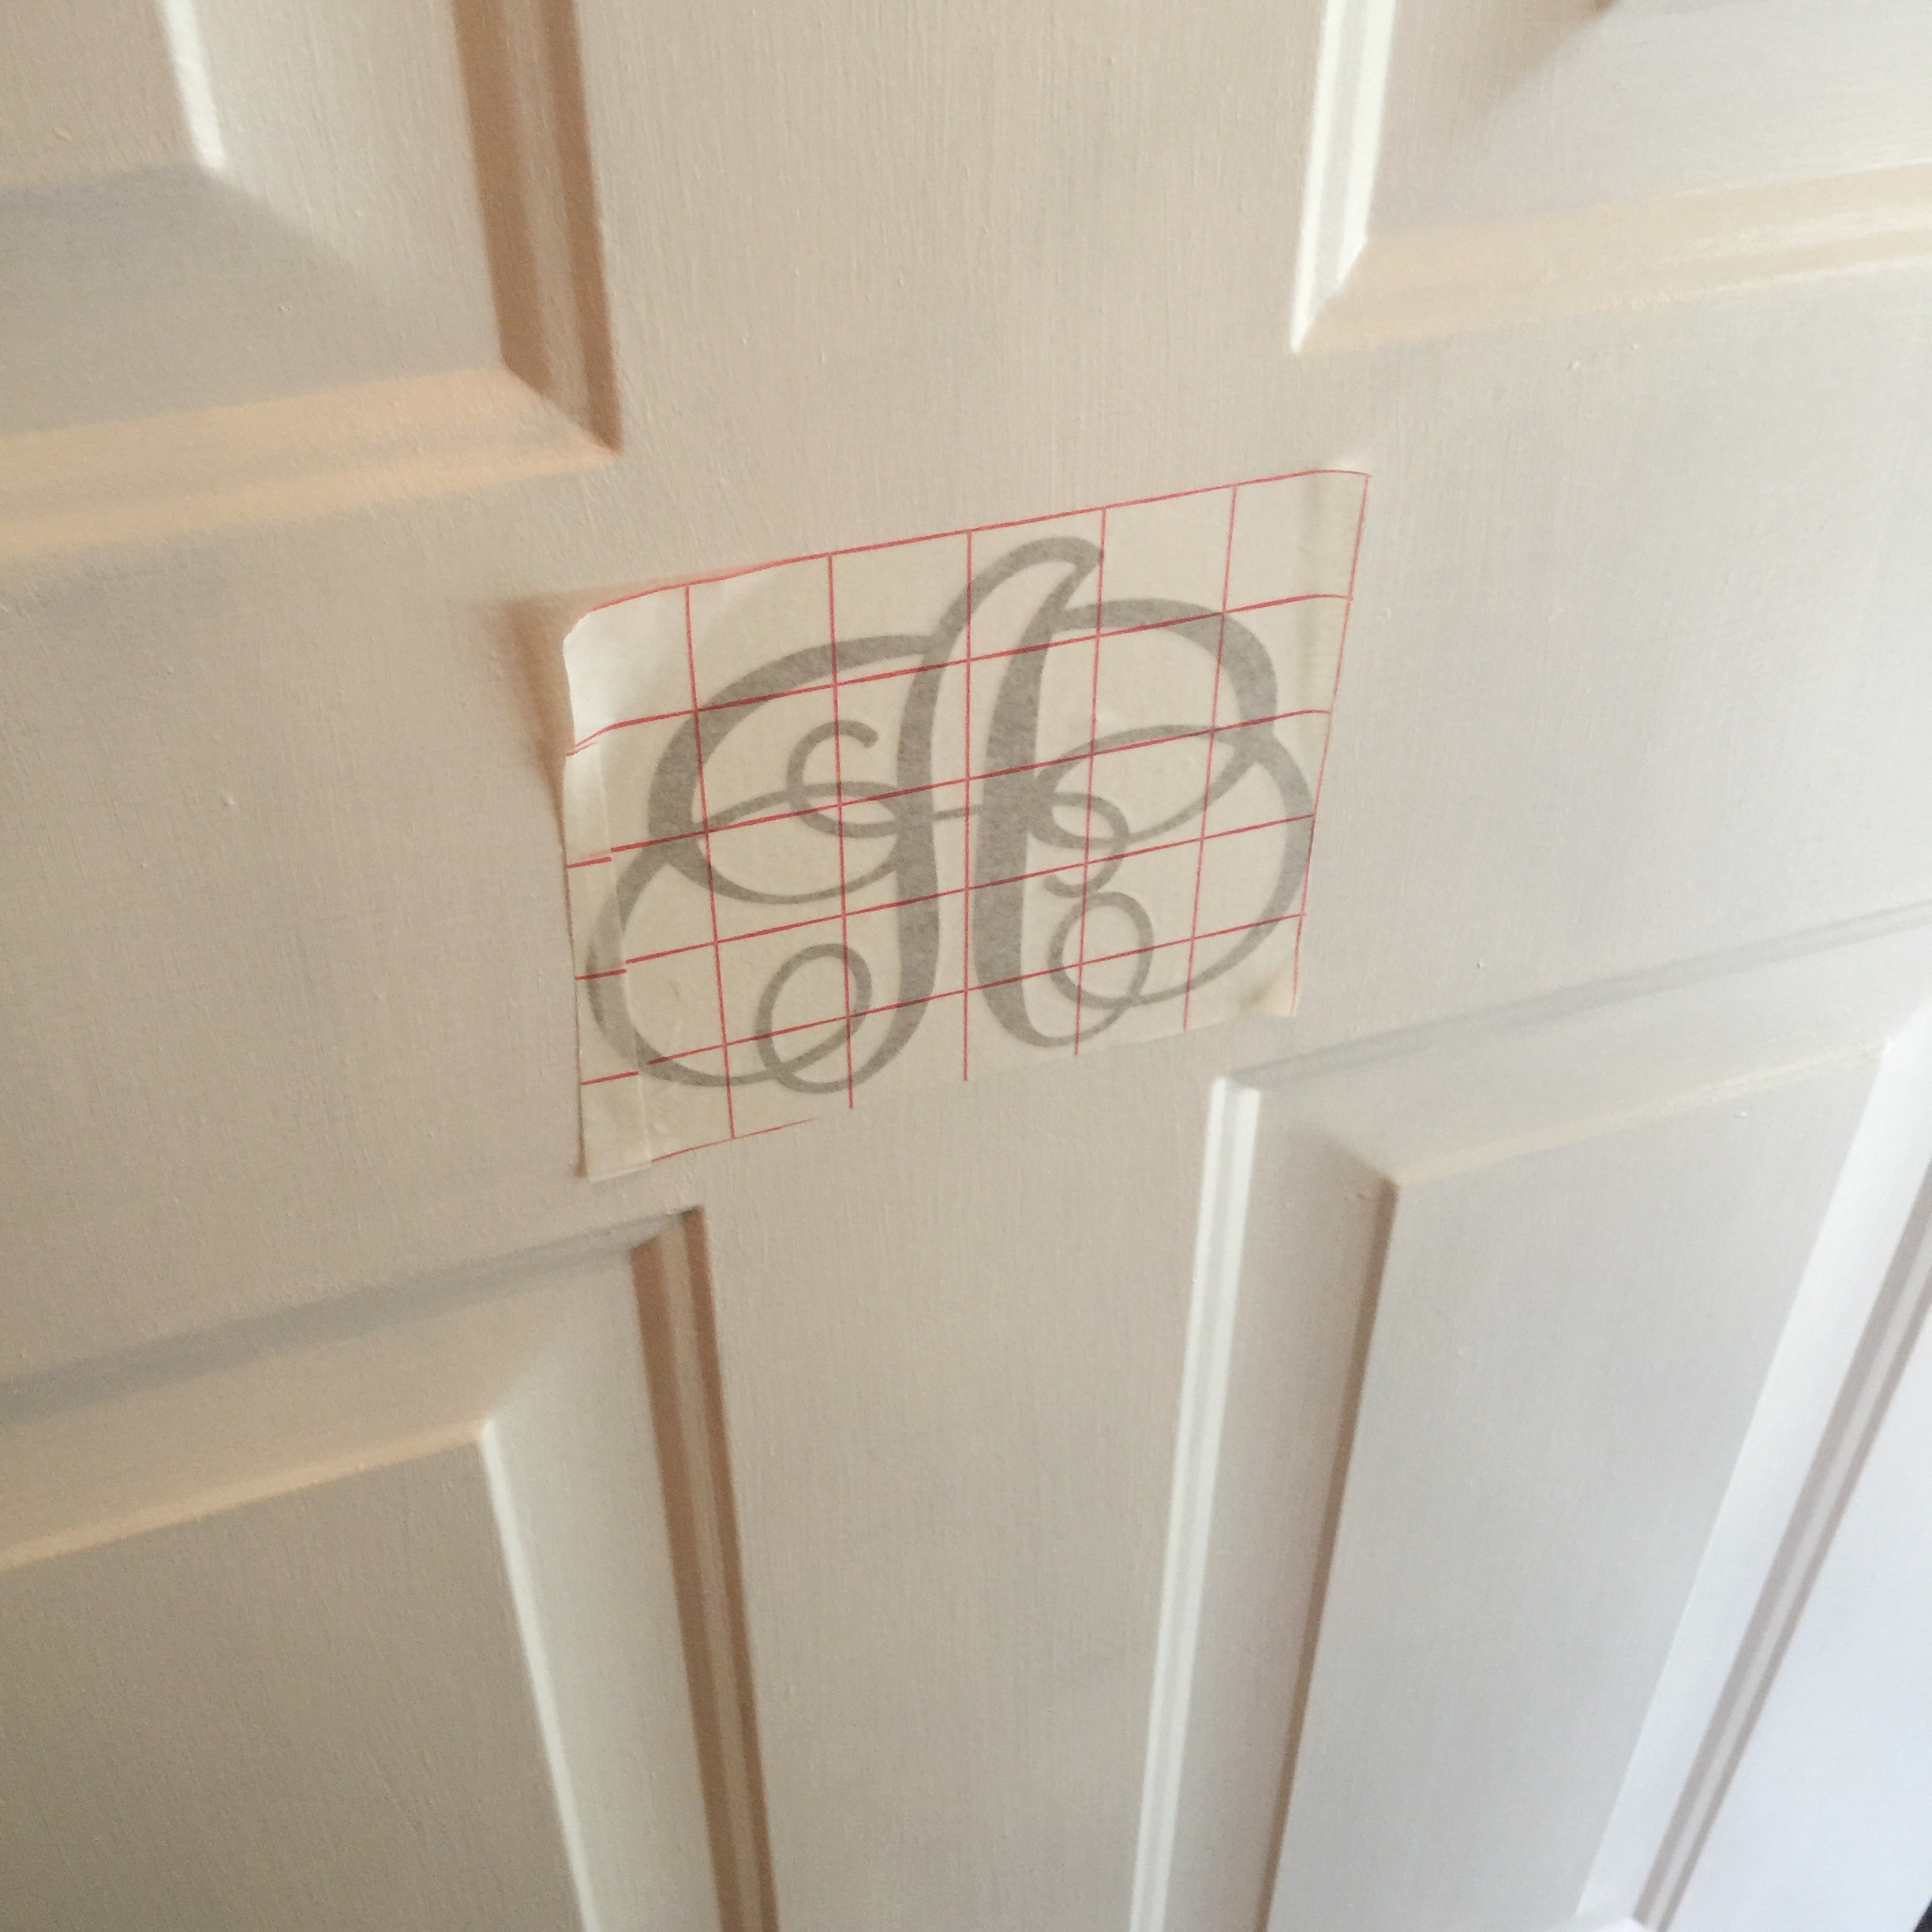
Now, stick your transfer paper with vinyl side down onto your door EXACTLY where you want it. I had my husband line up a leveler on the bottom of it to make sure it was level and he also measured it on both sides with a tape measure. You want it to be PERFECT, if you mess up you’ll have a hard time removing this from your door to correct it. I know, no pressure, right? 😉 Once you have it lined up, smooth it out over your door and peel off the transfer paper and your vinyl will adhere to the door.
Staining the Bench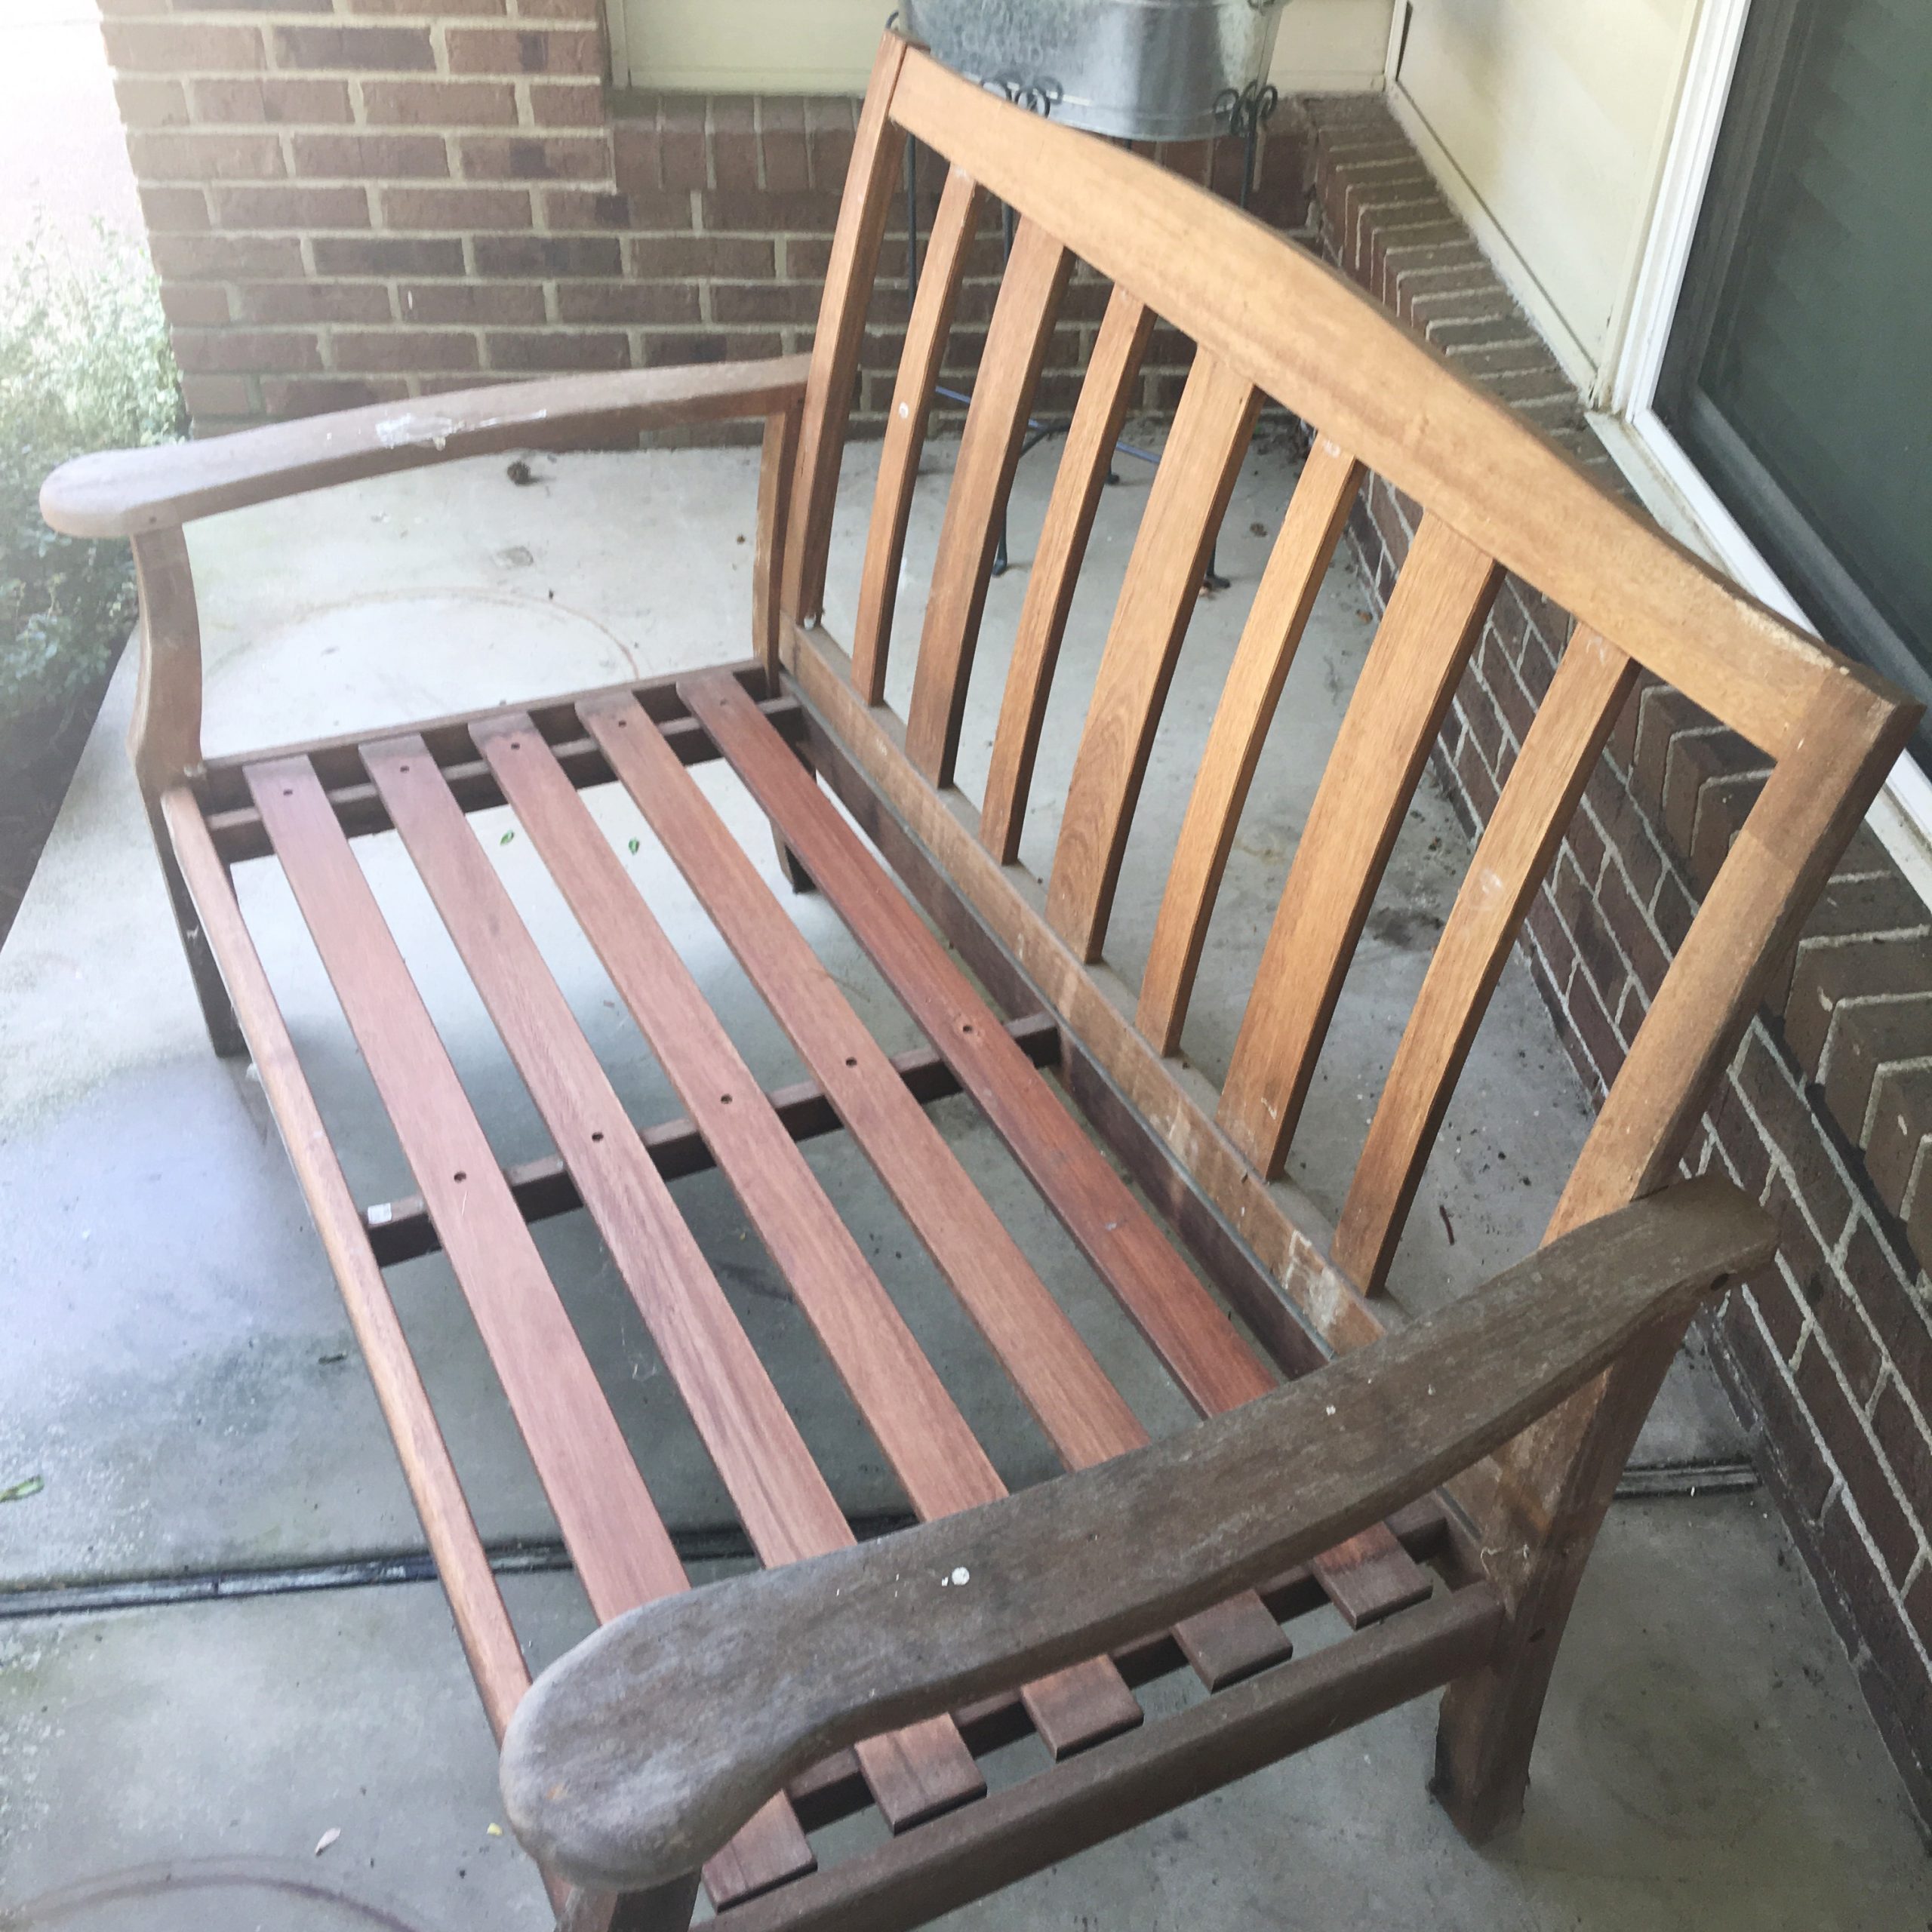
Here is a before photo of our bench that is 10 years old and purchased from Sears Home. I really love this bench on our front porch, but its starting to look its age. I decided to have Brian wash and stain it with some stain we already had around the house. It didn’t take him long and the bench looks so much better.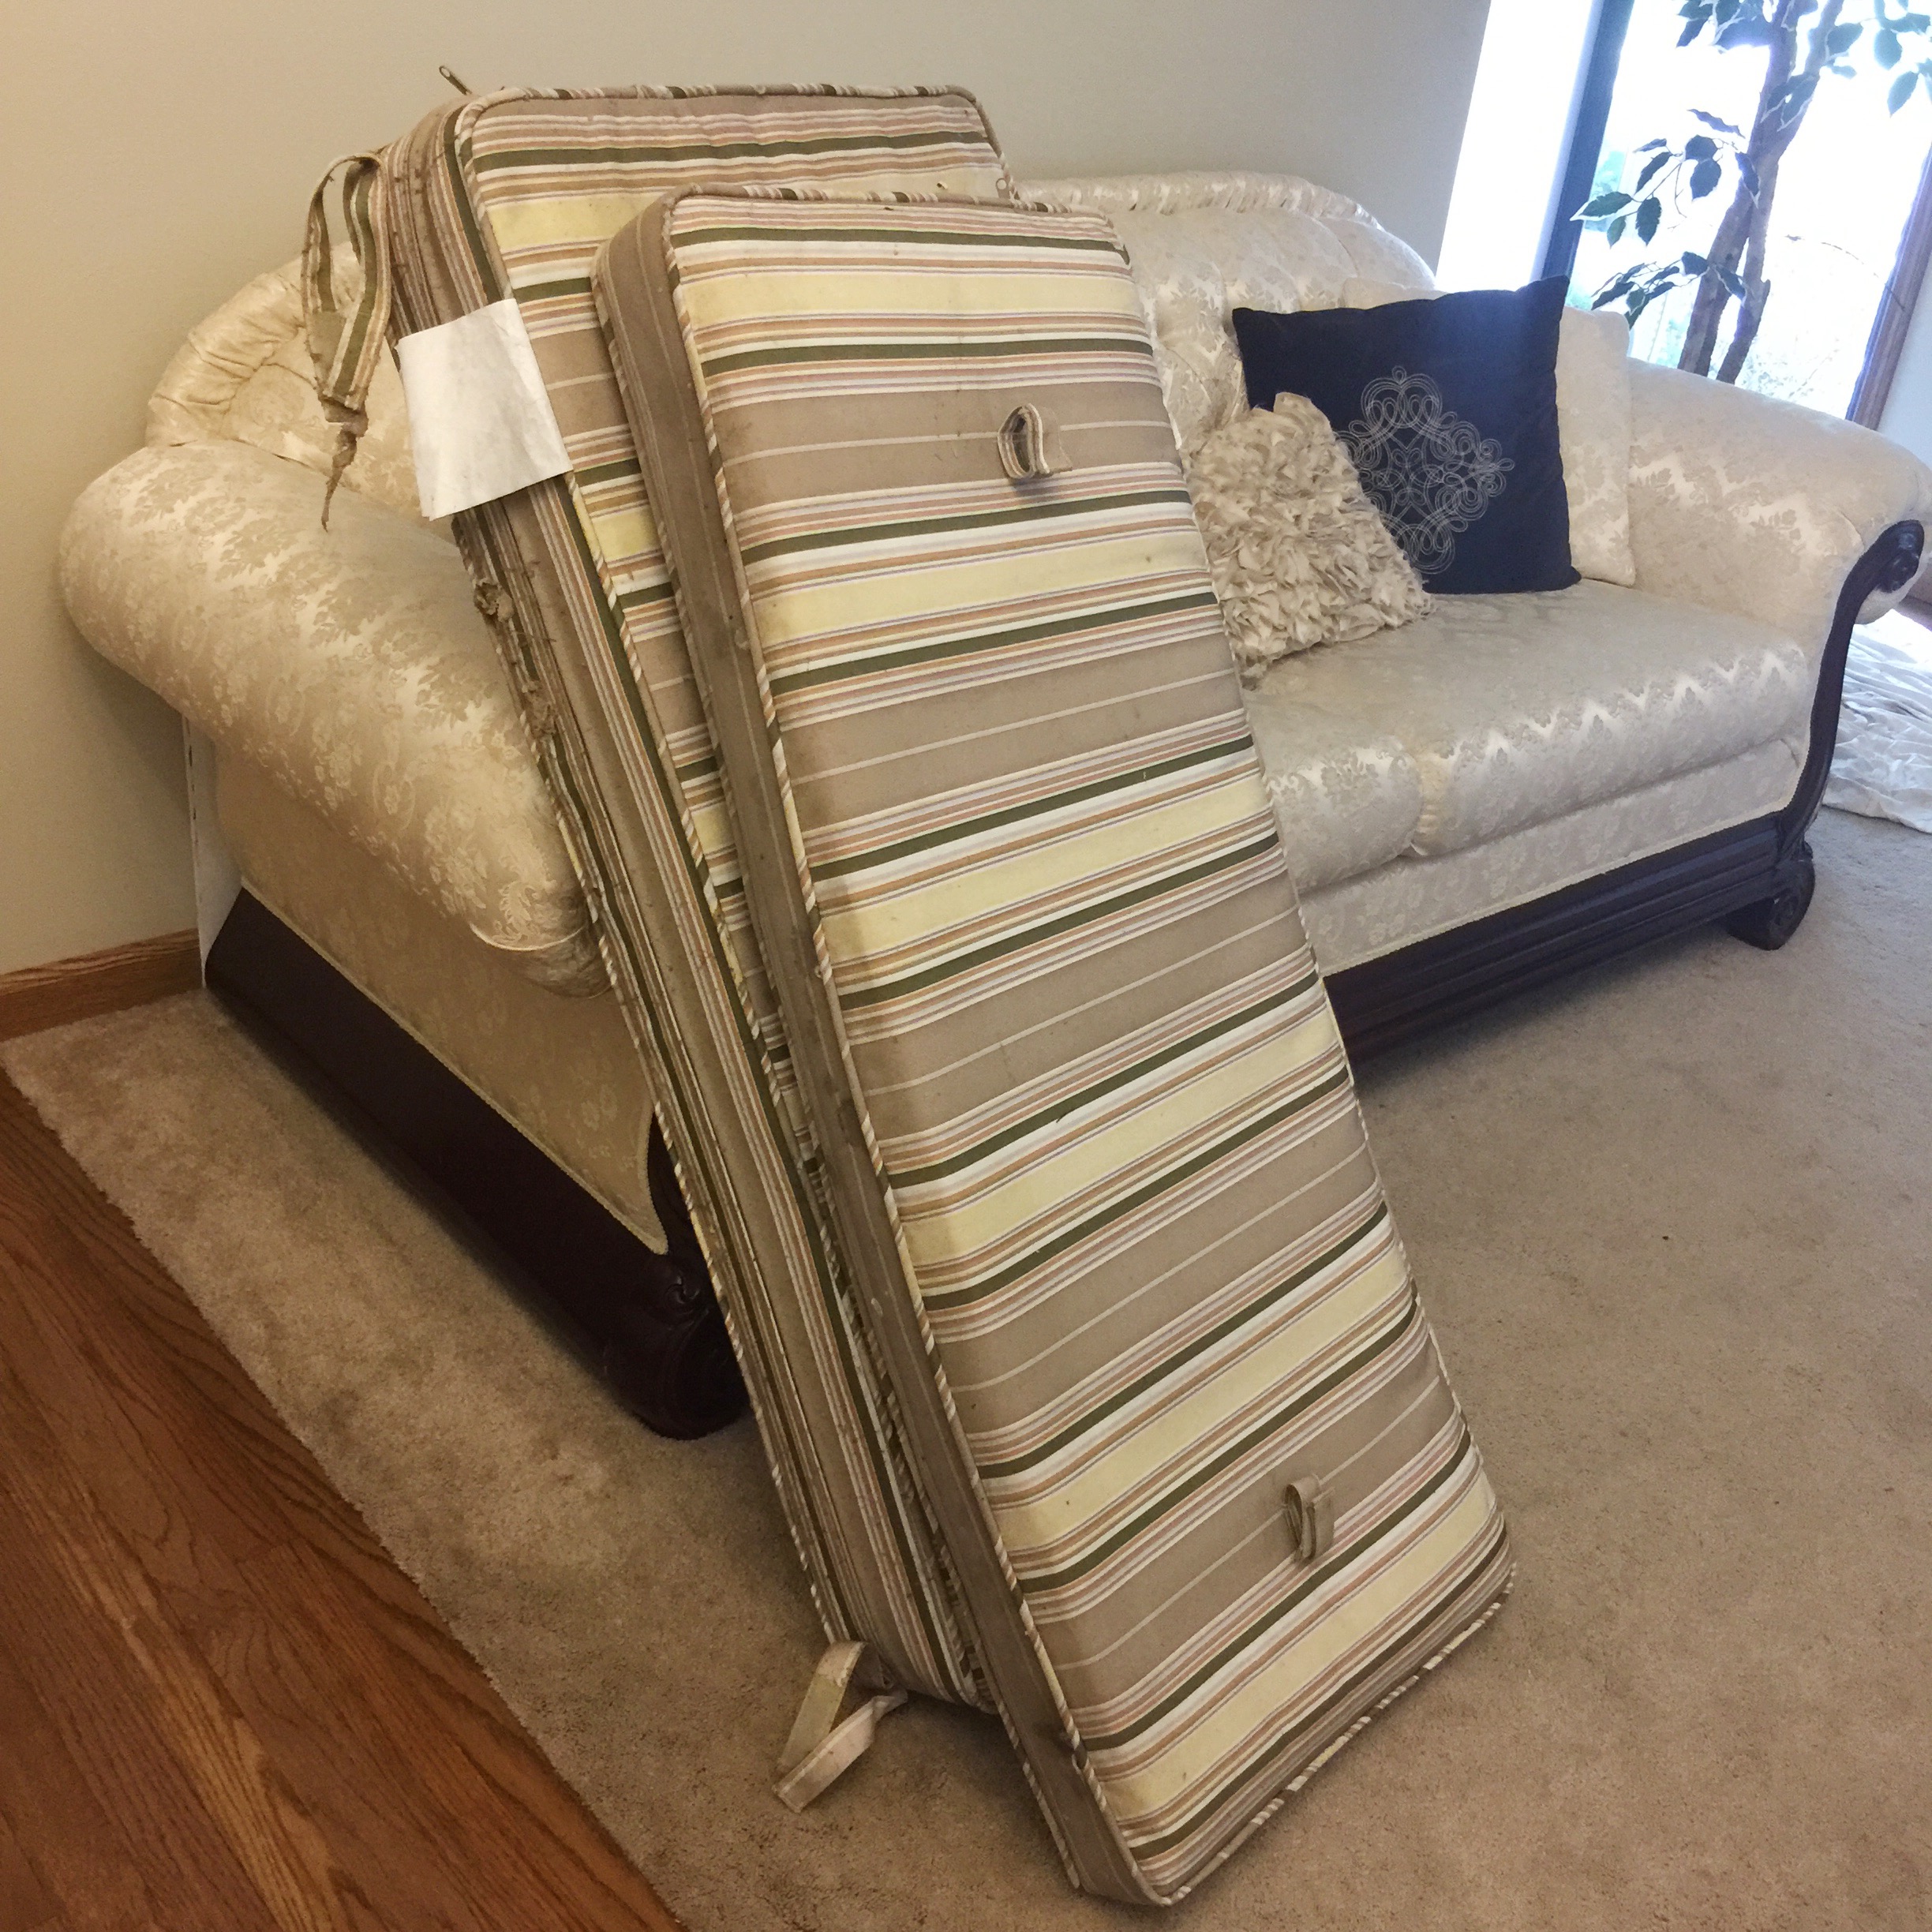
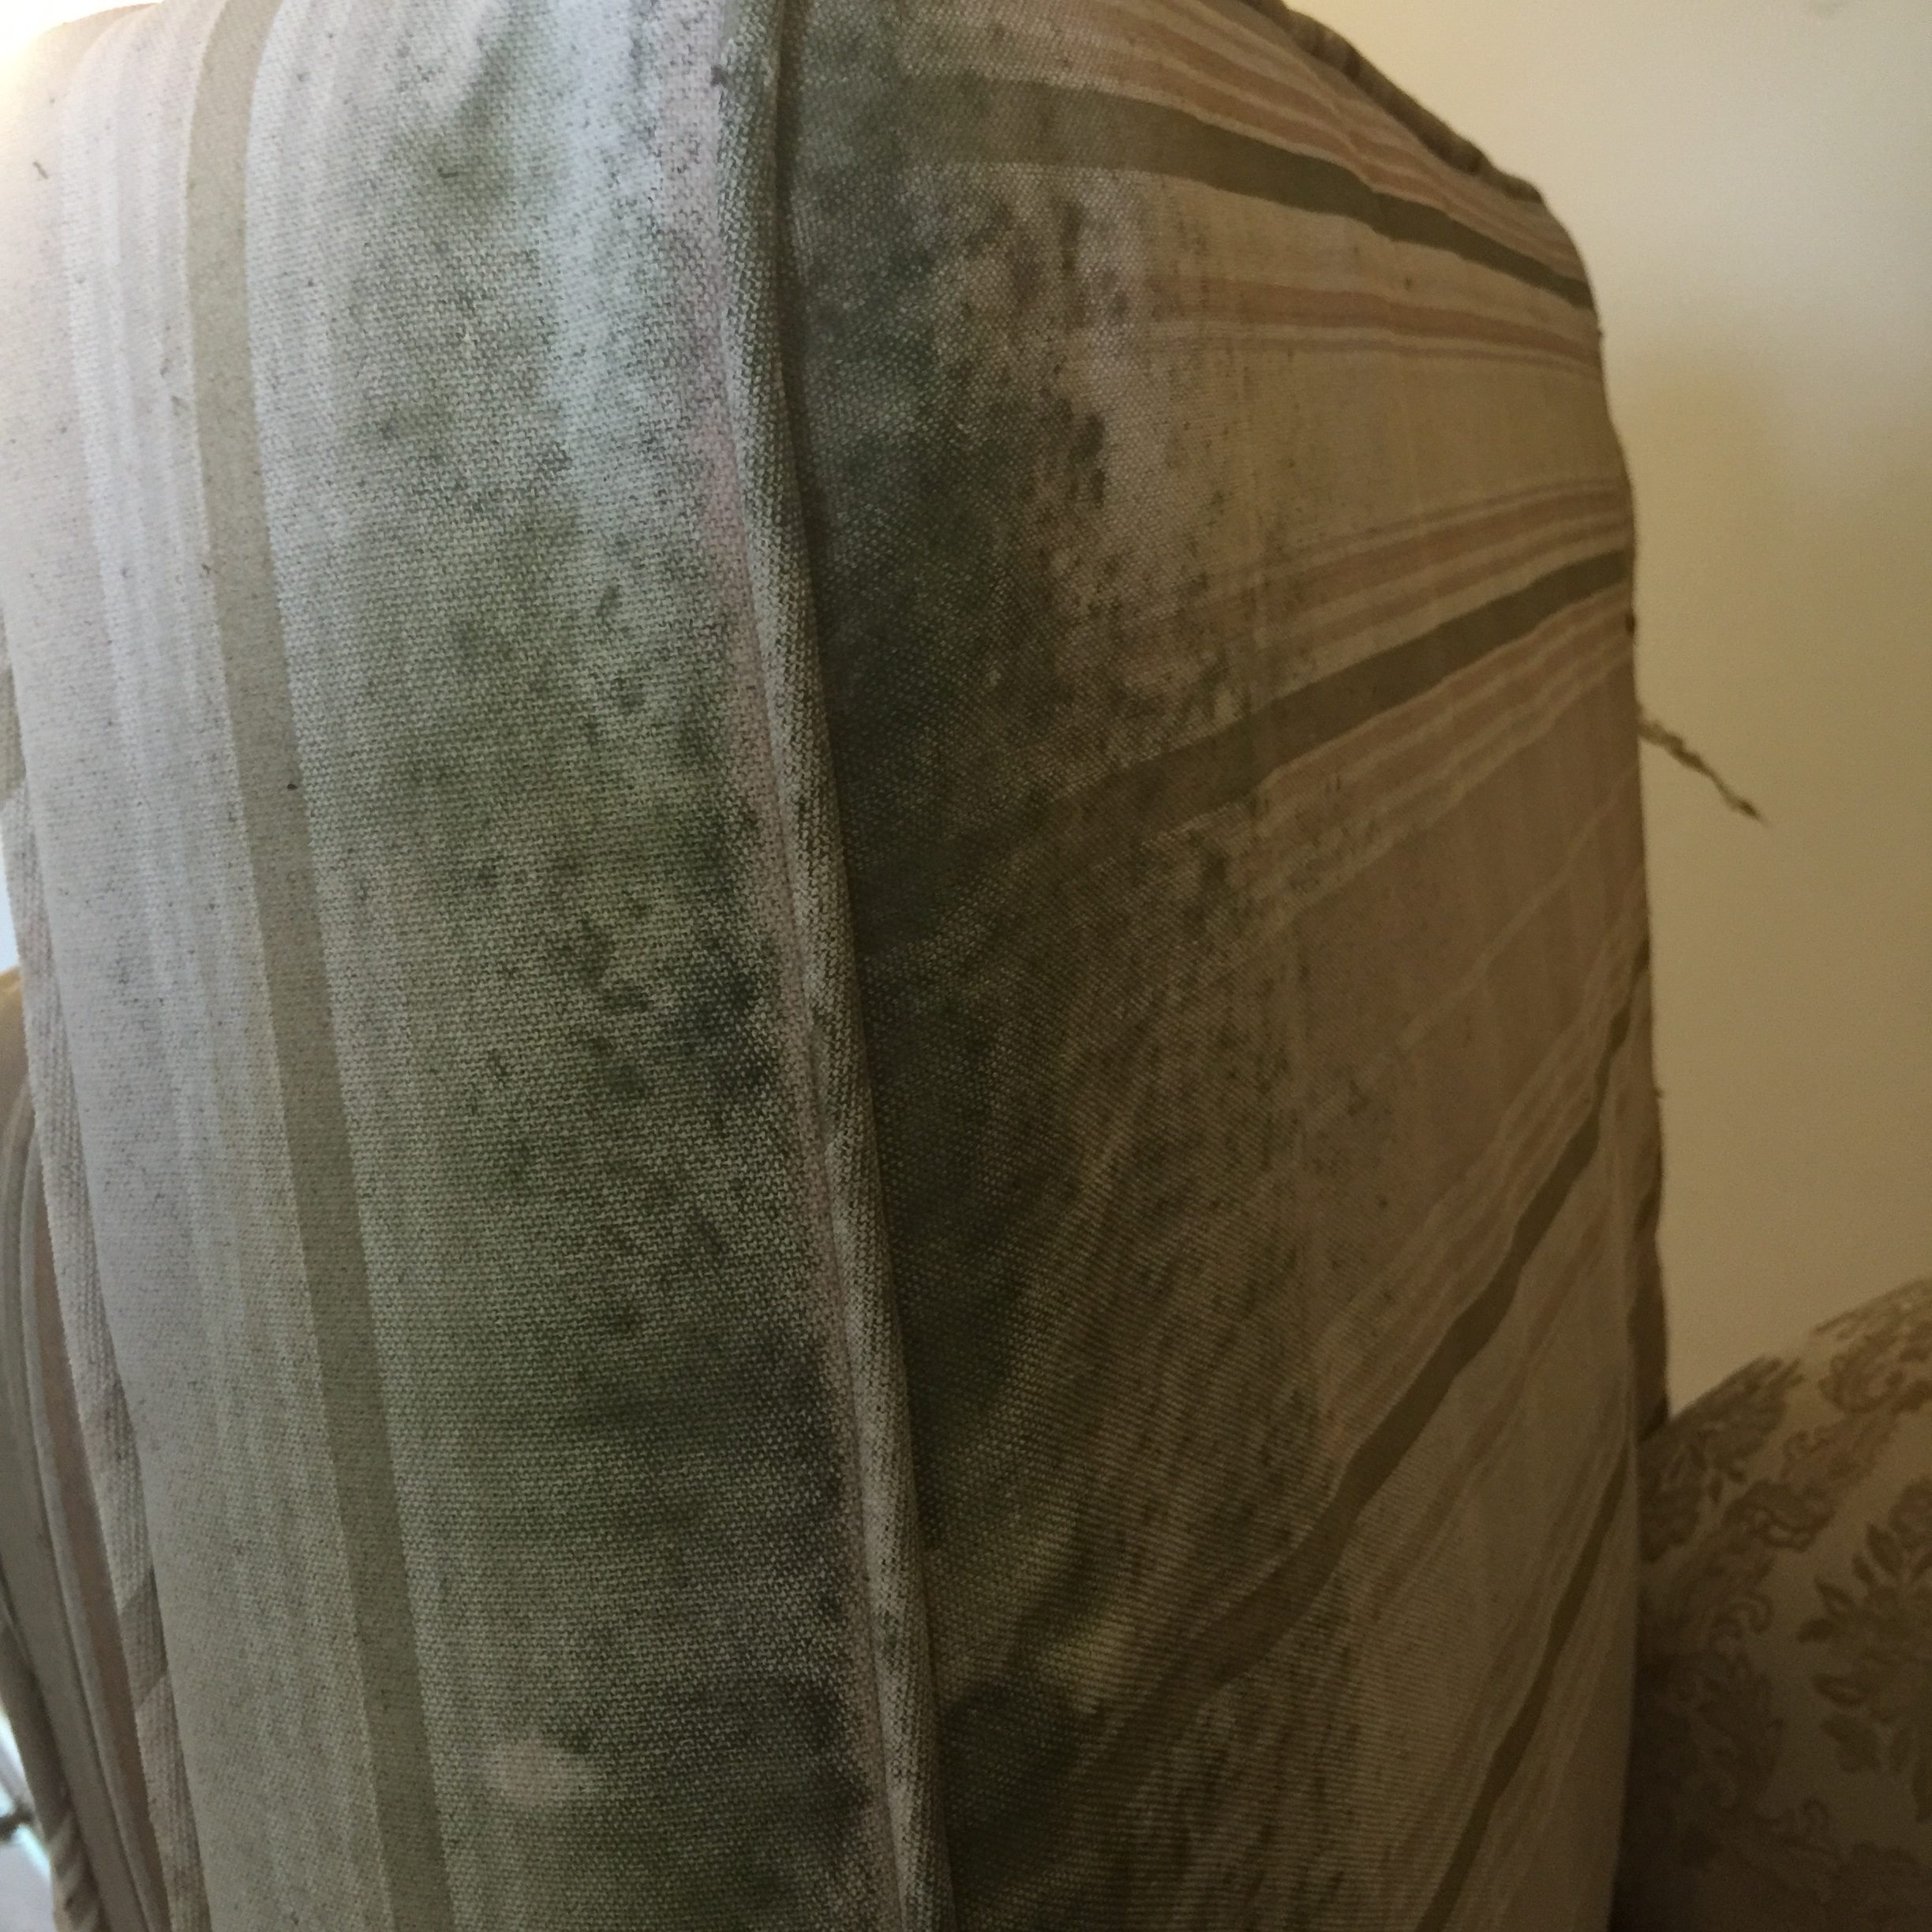
In the first photo, the cushions on the bench look OK… but, in this second photo you can see there is a lot of mildew on them. I was going to try to get it off with a Magic Eraser, but it is just impossible. I did get some extra use out of these cushions by flipping them over, but I’ve decided that getting a new cushion would be the best plan.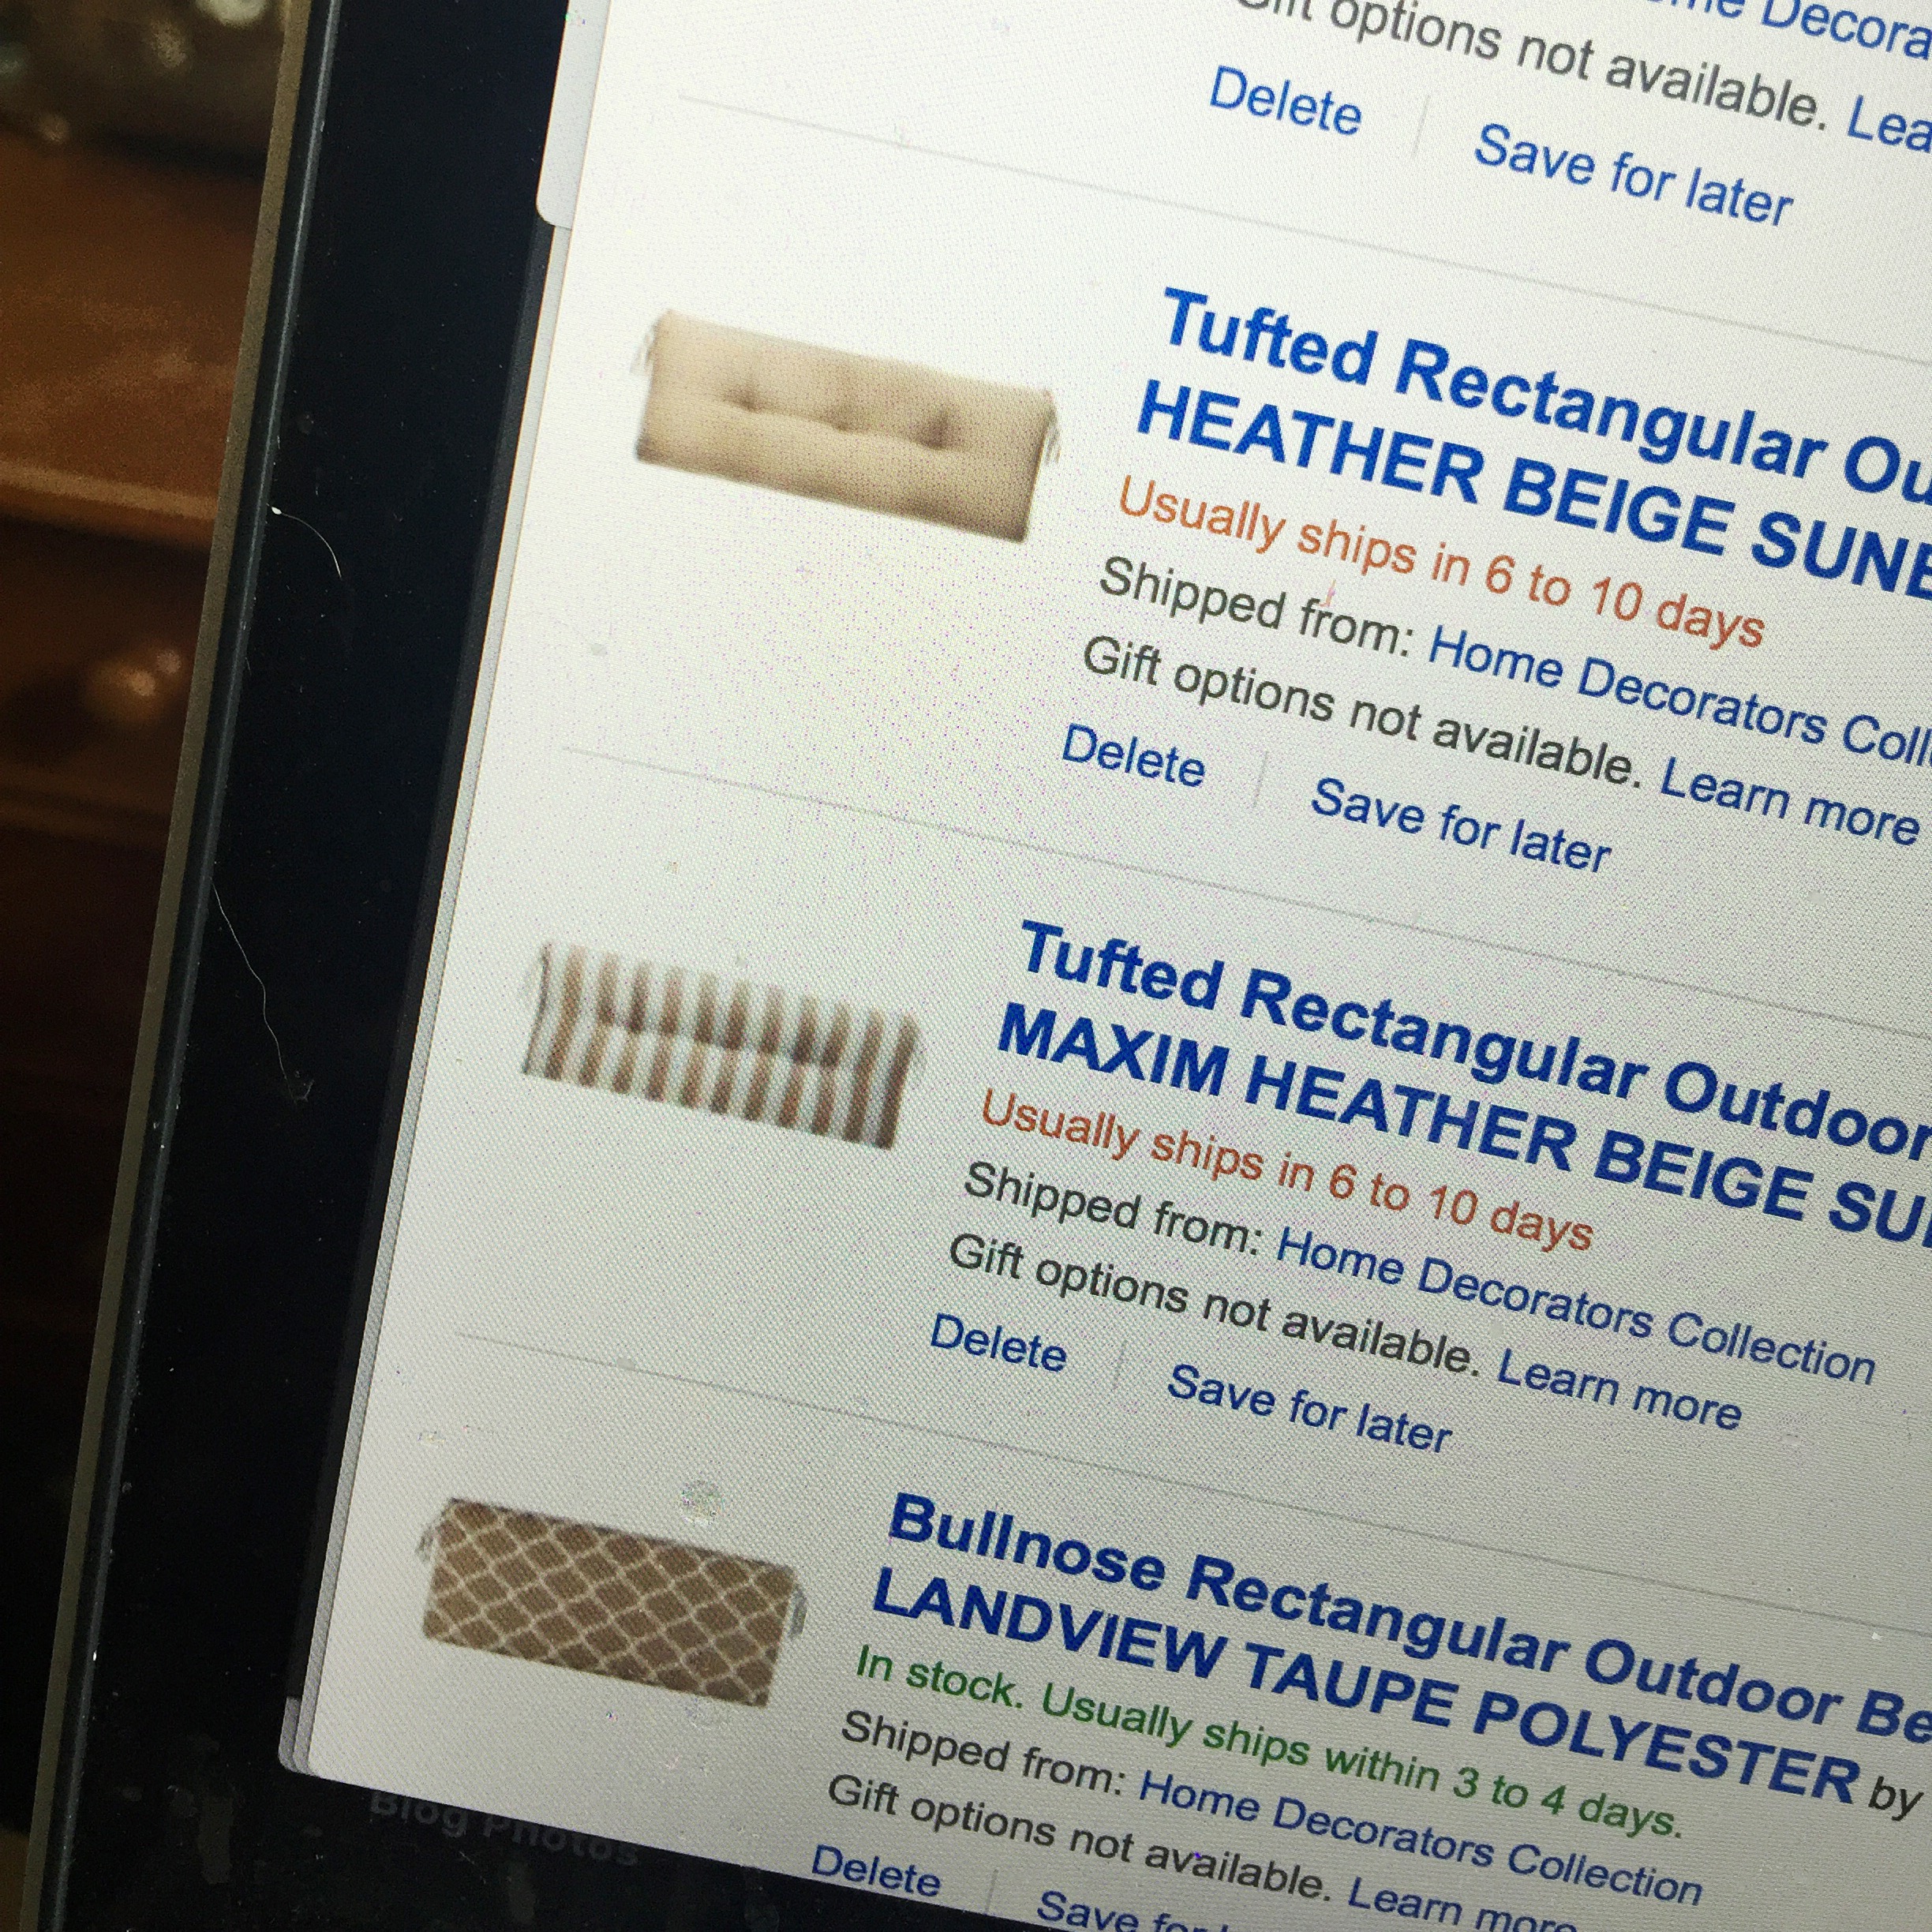
I decided to look for a cushion online. If I wanted to have some cushions custom made to match the cushions that were already on our bench, it would run us around $175 for a seat cushion and another $175 for a back cushion! No way! I decided to buy a cushion off of Amazon (I had a gift card, so it was free) from the Home Decorators Collection. This is a St. Louis store and they had a wide variety of sizes, colors and patterns to choose from. I’ve decided to just get a seat cushion for the bench and not a back cushion. It was just too hard to find a way to make it work and since I already put a few pillows on the bench, I didn’t think it’d be a big deal to lose the back cushion. I had trouble deciding on what color/pattern to get, so I took a photo and sent it around to some friends/family to help… but, if you’re curious, I selected the top/taupe cushion. I like a neutral so that I can have fun with the pillows!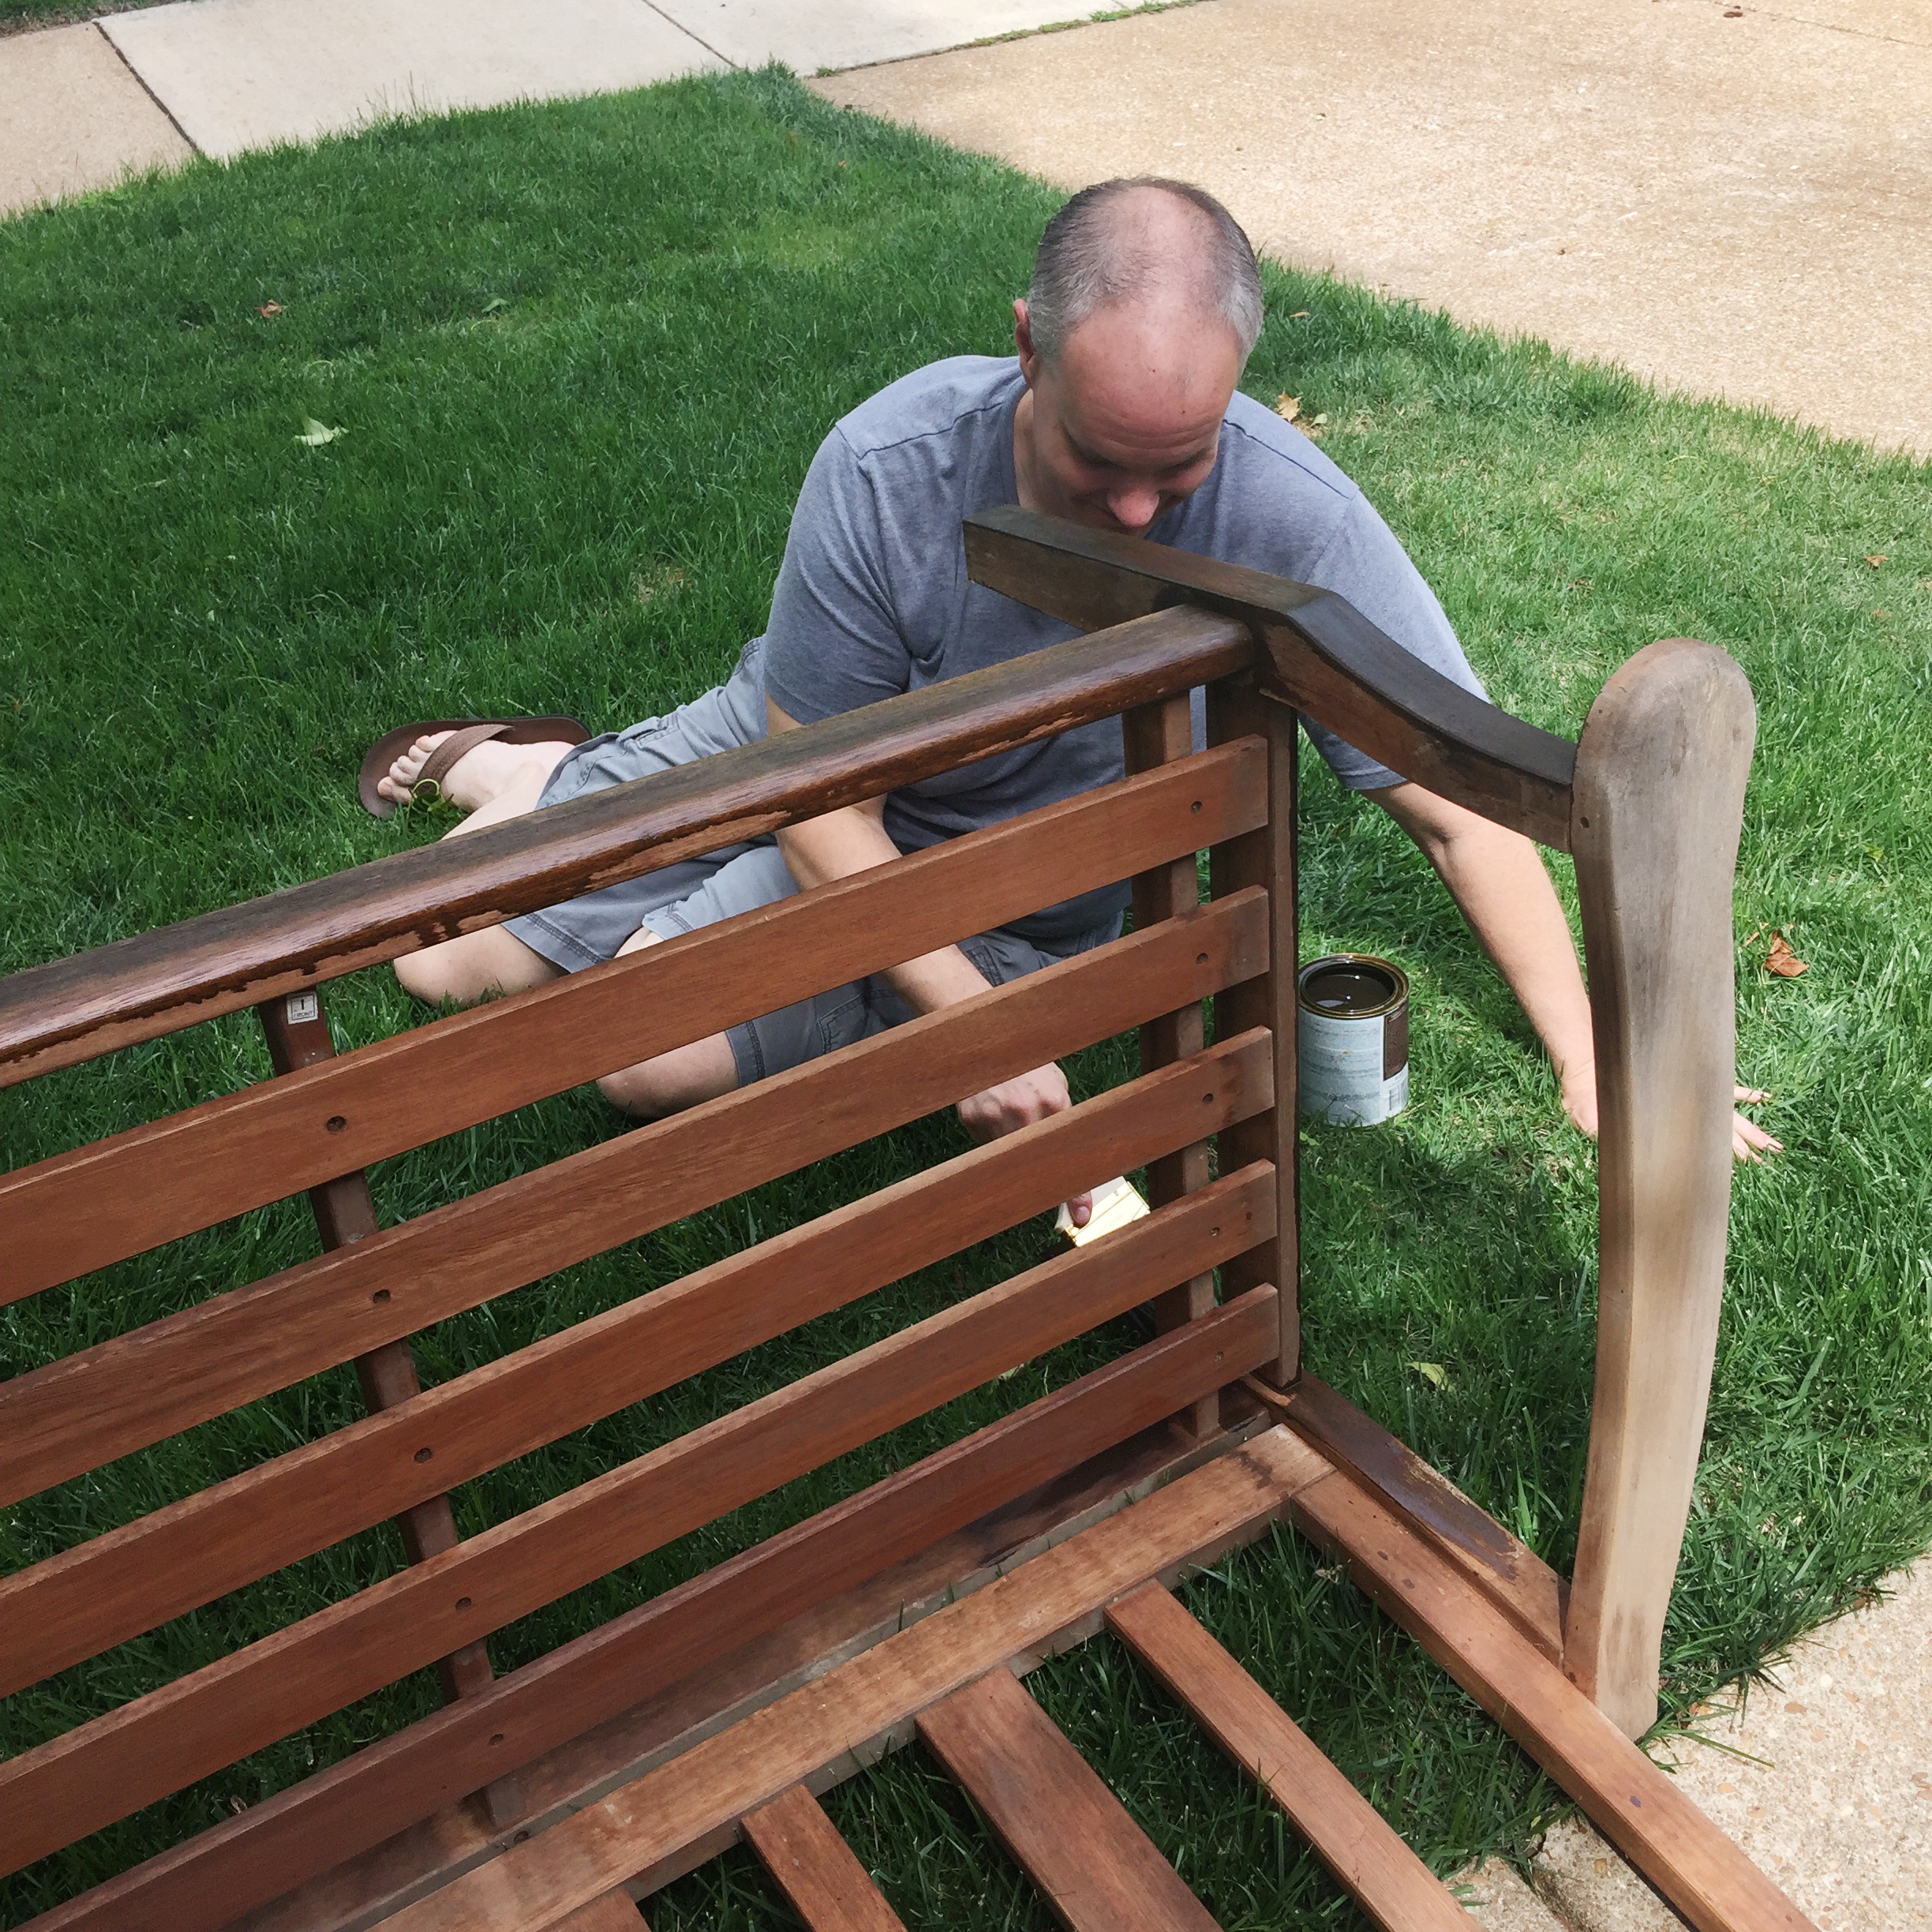
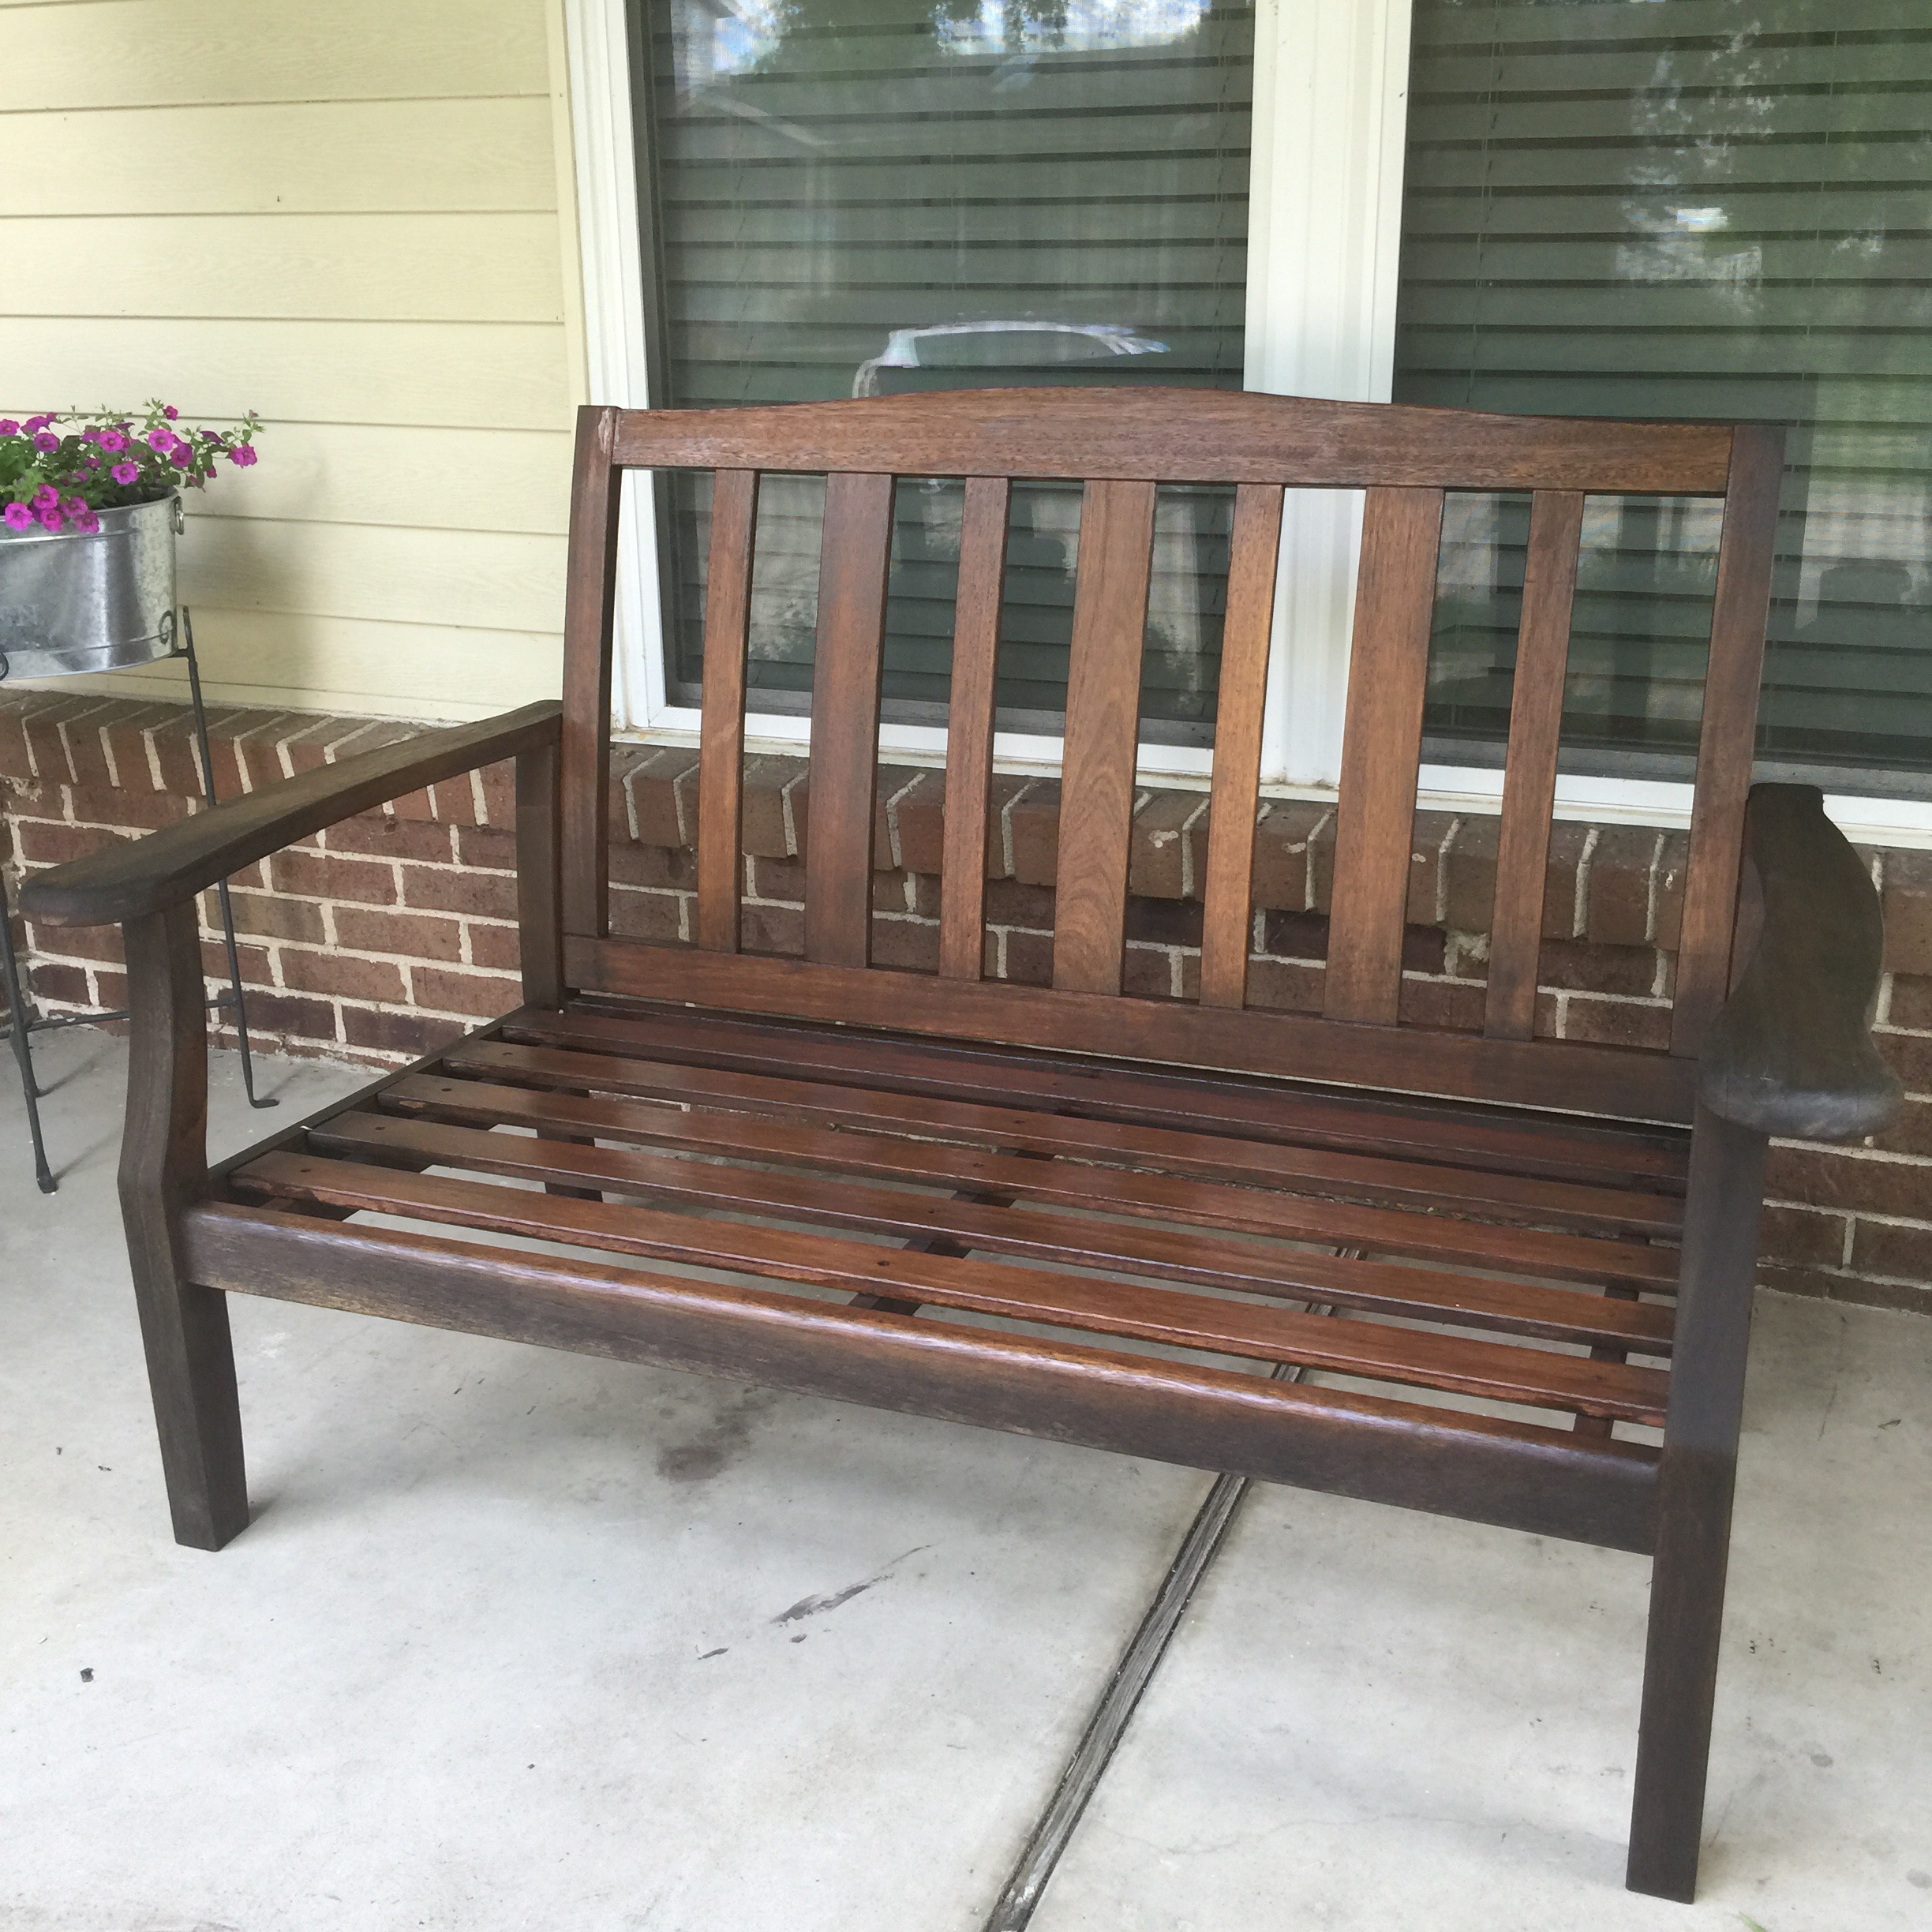
Brian working on the bench, it’s so fun to get photos of the hubs in action! And, here is what the bench looked like after he stained it. So much better!
Please be sure to stop by my friends’ blogs to check out what they plan for the curb appeal projects. Also, stop by next week to see what I’ve completed for the third part of my project!
Have you ever painted your door or had to replace cushions on an odd sized bench? How’d it go?
Full Disclosure: This is a sponsored post. Pro World sent me vinyl in exchange for this post. All opinions are 100% mine.