Well, I did it! I learned how to make sourdough!
I set some Summer Goals for myself, and I’ve already checked one off for June! I made my first sourdough starter and baked my very first loaf of sourdough bread. It was something I’d been curious about for a while, but I finally decided this summer was the perfect time to give it a try.
You may be wondering what inspired me to start making sourdough. Honestly, I think it began when I listened to Taylor Swift’s interview on the New Heights podcast. During the interview, she briefly talked about learning how to make sourdough and experimenting with all kinds of delicious variations, from blueberry to cinnamon and even a dot cake version. I was also intrigued by all of the sourdough discard recipes out there, especially things like Sourdough Discard Chocolate Chip Cookies. Before long, I had a growing list of recipes I wanted to try myself!
Summer felt like the perfect season to dive into a new hobby. Life slows down a bit, and I finally had some extra time at home to devote to learning the process. What I quickly discovered, though, is that sourdough requires a little patience! It took me an entire week just to get my starter established, and the actual dough-making and baking process is practically an event of its own. Today, I’m sharing my first week of learning sourdough, including how I made my starter and some of the trial and error along the way. In a future post, I’ll share the dough-making and baking process, plus the tools and supplies I used. And yes… my very first loaf was a total success! In fact, my starter eventually tripled in size!
Grocery Store List for Making a Sourdough Starter
- Dehydrated Sourdough Starter from Amazon (more on that below)
- Unbleached All-Purpose Flour (I used King Arthur Unbleached All-Purpose Flour.)
- Purified Water (I bought a gallon at the grocery store) or filtered water
That’s it! While there are plenty of fancy sourdough supplies you can purchase, flour and water are the only grocery store ingredients needed to get your starter going.
Optional Supplies
These aren’t grocery store items, but I found them very helpful:
- Kitchen Scale (grams and ounces)
- Glass Jar Set (I liked having a second clean jar available for feedings.)
- Silicone Spatula or Spoon
Getting Started with My Sourdough Starter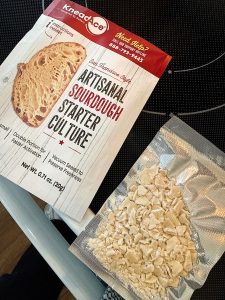
Shop:

Unless you have a kind friend willing to share some of their sourdough starter, you’ll need to create your own! I found this to be the most challenging part of the entire sourdough process. It took me about five days of trial and error before I finally felt like I had it figured out.
Thankfully, after learning a few lessons along the way, I was able to simplify the process. Hopefully my experience will help you avoid some of the mistakes I made and get your starter active and ready for baking a little faster than I did!
I purchased the Artisanal Sourdough Starter Culture from Amazon, and it arrived within a few days. This package makes one sourdough starter. For some reason, I expected it to contain multiple starter packets, so I was surprised when there was only one inside.
A quick note: the package does include instructions, but I ended up creating my own process after reading several sourdough blogs and doing a little experimenting. I’ll be sharing exactly what worked for me below.
Making the Sourdough Starter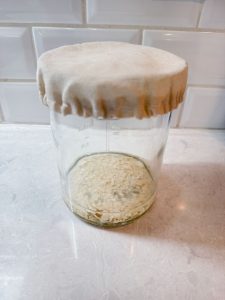
Shop:
Step 1: Begin the Activation Process (Day 1)
I recommend starting this step in the morning before you start your day.
To activate the dehydrated sourdough starter culture, I mixed the entire packet with 3 ounces of purified or filtered lukewarm water (about 70°F). I microwaved my water for about 10 seconds to reach that temperature.
The activation process takes about 3 hours. During that time, you’ll stir the mixture every 30–45 minutes to help wake up the dormant cultures. I chose to stir mine every 45 minutes, for a total of four stirrings.
I know this part sounds a little tedious, but hang in there! The good news is that this is a one-time process. Once your starter is active, you’ll never have to go through the activation stage again.
Step 2: Feed the Starter (Day 1 Still)
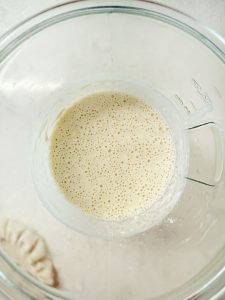
Next, it’s time for your first feeding! In a clean glass jar, combine 85 grams of purified or filtered lukewarm water (about 70°F) with 85 grams of unbleached all-purpose flour.
Pour in the activated sourdough starter mixture and stir everything together until well combined. Before adding my starter mixture, I removed about a dozen small pieces of dehydrated starter that hadn’t fully dissolved during the activation process.
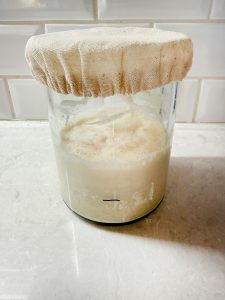
Once everything is mixed together, loosely cover the jar and let it sit at room temperature for about 12 hours (up to 24 hours if needed). I completed this step in the evening so I could leave it overnight and check on it the next morning.
Next Morning: Feed the Starter Again (Day 2)
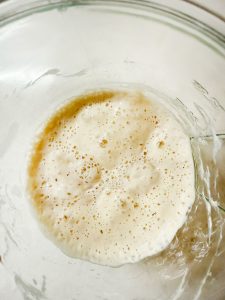
After about 12 hours, you should start seeing signs of activity in your starter. Look for small bubbles throughout the mixture and possibly a little liquid on top. Don’t worry if it hasn’t risen much yet—every starter develops at its own pace.
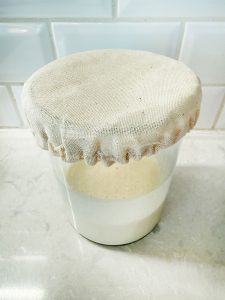
On the morning of Day 2, I transferred 85 grams of starter to a clean glass jar and discarded the rest (or saved it for future discard recipes). Using a fresh jar makes it much easier to monitor your starter’s growth and see exactly how much it rises. (At this point, I switched to using a kitchen scale, which made the process much easier and more accurate.)
Next, I added 85 grams of purified or filtered lukewarm water (about 70°F) and 85 grams of unbleached all-purpose flour. After stirring everything together well and scraping down the sides of the jar, I left it at room temperature. After another 8–12 hours, it was time for another feeding.
Step Three: Feed Your Starter for Baking (Day 2 Still)
After 8–12 hours, you should start to see more bubbles throughout the starter and possibly a little rise. This is a great sign that your starter is becoming active!
Transfer 85 grams of starter to a clean glass jar and discard the rest (or save it in a separate container in the refrigerator for future sourdough discard recipes). I found that using a fresh jar made it much easier to monitor my starter’s growth and see exactly how much it was rising.
Next, add 85 grams of purified or filtered lukewarm water (about 70°F) and 85 grams of unbleached all-purpose flour to the jar. Stir until everything is well combined and scrape down the sides of the jar.
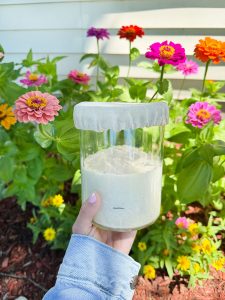
To track my starter’s progress, I placed a small piece of clear tape on the outside of the jar and marked the starter’s current level with a black marker. This made it easy to see exactly how much it rose over the next several hours.
I completed this feeding before going to bed because I was hoping to make my dough the following morning. Leave the starter at room temperature for 8–10 hours. By morning (Day 3!), you should see plenty of bubbles and, if all goes well, a noticeable rise in the starter. If your starter doubles (or even triples!) in size and has a slightly domed top, you’re ready to begin your bread journey with your new sourdough starter!
Special Note: If you’re discarding starter, avoid washing large amounts of it down your sink drain. The flour can harden and build up in your pipes over time, potentially causing plumbing issues. Either throw the discard in the trash or save it for future discard recipes.
What If Your Starter Doesn’t Double?
Don’t panic if your starter doesn’t double in size overnight. Mine didn’t at first either! If you’re seeing bubbles and some rise, that’s still a good sign that the yeast and bacteria are becoming active.
Simply repeat the feeding process: discard enough starter to leave 85 grams in the jar, then feed it with 85 grams of water and 85 grams of flour. Mark the level again and give it another 8–12 hours at room temperature.
It took my starter several feedings before it consistently doubled in size. Once it was able to double and develop a slightly domed top, I knew it was finally strong enough to bake with.
Where Should I Store My Starter If I’m Not Baking for a Few Days?
One of the great things about sourdough starters is that they’re surprisingly resilient. If you don’t plan to bake for a week or two, simply store your starter in the refrigerator. The cold temperature slows down the fermentation process and essentially puts your starter into “sleep mode.”
Before placing it in the refrigerator, I like to give my starter one last feeding. After that, I feed it about every 7–12 days. If you’re not planning to bake, you don’t need a large feeding. Just keep a few tablespoons of starter and add a few tablespoons each of water and flour, then stir everything together.
If you’re baking every day or every couple of days, you can keep your starter on the countertop. Just remember that a room-temperature starter will need regular feedings to stay active and healthy.
And if you’re heading out on vacation, don’t worry—your starter should be perfectly happy hanging out in the refrigerator until you return!
How Do You Wake Up a Refrigerated Starter?
When you’re ready to bake again, remove your starter from the refrigerator and let it sit on the counter for about 45 minutes to an hour.
Next, feed the starter. I like to keep 85 grams of starter and then add 85 grams of water and 85 grams of flour. Mix everything well and place the jar in a warmer spot in your home, such as near a sunny window or a warm vent.
Mark the starter’s level with your tape and marker so you can track its growth. Depending on the temperature of your home, it may take anywhere from 5–12 hours for the starter to become active again. Once it doubles in size and develops a slightly domed top, it’s ready to bake with.
I often do this feeding the night before so my starter is ready to use the next morning.
How Do You Know When Your Starter Is Ready?
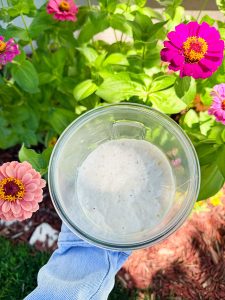
After feeding your starter, place it somewhere warm and watch for signs of activity. I typically keep mine near a heat vent or by a sunny window.
A healthy, active starter will:
- Develop lots of bubbles throughout the jar
- Rise significantly, often doubling in size
- Have a slightly domed top
- Smell pleasantly tangy or yeasty
If your starter hasn’t doubled yet, don’t worry! Simply give it another feeding and a little more time. Once it’s consistently rising and bubbling, it’s ready to help you bake delicious sourdough bread.
Starter Float Test
The float test is when you place a teaspoon of sourdough starter into a glass of water. If it floats, that’s usually a good sign that it’s active and ready to bake with. If it sinks, your starter may need more time or another feeding.
And that’s a look at my very first week learning sourdough! What started as a simple summer goal quickly turned into a fun new hobby, and I learned so much along the way. There were definitely a few moments when I wondered if my starter was ever going to cooperate, but seeing it not only double, but eventually triple in size made all of the waiting, feeding, and troubleshooting worth it.
I’m excited to keep experimenting with sourdough and try some of the discard recipes I’ve been eyeing as well. In my next sourdough post, I’ll be sharing the dough-making process, how I baked my very first loaf, the tools I used, and of course, plenty of photos of the finished bread!
Have you ever made sourdough before, or is it something you’ve been wanting to try? I’d love to hear about your sourdough adventures (or questions!) in the comments below.
I’d LOVE for you to follow me on the below platforms! Let me know if you decide to follow me on any of them in the comments, because I’d love to follow you back!