I’m back with Part 2 of my sourdough journey! Today I’m sharing how I took my starter out of the refrigerator, made my dough, baked my very first loaf, and, of course, the beautiful finished results.
The day had finally arrived—it was time to bake my very first loaf of sourdough bread! After spending a week learning how to create and feed my sourdough starter (see my sourdough post HERE), I was excited (and just a little nervous!) to see if all of my patience would pay off. Thankfully, it did! Today I’m sharing everything from waking my starter up after its time in the refrigerator to dough day, baking, and, of course, the finished loaf fresh from the oven.
Step 1: Wake Up Your Sourdough Starter (Day 1)
I recommend starting this process early in the morning. I took my starter out of the refrigerator around 6:00 a.m., which gave it plenty of time to become active before I made my dough later that day. By starting early, I was able to finish shaping my dough and place it in the refrigerator by around 9:00 p.m.
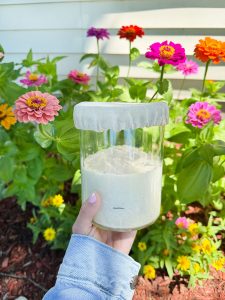
Remove your sourdough starter from the refrigerator and let it sit on the counter for about 45 minutes to an hour to take the chill off.
![]()
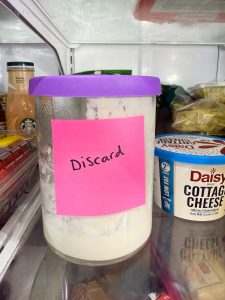
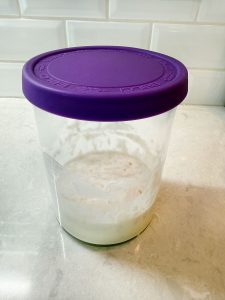
Transfer 85 grams of starter to a clean glass jar and save the remaining discard in the refrigerator for future discard recipes, or throw it away if you don’t plan to use it. I recently used my Discard to make these Sourdough Discard Chocolate Chip Cookies.
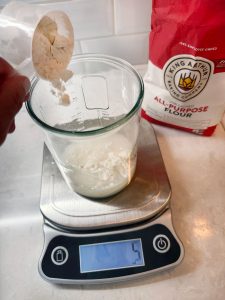
Next, add 85 grams of purified or filtered water and 85 grams of unbleached all-purpose flour.
Stir everything together until well combined, scrape down the sides of the jar, then place a piece of clear tape on the outside of the jar and draw a line on the tape to mark your starter’s current level. This makes it easy to see when your starter has doubled in size and is ready for dough day… which is today!
Step 2: Dough Day! (Day 1)
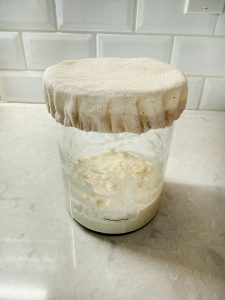
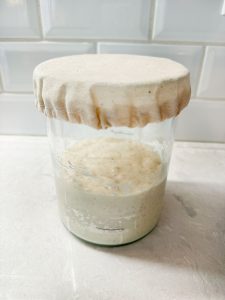 About 6–7 hours later, your starter should be bubbly and active. Mine practically tripled in size! That means it’s finally time for dough day.
Ingredients for One Loaf of Sourdough Bread
- 95 g Active Starter
- 390 g Purified Room Temperature Water
- 530 g Organic Bread Flour
- 2 Tsp Fine Artisan Sea Salt
Ingredients for Two Loaves of Sourdough Bread
- 190 g Active Starter
- 780 g Purified Room Temperature Water
- 1060 g Organic Bread Flour
- 4 Tsp Fine Artisan Sea Salt

I decided to make one loaf of bread, but if you’d like to make two, simply double the ingredients above.
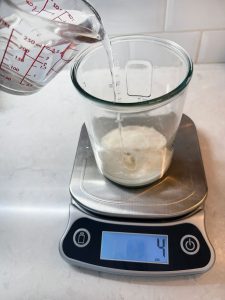
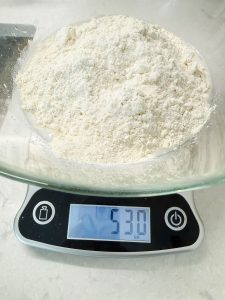
Start by placing a large mixing bowl on your kitchen scale and zeroing it out. Add 95 grams of active sourdough starter. Next, zero (tare) the scale again and add 390 grams of purified room-temperature water. Stir everything together until well combined. Finally, zero the scale one last time and add 530 grams of organic bread flour.
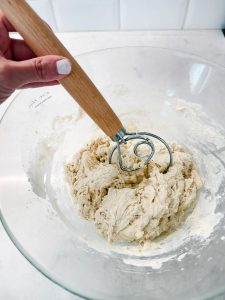
Mix everything together using a Danish dough whisk (it makes the process so much easier!) or simply use your hands until the dough comes together.
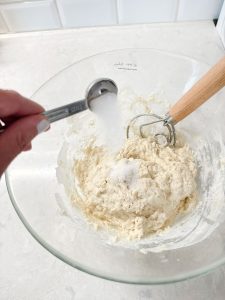
Finally, add the salt. I like to add it last so it doesn’t interfere with the starter while it’s becoming active. Mix until the salt is fully incorporated.
At this point, don’t worry if the dough feels very sticky and doesn’t hold its shape—that’s completely normal! Cover the bowl with a towel and let the dough rest for 45 minutes.
After making your sourdough, feed your starter jar:
- 85 g starter
- 85 g water
- 85 g flour (all purpose)
Mix well and let it sit on the counter a few hours until it becomes active again (starts rising and getting bubbly).
Put the lid on loosely and return her to the fridge.
Stretch & Fold #1:
After the dough has rested for 45 minutes, it’s time for your first stretch and fold. This simple technique helps strengthen the dough and build structure without kneading.
With slightly damp hands, gently grab one side of the dough, stretch it upward without tearing it, and fold it over toward the center. Turn the bowl a quarter turn and repeat this process on all four sides of the dough until you’ve made a complete circle. When you’re finished, cover the bowl with the towel again and let the dough rest for another 45 minutes before repeating the process.
 Stretch & Fold #2:
Complete one final stretch and fold using the same technique as before. I always leave my dough in the bowl for this step, so there’s no need to transfer it to the countertop.
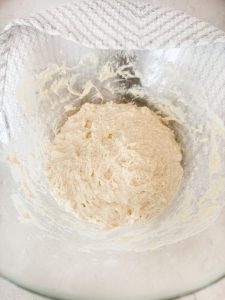
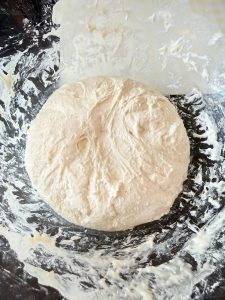
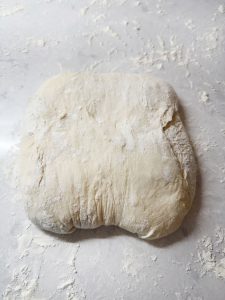
Once you’ve completed the stretch and fold, gently shape the dough into a loose ball. Don’t worry if it still looks a little shaggy—that’s perfectly normal! Cover the bowl with the towel and let the dough rest at room temperature for 3–5 hours, or until it has doubled in size. This is known as the bulk rise.
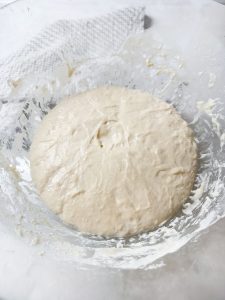 Success! By now, your dough should have doubled in size and be nice and puffy. It’s finally time to shape your loaf!
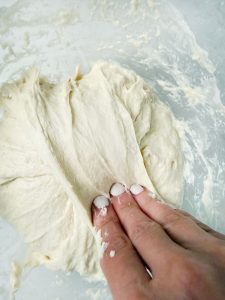
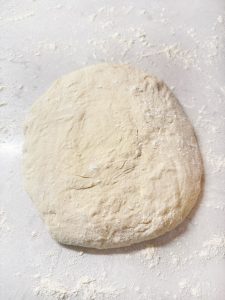 Remove the dough from the bowl and gently turn it out onto a lightly floured countertop.
I made one loaf, so I skipped dividing the dough. However, if you’re making two loaves, divide the dough into two equal pieces. I like to use a kitchen scale to make sure each portion weighs about the same so they’ll bake evenly. Don’t worry if they’re off by a few grams—that’s perfectly fine!
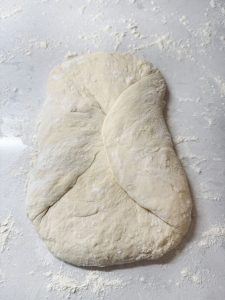
Begin to shape the dough:
Starting on the left (or right) side, stretch the dough outward and fold it over toward the center. Repeat on the opposite side.
Stretch and fold the dough from the bottom to the center. Repeat at the top.
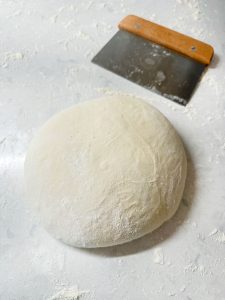
Using a bench scraper or bench knife, gently flip the dough over and let it rest for 5–10 minutes to allow the gluten to relax.
Next, with lightly floured hands, gently cup the dough and rotate it in a circular motion against the countertop to create tension and form a smooth, round loaf.
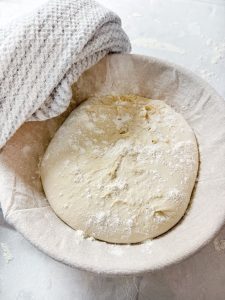
Place the shaped dough seam-side up into a lightly floured proofing basket or a bowl lined with a well-floured towel.
Cover the dough and place it in the refrigerator overnight to cold proof. The longer the dough proofs in the refrigerator (up to about 36 hours), the more developed and tangy the sourdough flavor will become.
If you’d like to add mix-ins such as cheese, cinnamon sugar, raisins, herbs, or other flavors, incorporate them during the final stretch and fold before shaping the dough.
Step 3: Bake Your First Sourdough Loaf (Day 2)
The next morning, you are ready to bake your sourdough!
Preheat oven to 475 degrees.
Remove the proofed sourdough from the refrigerator.
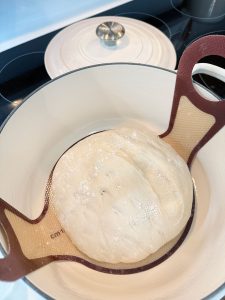
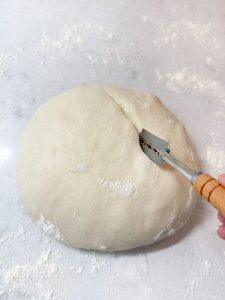
Carefully turn the dough onto a sheet of parchment paper or a silicone bread sling (these are specially designed for baking in a Dutch oven). Lightly dust the top with flour, then use your hands to gently spread the flour over the surface.
Using a bread lame (scoring tool), a sharp knife, or even kitchen scissors, score the top of the dough with one long slash about ½-inch deep. If you’d like, you can also add decorative designs. Scoring the dough allows it to expand as it bakes and helps create the beautiful “ear” that sourdough is known for.
Carefully transfer the dough (still on the parchment paper or silicone bread sling) into your Dutch oven and place the lid on top.
Bake Your Sourdough Bread
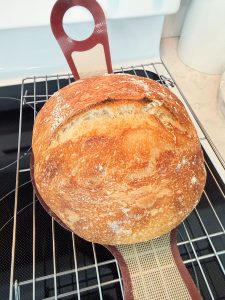
Bake for 50–55 minutes with the lid on. Then remove the lid and continue baking until the loaf is beautifully golden brown. Most recipes recommend about 10 more minutes, but my oven only needed about 2 minutes, so be sure to keep a close eye on your bread!
Keep in mind that every oven bakes a little differently, so keep a close eye on your bread once the lid comes off. After all the time and effort you’ve put into your sourdough, you definitely don’t want to burn it now!
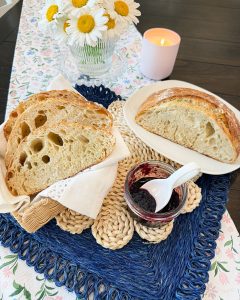
Allow the bread to cool on a rack for two hours before slicing.
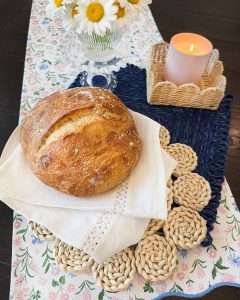
Enjoy your bread!
Optional Supplies
These aren’t grocery store items, but I found them very helpful:
- Kitchen Scale (grams and ounces)
- Glass Jar Set (I liked having a second clean jar available for feedings.)
- Silicone Spatula or Spoon
- Danish Dough Whisk
- Sourdough Bench Scraper
- Bread Proofing Basket
- Silicone Bread Sling for Dutch Oven
- Bread Lame for Scoring
- Dutch Oven

And that’s a wrap on my very first sourdough adventure! From creating my starter to baking my very first loaf, this has been such a fun hobby to learn. I can’t wait to keep experimenting with new recipes, flavors, and techniques as I continue my sourdough journey.
Have you ever baked sourdough before? If so, I’d love to hear your favorite tips, flavors, or mix-ins. And if you’re just getting started, let me know what you’re most excited to bake first!
Missed Part 1?
Be sure to read My First Week Learning Sourdough, where I share how I created my starter from scratch and got it active enough for baking!
I’d LOVE for you to follow me on the below platforms! Let me know if you decide to follow me on any of them in the comments, because I’d love to follow you back!